


MC300 Prism Management Card Quick Reference Guide
3
Step 3: Attach the Interconnect Cables
Once you have installed the MC300 PMC, attach the interconnect
cable from the diagnostic serial port on the MC300 PMC to the
library serial port (see figure 3).
If you are using a FC420 and Fibre Channel Management is
desired, you must install a dedicated Ethernet connection between
the MC300 and the FC420, see the
MC300 Prism Management
Card User’s Guide
(PN 6311631). Quantum does not provide an
Ethernet hub/switch or the cables.
Step 4: Establish an MC300 PMC-to-Host Connection for Library Management
1
Connect an Ethernet cable from the ETH 0 port (see figure 3) on the MC300 PMC to one of the following:
•
A TCP/IP network segment with a Dynamic Host Configuration Protocol (DHCP) server.
•
A non-DHCP computer directly connected to the MC300 PMC using a hub or crossover cable.
2
Make sure the host computer is turned on.
3
Reconnect the library power cable and turn on the library.
The MC300 PMC broadcasts a DHCP request. If you are using a DHCP server, the server assigns an IP address to
the MC300 PMC.
4
Get the IP address assigned to the MC300 PMC:
•
If the host computer is on the same network as a DHCP server
, go to the
DHCP Manager
window on the
DHCP server and find the IP address assigned to the MC300. You can also obtain this information from the
library graphical user interface (GUI) by selecting
Main > QuickView > Library > Network
.
•
If the host computer is not on a DHCP network
, configure the MC300 PMC with network information
compatible with the host computer as follows:
a
On the library GUI, select
Main > Menu > Config
.
b
When the
Configuration
screen appears, scroll down until
IP Address
is highlighted, then press
Select
.
This causes the first portion of the IP address to be highlighted.
c
Use the
Up
and
Down
buttons to increase or decrease the value of the selected portion of the IP address.
Then, press
Select
to highlight the next portion of the IP address. Continue using the
Up
,
Down
, and
Select
buttons to modify the rest of the IP address. Press
Select
after modifying the last portion of the IP address to
save the new IP address.
Note:
The connectors are different sizes; the cable can only
be connected in the proper orientation.
Note:
If the DHCP server does not assign an IP address to the MC300 PMC within 30 seconds of the DHCP
request, the request times out and the MC300 PMC is assigned the default static IP address of 192.168.1.1. If this
occurs, you can change the IP address of the MC300 PMC (see steps 4a through 4e below), or you can configure
the host computer to be compatible with the default static IP address of the MC300 PMC (see the
Note
on page 4).
Caution:
Be sure to select an available IP address in the same class as the host computer’s network.
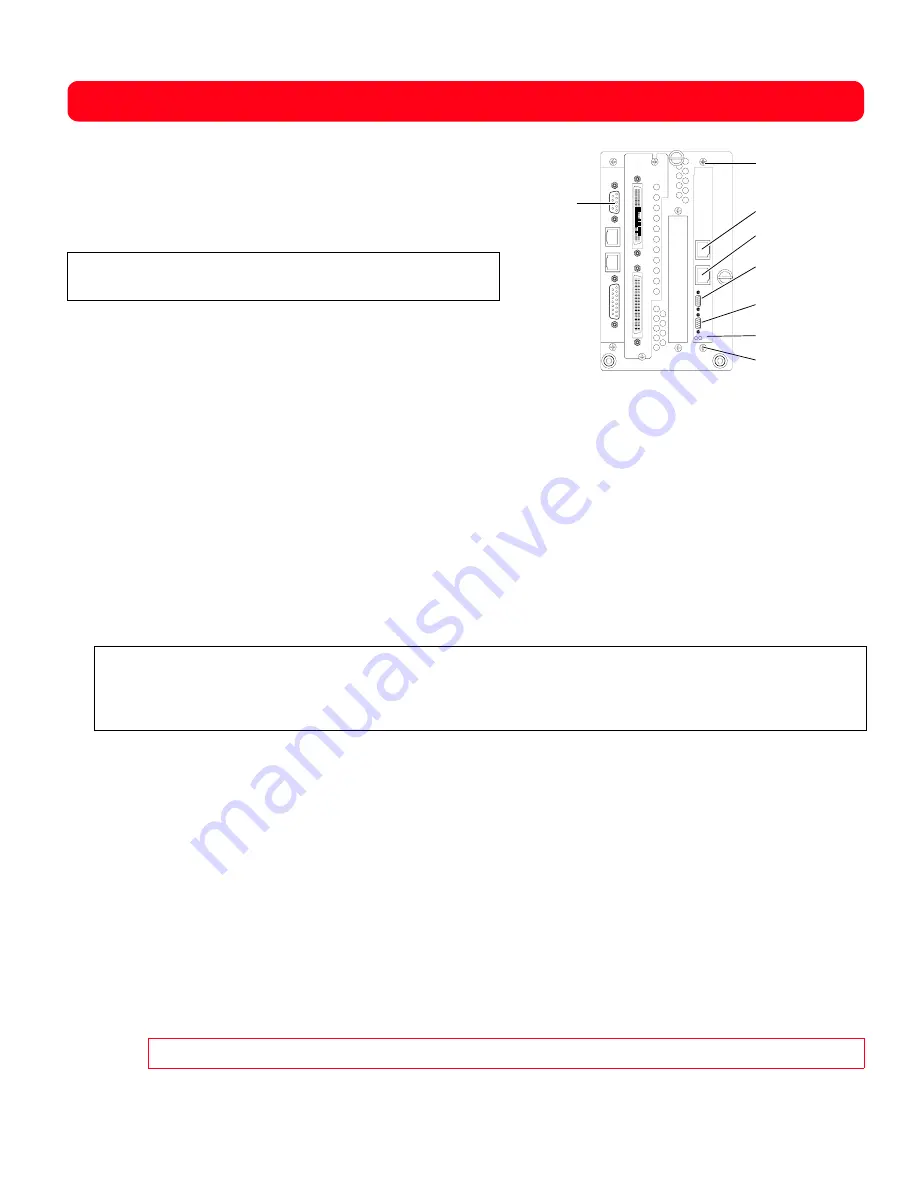
Ethernet 0 (ETH 0)
Command serial
port (RS-232)
Mounting screw
Ethernet 1 (ETH 1)
Diagnostic serial
port (RS-232)
LEDs
Mounting screw
Figure 3
MC300 PMC Ports and Indicators
Library
serial port


