background image

Important - Please read these instructions fully before starting assembly

6

Customer Helpline 

0845 077 8888

Work area

• 

Do not expose the appliance to rain. Do not use the appliance in damp or wet conditions.

• 

Only use the appliance in daylight or good artificial light.

Personal protection

• 

Wear stout shoes or boots to protect your feet. Do not operate the appliance wearing open-toed 
sandal or when barefoot.

• 

Wear long trousers to protect your legs.

Using your appliance

• 

Be sure that the appliance is switched off before connecting it to the mains supply.

• 

Stay alert at all times. Watch carefully what you are doing. Use common sense.

• 

Do not operate the appliance when you are tired.

• 

If the appliance begins to vibrate abnormally, switch it off and remove the plug from the socket. 
Allow rotating parts to stop and inspect the appliance for damage and loose part.

• 

Never pull the cord to disconnect the plug from the socket. Keep the cord away from heat, oil and 
sharp edges.

• 

If the main cable becomes damaged during use. Switch the appliance off and disconnect the plug 
from the mains immediately. Do not touch the main cable before disconnect from the mains.

Safety of others

• 

Do not allow children or any person unfamiliar with these instructions to operate the appliance.

• 

Do not allow children, bystanders or animal to come near the work area or to touch the appliance 
or mains cable.

• 

Remember that the operator maybe held responsible for the accidents or hazards occurring to 
other people or their property.

After use

• 

Switch off, remove the plug from the socket and ensure that moving parts have stopped rotating 
before leaving the appliance unattended and before changing, cleaning or inspecting any parts of 
the appliance.

• 

When not in use, the appliance should be stored in a dry place. Children should not have access 
to stored appliances.

Inspection and repairs

• 

Before use, check the appliance for damaged or defective parts. Check for misalignment and 
seizure of moving part, broken parts, damage to guards and switches or any other conditions that 
may affect its operation.

• 

Do not use the appliance if any part is damaged or defective. Do not use the appliance if the 
switch does not turn it on and off.

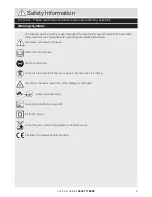
Precautionary Measures

Safety Information

Summary of Contents for GT2826

Page 1: ...hat will help you get the best from your mower ensuring it is assembled correctly and safely If you need help or have damaged or missing parts call the Customer Helpline on 0845 077 8888 Qualcast 430W...

Page 2: ...structions Tips 11 Switching ON and OFF 11 Adjusting the Additional Handle 12 Adjusting the Cutting Angle 12 Lengthening the Cutting Lines 13 Manner of Operation 13 Cutting grass 14 Vertical Cut Lawn...

Page 3: ...nd operating the trimmer Take extra care beware of hazards Read instruction manual Wear eye protection Do not use the machine in the rain or leave it outdoors when it is raining Disconnect the mains p...

Page 4: ...ed during use disconnect the cord from the supply immediately DO NOT TOUCH THE CORD BEFORE DISCONNECTING THE SUPPLY Do not use the appliance if the cord is damaged or worn Read the instructions carefu...

Page 5: ...trols and proper use of the equipment Before use always check the supply and extension cord for signs of damage or ageing If the cord becomes damaged during use disconnect the plug from the mains supp...

Page 6: ...the appliance off and disconnect the plug from the mains immediately Do not touch the main cable before disconnect from the mains Safety of others Do not allow children or any person unfamiliar with t...

Page 7: ...lways check that the power supply corresponds to the voltage on the rating plate Before using the appliance check that your cutting path is free from sticks stones wire and any other dangerous objects...

Page 8: ...e 3 Cable strain relief hook 4 ON OFF switch 5 Wing nut and screw 6 Helper handle 7 Locking sleeve 8 Aluminium shaft 9 Motor head 10 Flower guard 11 Cutting head with line spool 12 Line cutter 13 Prot...

Page 9: ...luminium shaft into the plastic housing assembly and tighten the locking sleeve Mount the protective cover 13 by sliding it into position then use 3 screws to lock it into place WARNING Never use the...

Page 10: ...Helpline 0845 077 8888 Pull the ends of the helper handle 6 apart and slide it over the handle seat 14 Attach the helper handle 6 bolt and wing fastener 5 Step 3 Assembling the Additional Handle Assem...

Page 11: ...und To switch on depress the ON OFF switch 4 Release the switch to switch off After the trimmer has been switched off the cutting head will continue to rotate for a few seconds Keep hands and feet wel...

Page 12: ...n different positions Set the handle in such a manner that the cutting head is slightly tilting forwards when in the working position Loosen the wing nut 5 and adjust the helper handle 6 to the requir...

Page 13: ...es for damage and whether the lines still have the correct length defined by the line cutter When no line ends are visible Renew the line spool see Replacing the linespool in the chapter on cleaning a...

Page 14: ...ndle to 180 position and retighten the locking sleeve 7 in a anti clockwise direction The handle will only rotate in one direction Special care and attention has to be taken when the cutting head is g...

Page 15: ...njury Do not spray water onto the trimmer and do not clean it under flowing water This would result in the danger of an electric shock and the trimmer could be damaged Always keep the trimmer clean Do...

Page 16: ...a little Repeat this process until the ends of the cord project a little beyond the cord cutter 12 Check the line cutter Never operate the trimmer without the line cutter or if the line cutter is defe...

Page 17: ...so that it just reaches the line trimming blade Technical Data Table Disposal and Recycling Getting Help Technical Data Disposal Specification Value Rated voltage 220 240V 50Hz Power 430W No load spe...

Reviews: