


13
Customer Helpline
0845 077 8888
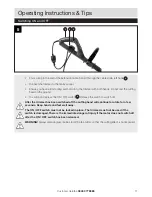
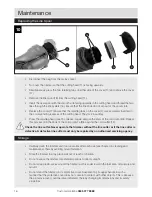
Lengthening the Cutting Lines
Manner of Operation
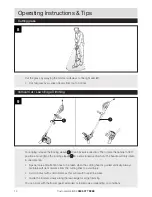
Operating Instructions & Tips
Cutting will be poor with short or worn out lines. Check whether the line spool still holds
sufficient lines when the cutting performance declines. Always disconnect the plug from the
mains socket beforehand! Line spool changing is described in “Replacing the line spool” in
the chapter on cleaning and maintenance.
Fully automatic dual line system
•
The trimmer features a fully automatic dual line system so that the lines are automatically
lengthened each time the trimmer is switched on after a standstill. If the lines should be longer
that defined by the cutting circle then they will be automatically cut to the correct length by the line
cutter.
Regularly check the nylon lines for damage and whether the lines still have the correct
length defined by the line cutter.
When no line ends are visible
•
Renew the line spool (see “Replacing the linespool” in the chapter on cleaning and maintenance).
Adjusting the line length manually
•
Disconnect the plug from the mains socket! Press the retaining head, release it again and pull the
ends of the cord out a little. Repeat this process until the ends of the cord project a little beyond
the cord cutter.
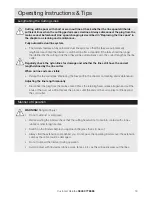
WARNING!
Danger of injury!
•
Do not cut moist or wet grass.
•
Before starting the trimmer check that the cutting head will not come into contact with stones,
rubble or other foreign bodies.
•
Switch on the trimmer before you approach the grass that is to be cut.
•
Always trail the extension cable behind you. Do not pass the operating trimmer over the extension
cable as the cable could be damaged.
•
Do not overload the trimmer during operation.
•
Avoid contact with obstacles (stones, walls, fences, etc.) as this will rapidly wear out the lines.


