background image


14   Operating Your Cleaner


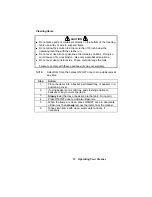
To repeat a timed cleaning cycle

 - press ON/OFF once while in the 

Set Sonics mode.  This cleaning cycle time will remain in memory until 
reset or you turn off the power to the cleaner. 


To reset ultrasonics time during a cleaning cycle

 - press ON/OFF 

once, press SELECT OPTION until the SET SONICS LED lights.  To 
increase time, press SET DISPLAY to your desired setting.  To 
decrease time, press CLEAR DISPLAY, press SET DISPLAY to set 
the time, then press ON/OFF once to resume the cycle. 


To monitor the solution temperature

 - press SELECT OPTION until 

the SOLUTION TEMP LED lights.  The LED Display will display the 
solution temperature in degrees Centigrade (  4ºC).  The cycle will 
continue during this process. 


Draining Your Cleaner


½ and ¾ gallon models

 do not have a drain.  To empty, use the 

indented side of the rim to pour the used solution into a waste disposal 
unit, rinse the tank thoroughly and refill with new solution. 


WARNING 


Do not immerse the cleaner in water. 

Unplug the cleaner from the power source. 

Summary of Contents for 50

Page 1: ...Ultrasonic Cleaners Models 50 75 150 250 550 Operator s Manual 53 Church Hill Road Newtown CT 06470 USA 203 426 0101 telephone 203 426 7026 fax info sonicator com www sonicator com...

Page 2: ......

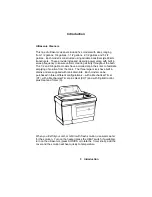
Page 3: ...QSONICA Tabletop Ultrasonic Cleaner...

Page 4: ...t in any case exceed the cost of repair or replacement of the defective equipment and such repair or replacement shall be the exclusive remedy of the purchaser and in no case will we be responsible fo...

Page 5: ...nstalling Your Cleaner 5 Equipment Specifications 6 How Ultrasonic Cleaning Works 7 Operating Your Cleaner 7 Operating Your CT or CHT Cleaner 10 Operating Your C Cleaner 14 Draining Your Cleaner 16 Op...

Page 6: ...our cleaner high voltage inside the cleaner is dangerous Do not immerse the cleaner in water To prevent personal and or property damage Do operate the cleaner with a vented cover or no cover Do use wa...

Page 7: ...or containers directly on the bottom of the cleaning tank use a tray or wire to suspend items Failure to comply may cause transducer damage and will void your warranty Do not allow the solution to dr...

Page 8: ...on models have a molded dip in their rims to facilitate emptying of solution from the tank The three larger sizes have built in drains and are supplied with tank drain kits Each model can be purchased...

Page 9: ...y before contacting Qsonica LLC Please retain your packaging for future use Installing Your Cleaner Check the plate on the back of the cleaner for correct power requirements Position your cleaner with...

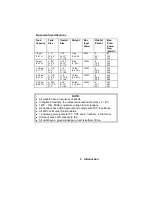
Page 10: ...5 2 1 2 gal 9 51 L L 11 5 W 9 5 D 6 L 16 W 15 5 D 14 5 14 lbs 6 4 KG 185W 0 284 284 185 469 469 5 1 2 gal 20 81 L L 19 5 W 11 5 D 6 L 24 W 18 D 14 5 26 lbs 11 8 KG 320W 0 561 561 320 881 881 NOTE All...

Page 11: ...r radiate through the solution in the tank they cause alternating high and low pressures in the solution During the low pressure stage millions of microscopic bubbles form and grow This process is cal...

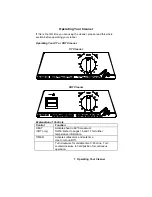
Page 12: ...g Your CT or CHT Cleaner CT Cleaner CHT Cleaner Explanation of Controls Control Function HEAT CHT only Activates heat to 60 C maximum NOTE Refer to pages 16 and 17 for further temperature information...

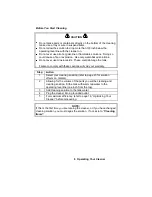
Page 13: ...aner before proceeding CAUTION Do not place parts or containers directly on the bottom of the cleaning tanks use a tray or wire to suspend items Do not allow the solution to drop more than 3 8 inch be...

Page 14: ...on 1 Set the TIMER for the amount of time you wish the items to be cleaned 2 Place the items into a basket perforated tray or beakers in a positioning cover 3 If using beakers or a solid tray add clea...

Page 15: ...S SET DEGAS LED Display Indicates the tank temperature set temperature ultrasonics time or degas time setting depending on your SELECT OPTION choice SET CLEAR DISPLAY Used in conjunction with SELECT O...

Page 16: ...dicates heat is activated and has been set SET TEMP Before You Start Cleaning Step Action 1 Select your cleaning solution 2 Allowing for the volume of the parts you will be cleaning and for the cleani...

Page 17: ...ISPLAY to alter this setting Press ON OFF once to activate timed ultrasonics 2 Set Temp To set the tank temperature press SELECT OPTION until the SET TEMP LED lights Then press SET DISPLAY to alter th...

Page 18: ...clean press ON OFF once to deactivate ultrasonics then slowly remove the items from the cleaner 6 Rinse clean items with clean warm water and dry if necessary CAUTION Do not place parts or containers...

Page 19: ...ess CLEAR DISPLAY press SET DISPLAY to set the time then press ON OFF once to resume the cycle To monitor the solution temperature press SELECT OPTION until the SOLUTION TEMP LED lights The LED Displa...

Page 20: ...le or a 21mm wrench Tighten the valve no more than one full turn when using the wrench until the handle is on top CAUTION Over tightening of the valve can cause damage to the ultrasonic tank Always us...

Page 21: ...Overload do not rest any items on the tank bottom Weight on the tank bottom dampens sound energy and will cause damage to the transducer Instead use a tray and or beaker positioning cover to support...

Page 22: ...s mode speeds up the degassing process Solutions that have been sitting unused for 24 hours or longer have reabsorbed some gases Heat increases the chemical activity of cleaning solutions Surface tens...

Page 23: ...ker or suspend in the solution Rinsing items After cleaning use a clean water bath to rinse away chemicals adhering to items Lubricating items When necessary re lubricate items immediately after clean...

Page 24: ...ds to decide which one produces the best results for you Direct Method How it works Fill the tank with warm water and a cleaning solution Place the items to be cleaned in a perforated tray and lower t...

Page 25: ...r a solid insert tray to fit your cleaner Beakers should not touch the tank s bottom The advantages of this method are Removed soil stays in the beaker or tray so you can easily examine filter or disc...

Page 26: ...ater based solutions include carbonates silicates and caustics These cause emulsifying action which keeps soil from redepositing on the cleaned surface and improves cleaning action in hard water Alkal...

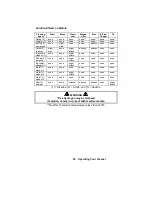
Page 27: ...le below for the effects of solutions on metals Chemicals Harmful to Your Tank The following chemicals will harm your ultrasonic tank and the action of ultrasonics and higher operating temperatures wi...

Page 28: ...none slight attack none none none none General 1 purpose none none slight attack none none none none Industrial strength 1 none none slight attack none none none none Metal 1 cleaner 1 none none none...

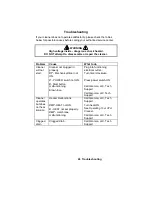
Page 29: ...fuse Plug into functioning electrical outlet Turn timer clockwise Press power switch ON Call Qsonica LLC Tech Support Call Qsonica LLC Tech Support Cleaner operates but does not heat solution Heater m...

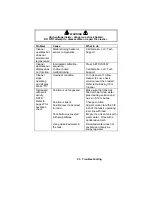
Page 30: ...mizing Your Cleaner Decreased ultrasonic activity NOTE Refer to page 27 for cavitation check Solution is not degassed Solution is spent Solution level is incorrect for load Tank bottom is covered with...

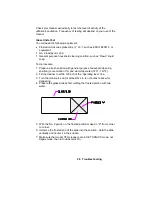
Page 31: ...solution with general purpose household cleaning solution concentration 1 and warm tap water 120 140 F 2 Fill the cleaner to within 3 8 inch of the operating level line 3 Turn the ultrasonics on for a...

Page 32: ...l lead should be removed within 10 seconds If your cleaner passes this test its ultrasonic cavitation is acceptable NOTE To ensure consistency from test to test be sure to repeat test conditions use t...

Page 33: ...m by following the suggestions in the Troubleshooting Guide If you find that your cleaner needs repair carefully pack and return it to Qsonica LLC If under warranty remember to include proof of purcha...

Page 34: ...Notes...

Page 35: ...Technical Support Qsonica LLC 53 Church Hill Road Newtown CT 06470 Tel 203 426 0101 Tel 877 338 9636 Fax 203 426 7026...

Reviews: