8
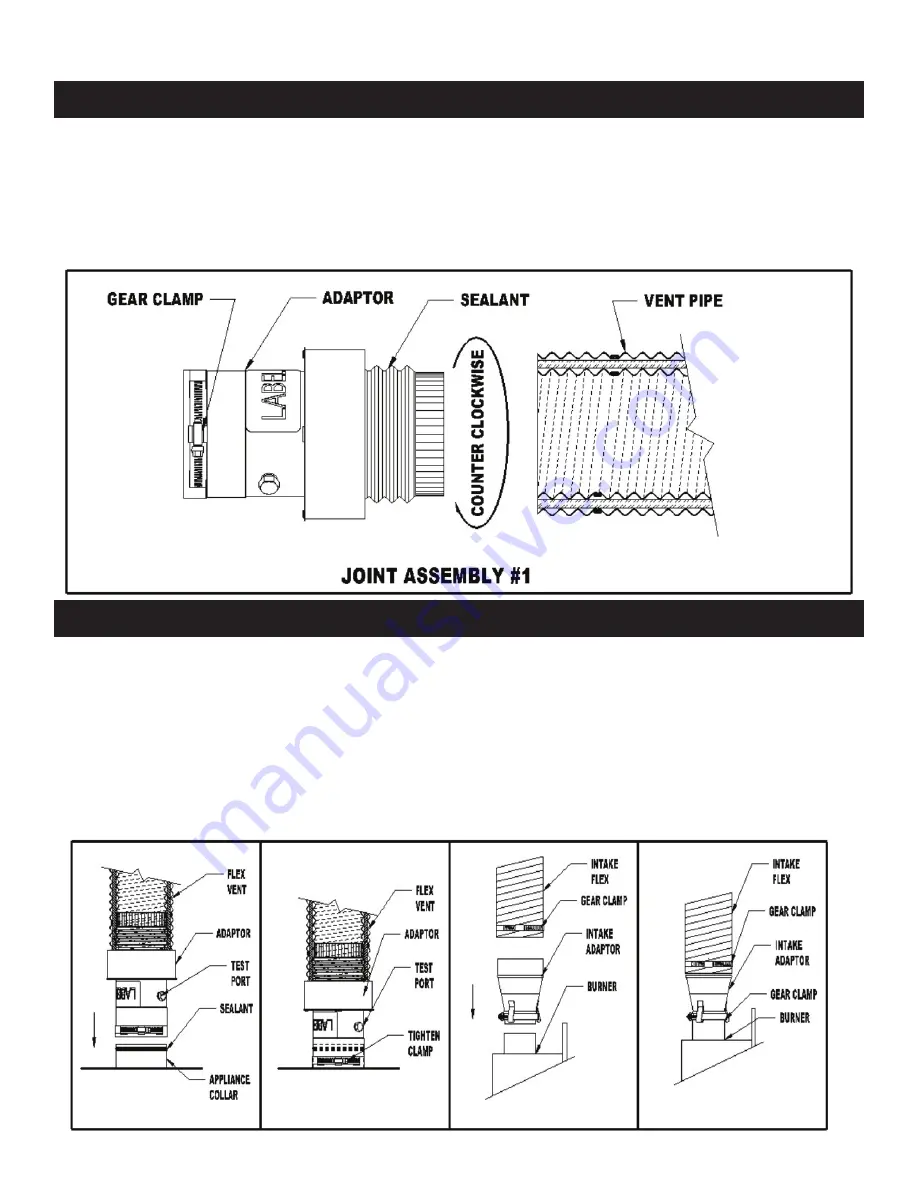
JOINT ASSEMBLY
1. Apply Sealant to “threaded” end of the vent adaptor.
2. Insert the threaded end into the vent pipe. Screw the adaptor into the vent pipe in a
counter clockwise direction. The adaptor should be inserted fully until it is tight. If it
does not completely screw into the vent, unscrew and repeat.
3. Tighten the gear clamp on to the outer sleeve to complete the joint assembly.
3.3 DVO Joint Assembly
APPLIANCE CONNECTION
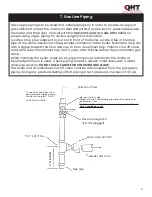
1. Connect the appliance adapter to the appliance collas as per joint assembly.
2. Apply Sealant around the appliance flue collar.
3. Slde the appliance adapter over the flue collar.
4. Tighten the gear clamp around collar.
5. Install the burner air adapter. Tighten integral clamp.
6. Put the gear clamp over the intake flex and slide flex over large end of adapter.
Tighten clamp.
7. Install Vacuum relief damper.
3.4 DVO Appliance Connection


