50
51
CHAPTER 7 REMOTE SUR
VEILLANCE
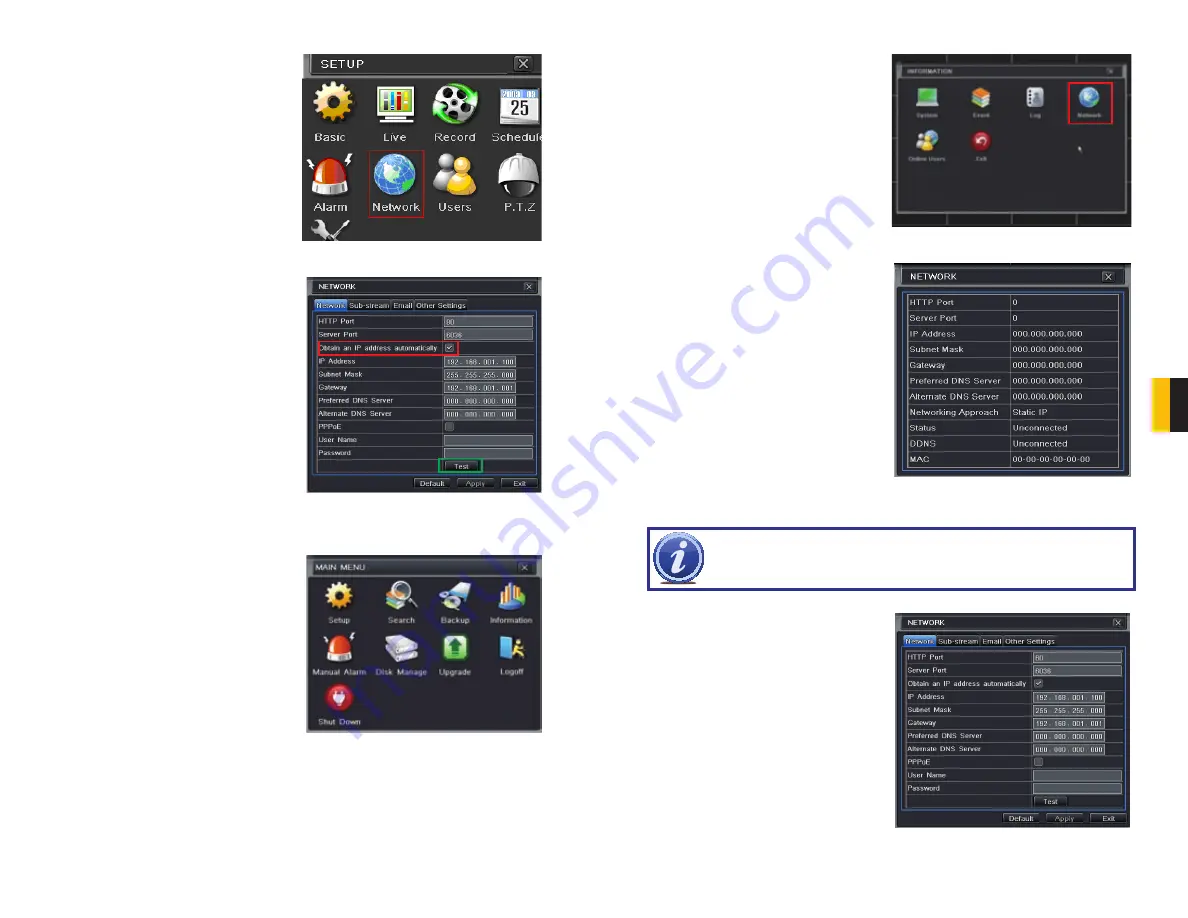
PICTURE 7-16
PICTURE 7-17
STEP 3
. Select
Network
(
Red box in
Picture 7-15
) in the
Setup Menu
window.
STEP 4
. In the
Network Settings
menu, check the box after
Obtain
an IP address automatically
(
Red
Box in
Picture 7-16
). Click the
Test
button (
Green Box in
Picture
7-16
). If you receive an OK message
in the lower left of the window, click
Apply
and then
Exit
.
STEP 5
. To view the IP address, you will
need to return to the main menu and
select the Information icon (
Red box
in
Picture 7-17
)
PICTURE 7-15
STEP 6
. Click on the Network icon (
Red
box in
Picture 7-18
).
STEP 7.
This window will show the:
1) IP Address
2) Subnet Mask, and
3) Gateway assigned to the DVR by
the router.
Write down this information and then
close the window.
STEP 8.
To ensure a more reliable
connection, we recommend that
you return to the
Network Settings
menu (See Step 4) and uncheck
the box after
Obtain an IP address
automatically.
Manually input the:
1) IP Address
2) Subnet Mask, and
3) Gateway values that you wrote
down in
Step 7
.
Click on
Apply
and then
Exit
.
PICTURE 7-18
PICTURE 7-19
PICTURE 7-20
1
2
3
NOTE!
If you have a 2Wire brand router, you may now skip to the next
section and determine the numbers of routers in your network.
1
2
3


