5
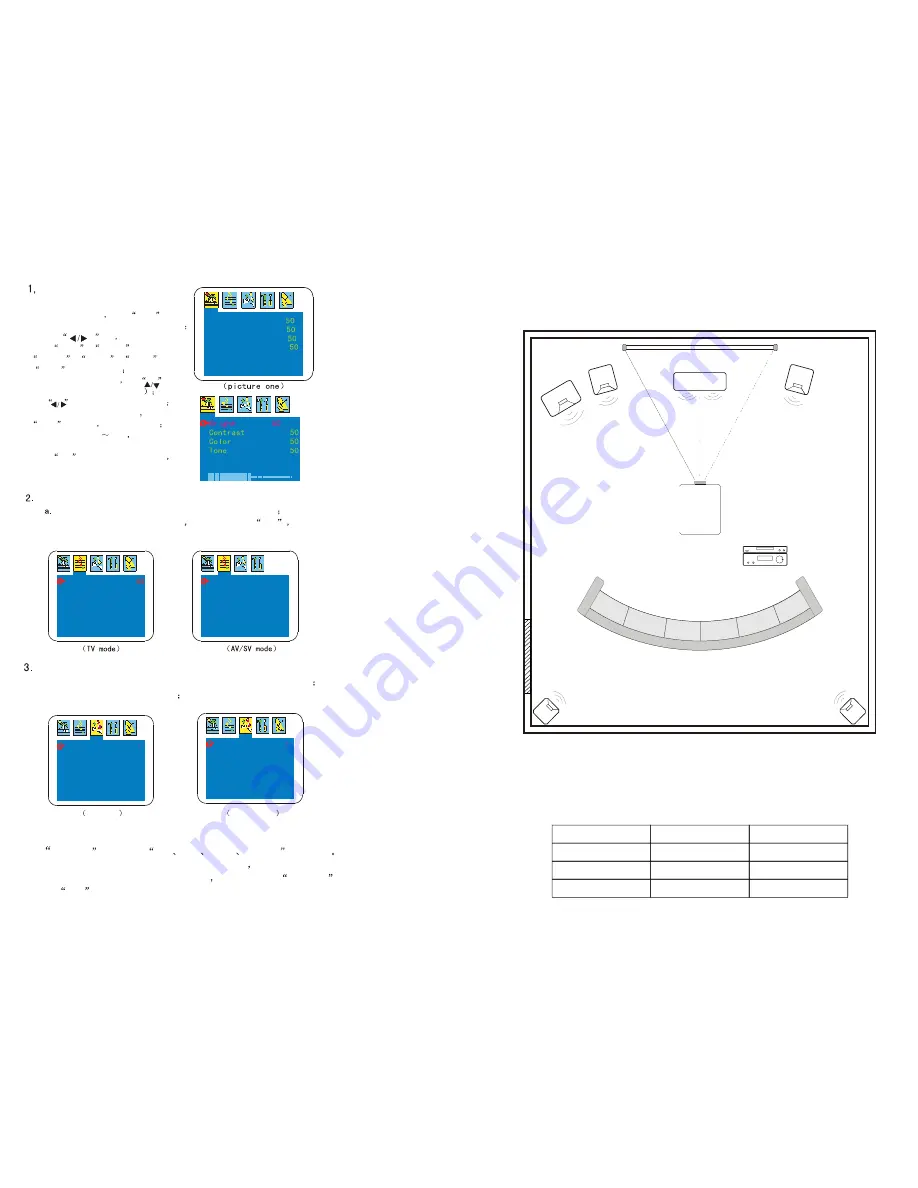
PROJECTOR INSTALLATION
Please use the setup indicated below:
Speaker
L
Subwoofer
Speaker C
Screen
Speaker
R
Appreciate seats
DVD
Amplifier
Projector
Speaker
Ls
Door
Speaker
Rs
SETTING UP THE SCREEN AND PROJECTOR
Place the projector on a smooth and stable surface. Please don't place any objects on top,
underneath or next to this product to ensure proper and sufficient cooling. De distance
between the projector and the projector screen varies from the screen's size. Please refer to
the table below for the correct setup distances.
Screen Size
4:3
16:9
50"
2.45m
3.45m
4.73m
2.65m
3.75m
5.15m
72"
100"
12
Menu setting method
1. Using the projector
press
menu
key,
enter the main menu window (picture one)
2. Press
key
the menu enter
into
image
>
volume
>
function
>
system
>
setting
>
image
secondary menu
3.Enter the secondary menu
use
key
to elect the function (picture two
4. use
key to change the parameter
5. Finished to adjust the parameter
press the
menu
key again
exit the window
6. Repeat operate the 2
5step
till finished all the parameter's setting.
press
exit
key,exit the menu window
Bright
Contrast
Tone
Color
English
English
Sharpness
Sharpness
TV mode
Volume menu adjustment
Adjust the volume of the speaker or amplifier equipment
b. Choose the audio output method
when setting as
line
the projector speaker will stop work.
Output speaker
Volume 50
Output speaker
Function menu adjustment
a. Switch image display mode (From 16:9 to 4:3 ,zoom function)
b. Setting the menu auto-exit time
c. Setting Blue screen or no when no signal input.
Zoom 4 3
Bluescreen OFF
OSD.Time 5
AV/SV mode
4. System menu adjustment
a.
Colour -S
can choose
auto
PAL
NTSC
SECAM
four mode
when the projector connect the new video devices
if you don't know
which system of the video output signal
please setting
Colour -S
as
auto
Volume
Zoom 4 3
Bluescreen OFF
OSD.Time 5
OSD menu


