3.PREPARATION
3.1 ASSEMBLING THE DETECTOR
You don’t need any special tools to assemble your metal detector. All you need is a small
Philips-head screw driver. After unpacking your detector, you may start the following
assembling and adjustment:
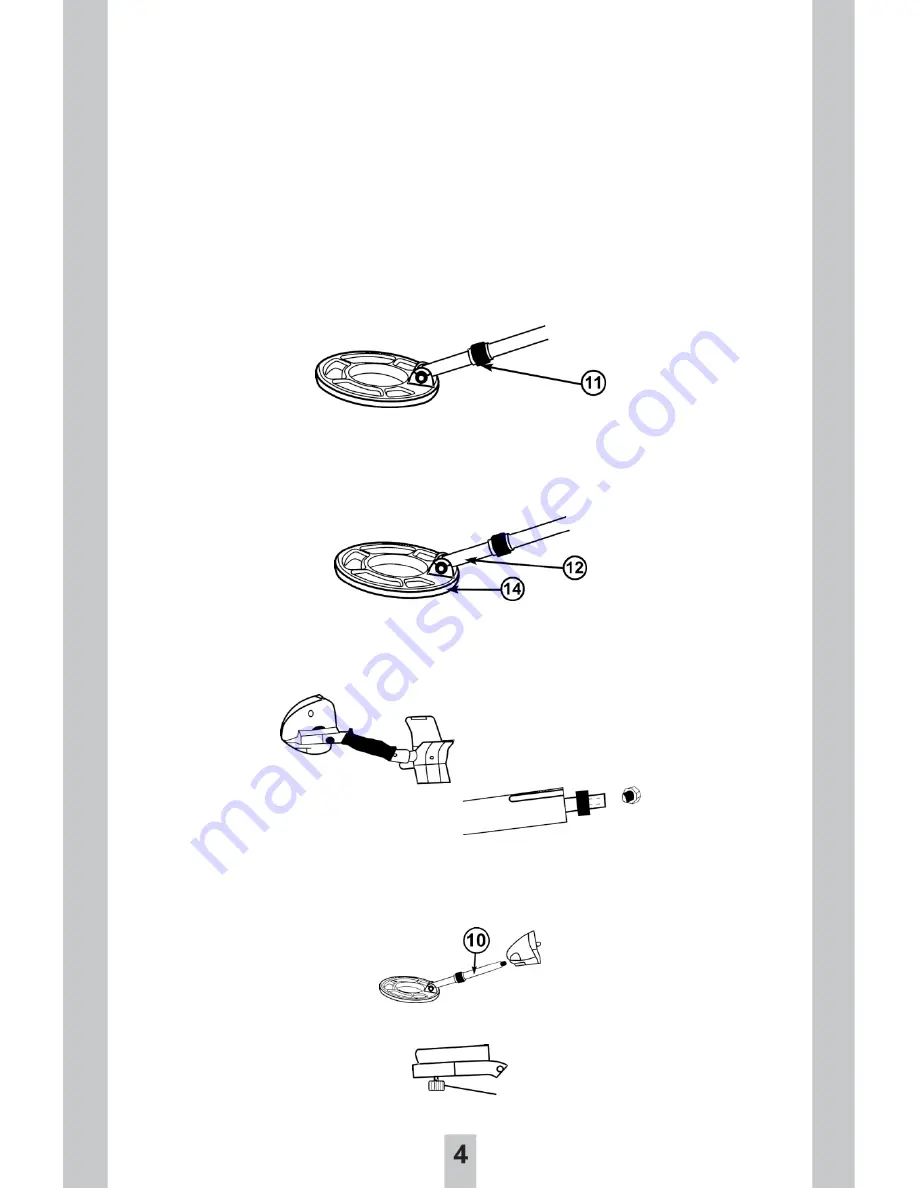
3.1.1 Rotate the STEM LOCK NUT (11) Clockwise until it loosens.
3.1.2 Slide the UPPER STEM (12) towards the SEARCH COIL (14) as indicated by an
arrow until you can see a micro-plug metal connector. Pull out the plug and keep it safely
on the side.
3.1.3 Locate the micro-jack connector in the HANDLE ASSEMBLY (6). Connect the plug
and the jack together and align the marks showing on the surface of the jack and plug.
3.1.4 Slide the UPPER STEM (10) towards to the CONTROLLER UNIT. Make sure the
direction of the cut slot (of the upper stem) is pulled underneath the support of the
controller unit.
3.1.5 Tighten the KNOB (8) which is located under the CONTROLLER UNIT (7).
Summary of Contents for PHMD53
Page 1: ......


