background image

11

Defective Pixel 

Repair

Restore Default Pixel Map 

This option allows you to cancel deletion of the defective pixels and return them to the 

original state.

• 

Press and hold down the 

МENU (3)

 button to enter the main menu.

• 

Select the 

Defective Pixel Repair 


menu item with the 

UP (2)/DOWN (5)

 buttons.

• 

Press briefly the 

МENU (3)

 button to open the submenu.

• 

Select 

Restore Default Pixel Map 

 menu item with the 

UP (2)/DOWN (5)

 buttons.

• 

Press briefly the 

МENU (3)

 button.

• 

Using the 

UP (2)/DOWN (5)

 buttons, select “Yes” if you wish to return to default defective 

pixel pattern, or “No” if you do not.

• 

Confirm selection with a short press of the 

МENU (3)

 button.

Device 

Information

This option allows the user to view the following information about the device:

  - Full name
  - SKU number
  - Serial number
  - Firmware version
  - Hardware version
  - Service information

To display the information, do the following:

• 

Press and hold down the 

МENU (3)

 button to enter the main menu.

• 

Select option 

Device Information   

with the 

UP (2)/DOWN (5)

 buttons.

• 

Press briefly the 

МENU (3)

 button to confirm.

Video Recording and Photography

Accolade 2 LRF Pro 

thermal imaging binoculars feature video recording and photography of the image being 

ranged to the internal memory card.

Before using this feature, please read the 

Date

 and 

Time 

subsections of the section 

General Settings

.

The built-in recorder operates in two modes - 

Video 

and 

Photo

.

Video mode. Video recording 

• 

Switch to 

Video

 mode by pressing and holding the 

REC (4)

 button.

• 

In the top left corner you will see icon 

 and remaining recording time in the format HH:MM (hours: 

minutes).

• 

Start video recording with a short press of the 

REC (4)

 button.

• 

Upon start of video recording icon 

 disappears, and icon REC and recording timer in the format MM:SS 

(minutes : seconds) appear instead: 

.

• 

Pause and resume recording video with a short press of the 

REC (4)

 button.

• 

Stop recording video with a long press of the 

REC (4)

 button.

• 

Video files are saved to the memory card after stopping video.

• 

Switch between modes (

Video

-> 

Photo

-> 

Video

) with a long press of the 

REC (4)

 button.

Photo mode. Capturing an image 

• 

Switch to the 

Photo

 mode with a long press of the 

REC (4)

 button.

• 

Take a picture with a brief press of the 

REC (4)

 button. The image freezes for 0.5 sec and a photo is saved to 

the internal memory.

• 

In the top left corner of the display you can see: photography icon 

, “>100” means that you can take more 

than 100 pictures. If the number of available pictures is less than 100, actual amount of available pictures (for 

example 98) is shown next to the icon 

.

Notes:

• 

You can enter and operate the menu during video recording;

• 

Recorded videos and photos are saved to the built-in memory card in the format img_xxx.jpg (photos); video_

xxx.avi (videos). xxx – three digit counter for videos and photos;

• 

Counter for multimedia files cannot be reset.

Attention!

• 

Maximum duration of a recorded file is five minutes. After this time expires a video is recorded into a new file. 

The number of recorded files is limited by the capacity of unit’s internal memory;

• 

 Check regularly the free capacity of the internal memory, move recorded footage to other storage media to 

free up space on the internal memory card.

Important! 

To playback video files recorded by thermal imaging devices on macOS based computers, we 

recommend that you use VLC video player or Elmedia player. Download links are shown below:

VLC VIDEO PLAYER

http://www.videolan.org/vlc/

download-macosx.html

ELMEDIA VIDEO PLAYER

https://itunes.apple.com/us/app/elmedia-

multiformat-video/id937759555?mt=12

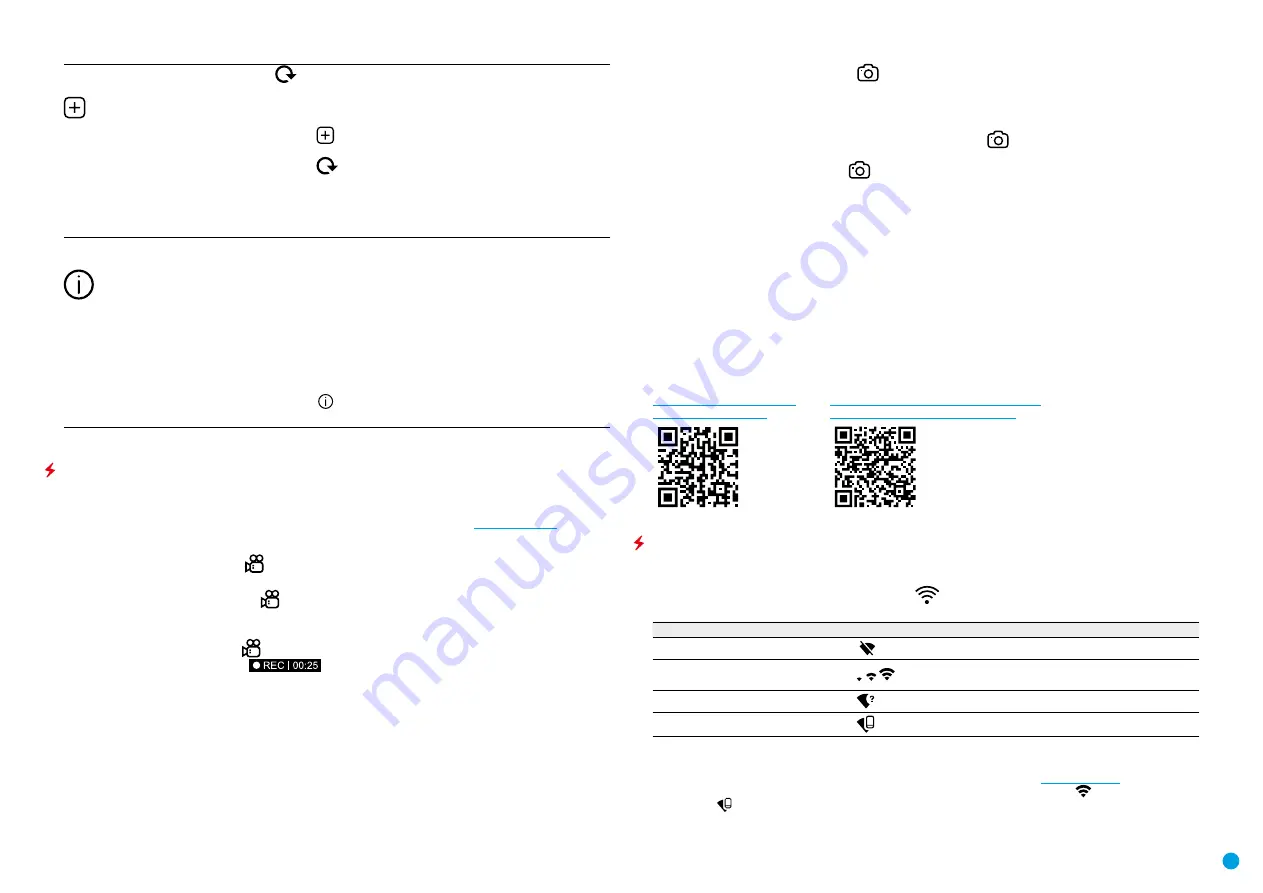
Wi-Fi Function

The device has a function enabling wireless communication with external devices (smartphone or tablet) via 

Wi-Fi.

• 

Turn on the wireless module in the 

WI-Fi Activation


 menu option.

Wi-Fi operation is shown in the status bar as follows:

CONNECTION STATUS

STATUS BAR INDICATION

Wi-Fi is off


Wi-Fi activated by the user,

Wi-Fi in the device is being activated
Wi-Fi is on, no connection with device
Wi-Fi is on, device connected
Your device is detected by an external device as “Accolade 2 LRF_XXXX”, where XXXX – is the last four digits of 

device’s serial number.

• 

After entering the password (default: 12345678) on an external appliance (see 

Password Setup

 subsection 

for more information on setting a password) and connection is established, the icon   in the status bar 

changes to 

.

Summary of Contents for ACCOLADE 2 LRF XP50 PRO

Page 1: ...ACCOLADE 2 LRF XP50 PRO USER MANUAL Thermal Imaging Binoculars ...

Page 2: ...vironment could cause radio interference The product design improvements are possible to make it more appealing for the consumer Repair of the device is possible within 5 years Detailed product description and complete user manual are available for download on our official web page https www pulsar nv com glo products 33 thermal imaging binoculars accolade version 2 lrf USER MANUAL ACCOLADE 2 LRF ...

Page 3: ... The reception range may vary depending on various factors obstacles other Wi Fi networks Depends on the characteristics of the object under observation and environmental conditions Package Contents Accolade 2 LRF Pro Thermal Imaging Binoculars Carrying case IPS7 Battery Pack Battery charger with mains charger Micro USB cable Neck strap Quick start guide Lens cloth Warranty card Description Accola...

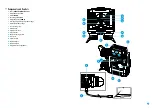
Page 4: ...ion button DOWN 6 Interpupillary distance adjustment rings 7 Diopter adjustment rings 8 Lens focusing ring 9 Battery Pack 10 Battery Pack latch 11 Tripod mount 12 Radiator cooling system 13 Lens cover 14 Objective lens 15 MicroUSB port 16 MicroUSB cable 17 Integrated laser rangefinder 2 1 5 9 14 15 F 6 7 10 11 16 8 12 13 3 4 6 7 ...

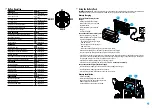
Page 5: ...attery into the charger Lift the lever C of the charger Remove the protective cover from the Battery Pack Install the Battery Pack into the charger Click the lever C Step 2 Сheck the current battery level Upon installation a green LED indicator D on the charger will start to glow and begin flashing once if the battery charge ranges from 0 to 50 twice if the battery charge ranges from 51 to 75 thre...

Page 6: ... a crisp image of the icons on the display rotate the diopter adjustment ring 7 Once adjusted there is no need to rotate the diopter adjustment ring for distance or any other conditions To focus on the object being observed rotate the lens focusing ring 8 Select the calibration mode manual M semi automatic SA or automatic A in the main menu enter the menu by long pressing the МENU 3 button Calibra...

Page 7: ...smooth digital zoom Enter the menu with a short press of the МENU 3 button To toggle between the functions below press successively the МENU 3 button Brightness press briefly the UP 2 DOWN 5 buttons to change display brightness from 0 to 20 Contrast press briefly the UP 2 DOWN 5 buttons to change display contrast from 0 to 20 Smooth digital zoom press the UP 2 DOWN 5 buttons to change digital zoom...

Page 8: ...mpanied by insignificant image graininess User It allows you to configure and save custom brightness and contrast settings as well as one of the three modes as basic Note to quickly change observation modes press and hold the DOWN 5 button Icon Brightness Press and hold the МENU 3 button to enter the main menu Use the UP 2 DOWN 5 buttons to select the Icon Brightness icon Press the МENU 3 button b...

Page 9: ...ith UP 2 DOWN 5 buttons Press briefly the МENU 3 button to confirm Date format is displayed as YYYY MM DD year month day Select the correct values for the year month and date with a short press of the UP 2 DOWN 5 buttons Switch between digits with a short press of the МENU 3 button Save selected date and exit the submenu with a long press of the МENU 3 button General Settings Time Time setup Selec...

Page 10: ...rol activation bought separately Before operating the remote control RC remember to activate it as follows Press and hold down the МENU 3 button to enter the main menu Select option Remote Control with the UP 2 DOWN 5 buttons Press briefly the МENU 3 button to confirm Display shows message Wait and countdown starts 30 sec within which hold down for two seconds any RC button If activation is succes...

Page 11: ...oto mode Capturing an image Switch to the Photo mode with a long press of the REC 4 button Take a picture with a brief press of the REC 4 button The image freezes for 0 5 sec and a photo is saved to the internal memory In the top left corner of the display you can see photography icon 100 means that you can take more than 100 pictures If the number of available pictures is less than 100 actual amo...

Page 12: ...ng performance can degrade in bright conditions or when ranging towards the sun Display Off Function The Display Off function deactivates transmission of image to the display by minimizing its brightness This prevents accidental disclosure The device keeps running When the device is on hold down the ON OFF 1 button Display goes out message Display Off appears To activate the display press briefly ...

Page 13: ...separately Wireless remote control RC duplicates the power on function digital zoom rangefinder control and menu navigation Controller 18 Button ON 19 Button ZOOM 20 Button LRF 21 Brief press Enter the quick menu Turn on the device Calibrate the microbolometer Activate incremental zoom Activate rangefinder Measure distance Long press Enter the main menu Display Off Turn off the device Activate fun...

Page 14: ...f the object being observed is missing Observation through glass Remove the glass from the field of vision There are several light or black dots pixels on device s display or microbolometer Presence of dots is caused by peculiarities of microbolometer or display production technology and is not a defect The device cannot be powered on with wireless remote control Remote control is not activated Ac...

Page 15: ...pulsar vision com ...

Reviews: