


2.4 Protection of the installation and the pump
• Before any start-up or complete stopping of the pump,
make sure the valves are open.
• During stop periods, with the pump full of product,
either the suction or discharge circuit must be left open
to enable expansion or contraction of the pumped
product through reheating or cooling. If this instruction
is not complied with, the bellows may be damaged and
lead to premature failure.
• The stop time may lead to cooling of the product in the
pump and therefore to an increase in viscosity. If this is
the case, we recommend re-starting the pump at a
speed adapted to this new viscosity (starting pump).
Once the product arrives in the pump at the installation
definition temperature, the pump may run at the speed
specified for this application.
• Protection against excess pressure :
The pump must be protected against excess pressure.
It can be delivered with a pressure switch to carry out.
• Protection against particles :
The pump and the installation must also be protected
against any risk of damage through the passage of foreign
bodies, by mounting a pre-filter at the pump suction.
In the event of foreseeable clogging of the pre-filter, we
recommend using a vacuum switch to inform the user
of pre-filter clogging. Prolonged running under cavita-
tion may damage the pump.
The largest dimensions of the allowable particles in the
pump are :
• Soft particles : . . . . . .0,8 mm
• Hard particles : . . . . . .0,4 mm
2.5 Unit Assembly
The following instructions apply to pumps delivered with
a bare shaft or for MOUVEX motor-driven pump units (if
the latter have no specific instruction notice).
2.5.1 INSTALLATION OF UNITS
The base below the unit is fundamental to ensuring cor-
rect operation and long service life.
The unit’s base must be flat, level and sufficiently resis-
tant to absorb the stresses caused by the motor-driven
pump unit without deformation (if it is made of concrete,
it must comply with the BAEL 91 standard).
If the unit is fastened using securing lugs or bolts, it must
be carefully wedged to avoid deforming the frame while
the bolts are tightened. A deformed frame would apply
damaging stresses on the pump and the drive mecha-
nism and misalign the coupling, causing vibrations,
noise and premature wear. Ensure that the frame is well
above the floor, except from the support plates.
If the unit is to be used in a food environment, support
plates that allow the unit to be lifted for easier cleaning
are recommended.
Allow, if possible, a clear space of approximately 50 cm
on each side of the motor-driven pump unit (overall
dimensions) to facilitate cleaning and give access if
necessary to the pump, reduction gear and motor faste-
ning nuts.
In all cases, the dimensions around the motor-driven
pump unit must be designed to give the space required
for dismantling the pump (if the need arises, use the
values given on the overall dimension drawing).
For staff and equipment protection, the frame includes a
ground connection point that should be used.
WARNING
INCORRECT SETTINGS OF THE PRES-
SURE RELIEF VALVE CAN CAUSE PUMP
COMPONENT FAILURE, PERSONAL INJURY,
AND PROPERTY DAMAGE.
Hazardous pressure
can cause
personal injury
or property damage.
WARNING
FAILURE TO INSTALL ADEQUATELY SIZED
PRESSURE RELIEF VALVE(S) CAN CAUSE
PROPERTY DAMAGE, PERSONAL INJURY
OR DEATH.
Hazardous pressure
can cause
personal injury
or property damage.
WARNING
PUMPS OPERATING AGAINST A CLOSED
VALVE CAN CAUSE SYSTEM FAILURE,
PERSONAL INJURY AND PROPERTY
DAMAGE.
Hazardous pressure
can cause
personal injury
or property damage.
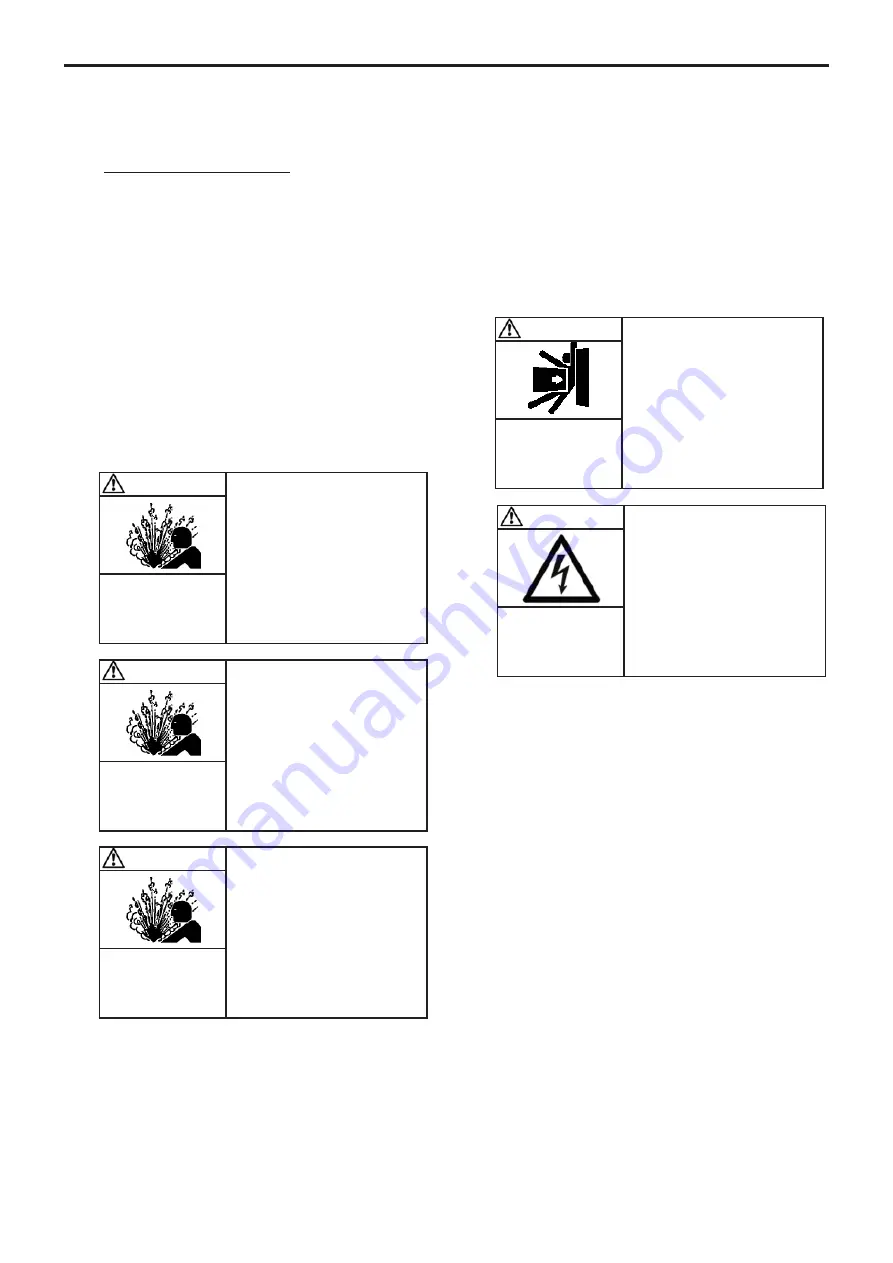
WARNING
BE CAREFUL WITH THE WEIGHT OF THE
PARTS WHEN THEY ARE BEING
REMOVED.
The weight ot the parts
can be dangerous and
may provoke bodily inju-
ries or material damages.
WARNING
DISCONNECT THE ELECTRICITY SUPPLY
BEFORE ANY MAINTENANCE OPERATION.
Dangerous voltage.
Can cause
injury and death
.
2. INSTALLATION (continued)
14/28
NT 1001-P00 02 19 Pumps Micro C e


