NAS System
User’s Manual
17
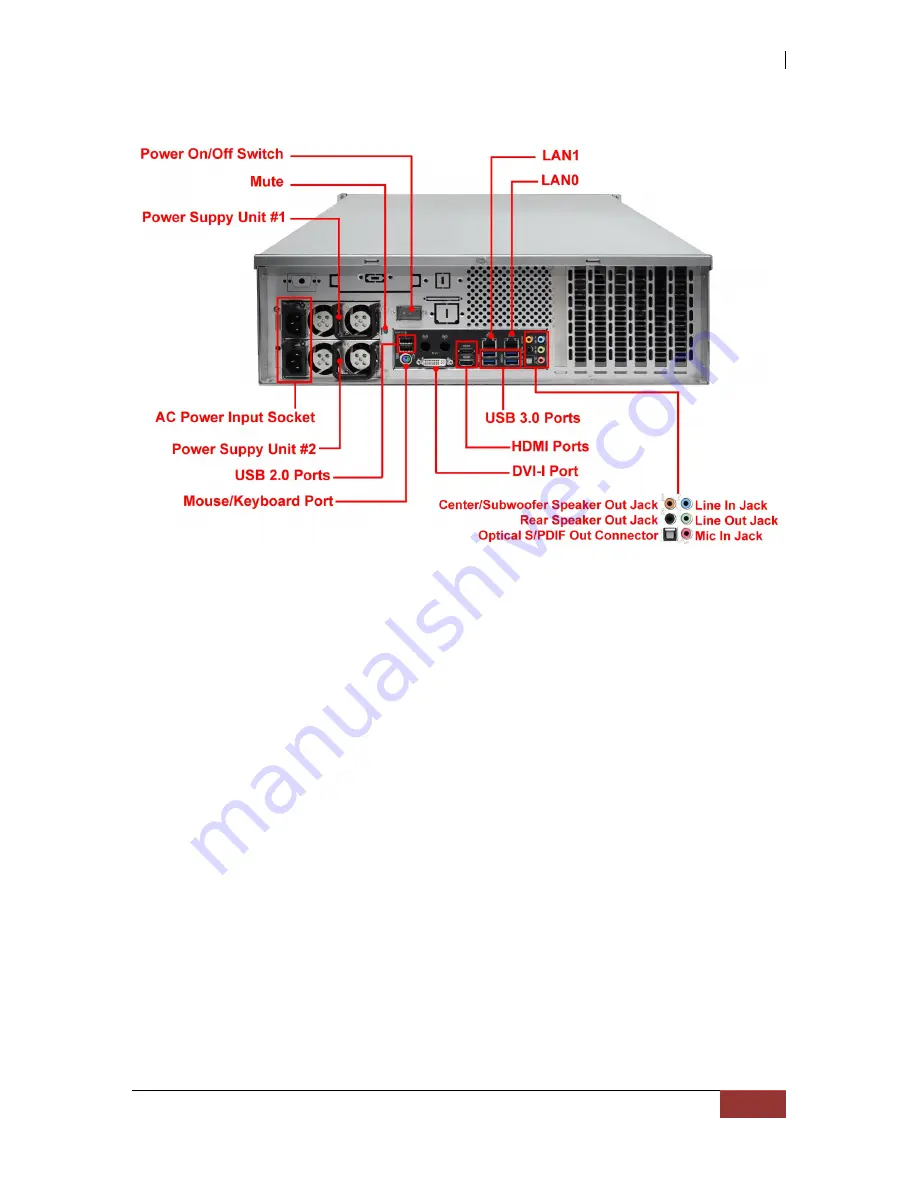
2.3.2 Rear View
1.
Power On/Off Switch
– Use this switch to power on the system.
2.
Mute
– Use the mute button to stop the power supply buzzer alarm.
3.
Power On LED
– Green LED indicates power is ON.
4.
Power Supply
–The NAS system has two power supplies.
5.
AC Power Input Socket
– Use this to plug in the power cable connected from
power source.
6.
USB 2.0 ports
– Two USB 2.0 ports are located at the rear of the system.
7.
Mouse/Keyboard Port -
Use this port to connect a PS/2 mouse or keyboard.
8.
USB 3.0 Port
–
Four USB 3.0 ports are located at the rear of the system. The
USB 3.0 port supports the USB 3.0 specification and is compatible to the USB
2.0/1.1 specification.
9.
HDMI Port -
Two HDMI ports are located at the rear of the system. HDMI (High-
Definition Multimedia Interface) is an all-digital audio/video interface capable of
transmitting uncompressed audio/video signals.
10.
DVI-I Port -
The DVI-I port conforms to the DVI-I specification and supports a
maximum resolution of 1920x1200 (the actual resolutions supported depend on
the monitor being used).
11.
LAN Ports
– The system comes with two 1Gigabit Ethernet ports LAN0 and LAN1.


