3.2.6 Measurement of DC current and AC current
Do not attempt a measurement on the current in a circuit, if when
the voltage between the open-circuit voltage and the ground is
over 250V. If the fuse is blown at the moment of measurement, you
are likely to damage the meter or get yourself hurt.
To avoid any damage to the meter or equipment to be measured,
do not attempt a current measurement unless you have examined
the meter's protective tube. In attempting a measurement, you
should use the correct input sockets, function positions and
measuring ranges. When a test lead is inserted into the current
input socket, do not put the other end of the test lead in parallel
connection with any circuit.
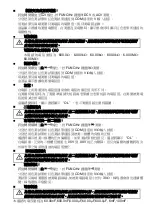
The meter provides DC/AC current measuring ranges as follows: 60.00mA,
600.0mA and 10.00A.
Measurement of current:
1. Turn the rotary switch to the appropriate position and
press “FUNC/Hz” to
choose DC or AC current measurement.
2. Connect the test lead in black to COM input socket. Connect the test lead in
red to a mA input socket when the measured current is less than 600mA;
connect the test lead in red to a 10A input socket when the measured current is
600mA~10A.
3. Disconnection of the circuit to be measured Connect the test lead in black to
the end of disconnected circuit (the voltage is lower) and connect the test
lead in red to the end of the disconnected circuit (voltage is higher).
4. Connect the power to the circuit and capture the displayed reading. If the
display unit only shows "OL", it means the input is over the selected
measuring range. At this moment, turn the rotary switch to a higher
measuring range.
3.2.7 Frequency and Duty cycle measurement
Do not test any voltage higher than 250V to prevent electric
shock or damage to the instrument.
1. Turn the switch to HZ%.
2. Connect the black test pen to the COM jack and the red pen to the Hz jack.
3. Measure the frequency value of the circuit under test with the other two ends
of the test pens.
4. Press the
“FUNC-Hz” button to select Frequency or Duty cycle measurement,
display show the readings of the test result.
Summary of Contents for MT-1236
Page 17: ...1 Pro sKit MT 1236 1 1 A B 60V DC 30V AC 3 1 5V AAA 600V...
Page 18: ...AC DC 600 V European Union 1 2 600V 250V mA F600mA 250V A F10A 250V 2 2 1 LED...
Page 26: ...5 2 F600mA 250V F10A 250V 3 x 1 5V AAA...
Page 27: ...MT 1236 3 5 6 1 Pro sKit MT 1236 1 1 A B 60Vdc 30Vac 3 1 5V AAA...
Page 28: ...600V AC DC CAT 600 V European Union 1 2 600V 250V mA F600mA 250V A F10A 250V...
Page 29: ...2 2 1 LED 2 2 NCV V mV V...
Page 37: ...5 2 F600mA 250V F10A 250V 3 x 1 5V AAA...
Page 38: ...MT 1236 12 0755 83692415 83692986 83246594 83247554 400 169 9629 0755 83692143...


