35
Recording
PLAYBACK VCR
CABLE BOX
OR ANTENNA
RECORDING VCR
OR
OR
TO TV
TO TV
3 CH. 4
IN FROM
ANT.
VIDEO
OUT
R-AUDIO-L
OUT TO TV
VHF/UHF
MONO
IN 1
3 CH. 4
IN FROM
ANT.
VIDEO
OUT
R-AUDIO-L
OUT TO TV
VHF/UHF
MONO
IN 1
I
OU
Caution:
The unauthorized recording of
satellite broadcasts, television
programs, or other copyrighted
materials may infringe the rights
of others.
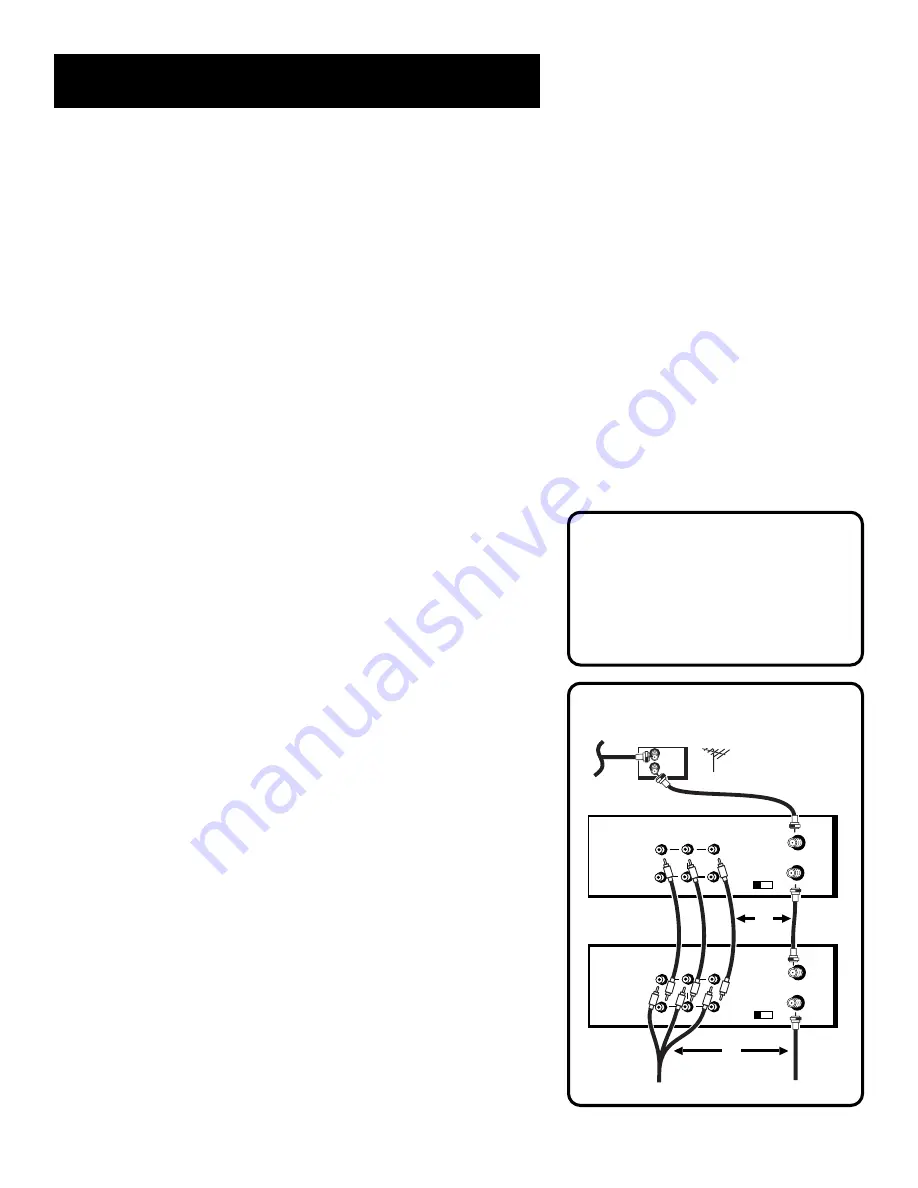
Two VCR Connection
2. Press the SPEED button on the remote if you want to override the
preferred Tape Speed setting.
3. Start audio source playing and press RECORD to begin recording.
4. Press STOP when you are finished.
Playing Back Audio Only
To get stereo sound, connect the AUDIO OUT jacks of the VCR to the
appropriate input on your amplifier or receiver. Do not use the phono
input. Refer to your amplifier or receiver user’s guide.
Using Two VCRs for Copying and
Editing Tapes
Use one VCR as the
playback VCR and the other as the
recording VCR.
1. Turn on the TV and VCRs.
2. Tune the TV to the VCR viewing channel (either 3, 4, or TV’s video
input).
3. If you connected your VCR using the IN FROM ANT. and OUT TO
TV jacks, tune
recording VCR to channel 3 or 4—the one selected
on the back of the
playback VCR.
If you have connected your VCR using the audio/video jacks
, press
INPUT on the
recording VCR’s remote to select the line input.
Select L1 for the jacks on the back of the VCR or L2 for the jacks
on the front.
4. Insert the tape you want to copy into the
playback VCR. Insert a
blank tape with safety tab in place into the
recording VCR.
5. Press PLAY on the
playback VCR to begin playback. When you
reach the point on the tape or program where you want to begin
copying, press PAUSE. You may need to adjust the tracking.
6. Press the RECORD button, then press PAUSE, on the
recording VCR.
7. Press the PAUSE buttons on
both VCRs at the same time to begin
copying the tape.


