background image

©2017 Prokit's Industries Co., LTD. All rights reserved. 2017001

寶工實業股份有限公司

電話

Tel:02-22183233

傳真

Fax:02-22182722

E-mail:[email protected]

https://science.prokits.com.tw

https://shop.prokits.com.tw

新 北 市 新 店 區 民 權 路

1 3 0

7

5

PROKIT’S INDUSTRIES CO., LTD

5F,No.7,Lane 130,Ming-Chung Rd., Hsin-Tien Dist,

New Taipei City, Taiwan,R.O.C  Post code:23141

Summary of Contents for GE-631

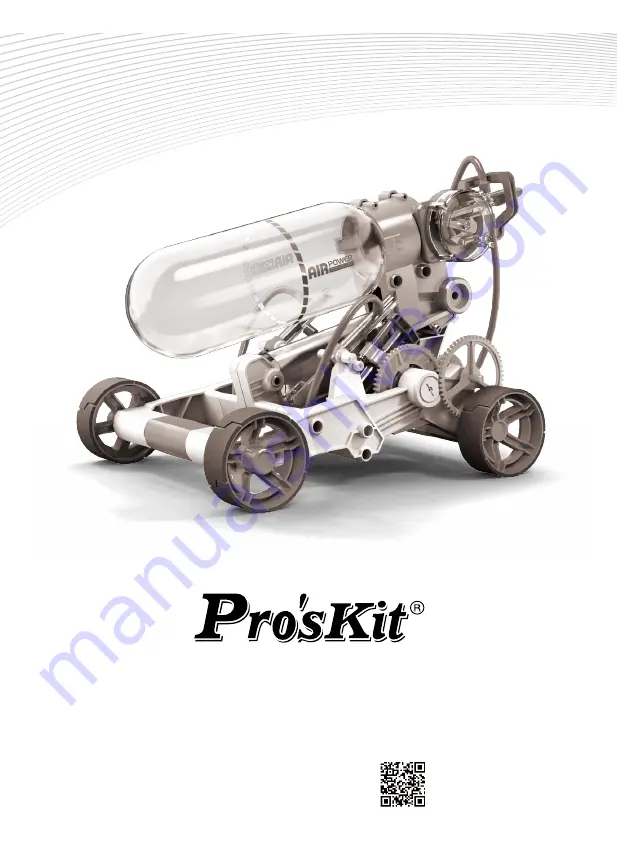
Page 1: ...Manual Assembly Instruction 組裝說明手冊 GE 631 空氣動力引擎車 Air Engine Car Kit ...

Page 2: ...s and worldwide problem Air as fuel could possibly be another alternative to petroleum Air is available 24 7 does not run out and it s free You may wonder how it will be possible Now build the Air Power Engine Car with your kids and bring the vision to life This kit designed with the environment in mind technology and also fun to build Assembly and operation is breeze A pump up bar with a pressure...

Page 3: ...icker Do not touch the oil while fitting the silicon tube Spare parts 1 pcs Spare part 1 pc Spare parts Ignore 數量 QTY 數量 QTY 數量 QTY 數量 QTY 數量 QTY 數量 QTY 數量 QTY 數量 QTY 數量 QTY 數量 QTY 數量 QTY 數量 QTY 數量 QTY 數量 QTY 數量 QTY 數量 QTY 備品x1 Spare part 1 pc 3 請依照組裝步驟將所需的零件剪下 以免組裝時造成零件混淆 C 1 2 3 4 5 MADE IN TAIWAN 6 1 2 3 4 5 7 6 8 9 10 20 19 18 17 16 15 14 13 12 11 D MADE IN TAIWAN 請忽略 1 2 2 4 3 4 5 A MADE IN T...

Page 4: ...urr 空 氣 軟 管 安 裝 How To Fit Air Tube Tilt the tube Tube Measuring Marking Cutting 空 氣 軟 管 裁 切 How To Cut Air Tube Follow the steps above cut the air tubes when they are required Do not cut them in advance Insert the tube to the bottom 5 1 請做2組 1 1 2 A2 A2 A4 11cm 11 cm 請於組裝前先將空氣軟管裁剪至左側標示長度 比例 空 氣 軟 管 模 組 A 組 裝 Tube Module A Assembly 2 Prepare air tube before assembly Scale ...

Page 5: ...repare air tube before assembly Scale 1 2 11 5 cm 7 A1 11 5cm 11 5cm 2 1 14 cm 14cm 請於組裝前先將空 氣軟管裁剪至左側 標示長度 請於組裝前先將空氣軟管 裁剪至左側標示長度 1 1 比例 Scale 1 1 比例 Scale 空 氣 軟 管 模 組 B 組 裝 Tube Module B Assembly Prepare air tube before assembly Prepare air tube before assembly ...

Page 6: ...to avoid air leakage B8 零 件 上 油 How To Oil The Parts Do not spill any oil from the B7 oil sink Keep oil contained Tissue Paper Do not oil outside the shadow as shown below 9 6 紙巾 請小心將液壓油倒入B7 請勿溢出 抹油 P16 B8 B7 注意 此圖代表零件需抹油 上油處以陰影標示 如下圖 請勿將油塗抹至非上油處 示範 Apply Oil Note Oil the parts when appears Example ...

Page 7: ...roper direction to avoid air leakage Video Tips Scanning the QR code to help you assemble below steps smoothly Red Cap Small Push pull the oiled part D16 several times to make it work smoothly B2 P8 11 12 13 E1 03 P19 04 P19 11 注意 組裝前請輕拉彈簧兩端 以確認彈簧伸縮性 注意 組裝前請輕拉彈簧兩端 以確認彈簧伸縮性 Note Give a slight pull on both ends of the spring to make sure of good strength extension before assembly ...

Page 8: ...own If P9 O Ring was set improperly as shown in above wrong fig re do step 6 again Straight A3 on the table and put E2 on A3 flatly Press down E2 to A3 entirely Video Tips Scanning the QR code to help you assemble below steps smoothly Vale Assembly Pay close attention to the following steeps correctly to avoid air leakage https youtu be pgkLWs 0nig 13 1 2 P12 D4 D4 1 2 P17 影片示範 請掃描QR code觀看影片 可幫助您...

Page 9: ... of the concave side with a finger Pull the D4 back Install E2 at a right position as shown above 3 D4 A3 指針停在原處 指針擺動至以上位置 15 漏氣 安裝正確 緊握住A3 將D4重複推入及拉出15 20次將空氣打入 到空氣瓶內 確認壓力表指針是否擺動 參照下圖所示 可看出空氣管模組B是否安裝 正確或是漏氣 Pointer stays still Pointer turns to above position Air Leakage Working Functionally Using D4 to repeat a Push Pull movement 15 20 times to collect air into PET bottle Check pressure meter and...

Page 10: ...ition 3 Put D4 aside B7 to avoid oil spilling with others Be sure to remove air tube D4 from A3 after testing is finished Back to page8 and re install step 5 again Back to page10 and re install steps 7 13 again Back to page12 and re install steps 1 6 again D2 C6 D5 D5 P6 17 1 2 比例1 1 1 2 2 1 如右圖所示 請將P6六角軸插入D5至底 比例1 1 請確認D2及D5是相反位置 Scale 1 1 車 體 組 裝 Vehicle Body Module Assembly Insert P6 hex shaft ...

Page 11: ...P1x2 C3 18 3 1 2 D5 D2 比例1 1 如上圖所示 請將D2及D5推到底以貼近車體 Push parts D5 D2 to the bottom as shown above Scale 1 1 P1x4 C1 19 4 5 2 1 比例1 1 Scale 1 1 ...

Page 12: ... Cut off the burrs before assembly Slightly hammer P5 into D1 Scale 1 1 Insert P3 to the bottom to match fig shown above scale 1 1 Scale 1 1 Insert P5 to the bottom to match fig shown above scale 1 1 組裝前請將毛邊剪切乾淨 Cut off the burrs before assembly D13 21 10 D13 9 將D13插入圓軸 並以鐵鎚輕敲至底 如下圖示 Slightly hammer D13 to the bottom as shown below ...

Page 13: ... air leakage Make Sure Set P10 and B13 Step By Step As Shown Below Red Cap Small Red Cap Small Tip Use C5 to assist you in setting P10 easily 小技巧提醒 使用C5協助組裝P10 Tip Use C5 to assist you in setting P10 easily 23 13 C5 請確認P10組裝方向以免漏氣 請注意 P10在步驟13的方向 與步驟11 12不同 P10 紅色活塞帽 小 小技巧提醒 若P10在組裝時出現扭轉 請使用C5 協助調整 小技巧提醒 使用C5協助組裝P10 請做2組 2 Ensure the direction of P10 is correct to avoid air leakage Direction of P1...

Page 14: ...例1 1 Scale 1 1 Red Cap Medium Note Make sure to lock A2 D9 entirely Do not mix up D9 D14 make sure to use D9 for assembly 2 Take off B13 if P10 Red Cap was twisted during assembly Re insert B13 to A2 after P10 was re set flatly 25 16 將B10及B13重複推入及拉出數次 使油 均勻沾附零件 以利後續操作 B13 B10 Push pull the oiled part B10 B13 several times to make them work smoothly ...

Page 15: ...17 4 2 3 1 1 請將空氣軟管置於如上圖所示位置 Route the air tube and have it at the right position as shown above 27 18 19 P1x4 2 4 3 1 5 1 請確認空氣軟管朝向正確方向 比例1 1 Scale 1 1 Make sure the air tube is facing the right direction ...

Page 16: ...A2及D14確實對位崁入並緊緊扣住 若P10於組裝時發生扭轉 請將B13取出並 調整P10後 再重新組裝B13 B13 P10 Push pull the oiled part B10 B13 several times to make them work smoothly Do not mix up D9 D14 make sure to use D14 for assembly Note Make sure to lock A2 D14 entirely Take off B13 if P10 Red Cap was twisted during assembly Re insert B13 to A2 after P10 was re set flatly ...

Page 17: ...30 23 24 1 31 25 4 3 2 1 ...

Page 18: ...D6 C4 32 26 27 2 3 2 4 5 1 1 6 1 P19 P19 02 02 比例 1 1 P1x5 33 28 29 Top View 上視圖 Scale 1 1 ...

Page 19: ...34 30 1 3 4 2 請確認空氣軟管位置是否正確 Ensure the right direction of air tube D19 D18x2 35 B6 P18 1 2 2 31 32 D10 1 ...

Page 20: ...ve the air tube be clamped and fail to pump sucessfully 比例1 1 比例1 1 Scale 1 1 Scale 1 1 Check if air tubes are clamped during assembly Slightly pull the tube as shown above to make sure it is freely moving without clamp 37 1 P18 D11 2 2 2 P2 35 36 P1 P1 組裝時請避免空氣軟管被夾住 組裝後輕拉空氣軟管確認是否可移動 如可移動表示空氣 軟管沒有被夾住 如上圖所示 Be careful not to clamp the air tubes during assembly ...

Page 21: ...38 B9 P18x5 37 39 38 組裝前請確認連接孔沒有沾附油 請做2組 2 Make sure connector is without oiling for assembly B5 B5 39 B12 P18x5 P7 40 41 ...

Page 22: ...1cm B11 40 P18x5 42 43 41 恭喜完成 P19 P19 06 07 44 Finished ...

Page 23: ...until pressure meter measured and pointed to the red range Rotate the rear wheel and have the align to the protrusion bar as below then start to pump In the beginning pump up 20 times at least to start If pressure meter can not gauge to red range or air leaks from uncertain somewhere Check if air tubes are installed correctly Below marked positions to help you quick check the air tubes for exact a...

Page 24: ...4 Check if P10 D16 are installed correctly refer to page 10 step 7 Red Cap Small P9 P17x2 B13 P10 紅色活塞帽 小 45 1 8 請確認P10 B13是否安裝如下圖示正確位置 請參考第22頁 步驟11 13 1 7 1 6 請確認P9 O型環 是否如下圖所示平整無歪斜 請確認P17是否安裝於如下圖示正確位置 請參考第12頁 步驟3 Red Cap Small Check if P10 B13 are installed in the right direction refer to page 22 steps 11 13 Check if P17 is installed in the right direction refer to page 12 step 3 Check if P9 O r...

Page 25: ...2 D5 are installed in the right direction refer to page17 step 2 If the pressure meter does not function while pumping Check if pointer is installed correctly refer to page 11 step 12 Check if air tubes are clamped during assembly Slightly pull the tube as shown below to make sure it is freely moving without clamp Check if air tubes are clamped refer to Trouble Shooting 2 2 If air tubes are loosen...

Page 26: ...Part Number Part Name 數量 Tapping Screw Tapping Screw Round Shaft Short Round Shaft Long Round Shaft Straight at both ends Hex Shaft Short Hex Shaft Long Spring O ring Balck Red Cap Small Red Cap Medium Red Cap Big Spacer Bottle Cap Silicon Tube Oil Bag Valve clear blue Sponge Sticker PET Bottle Plastic Part A Plastic Part B Plastic Part C Plastic Part D Plastic Part E Instruction Manual 若需要購買零件 請參...

Page 27: ...Tel 02 22183233 傳真Fax 02 22182722 E mail science mail prokits com tw https science prokits com tw https shop prokits com tw 新 北 市 新 店 區 民 權 路 1 3 0 巷 7 號 5 樓 PROKIT S INDUSTRIES CO LTD 5F No 7 Lane 130 Ming Chung Rd Hsin Tien Dist New Taipei City Taiwan R O C Post code 23141 ...

Reviews: