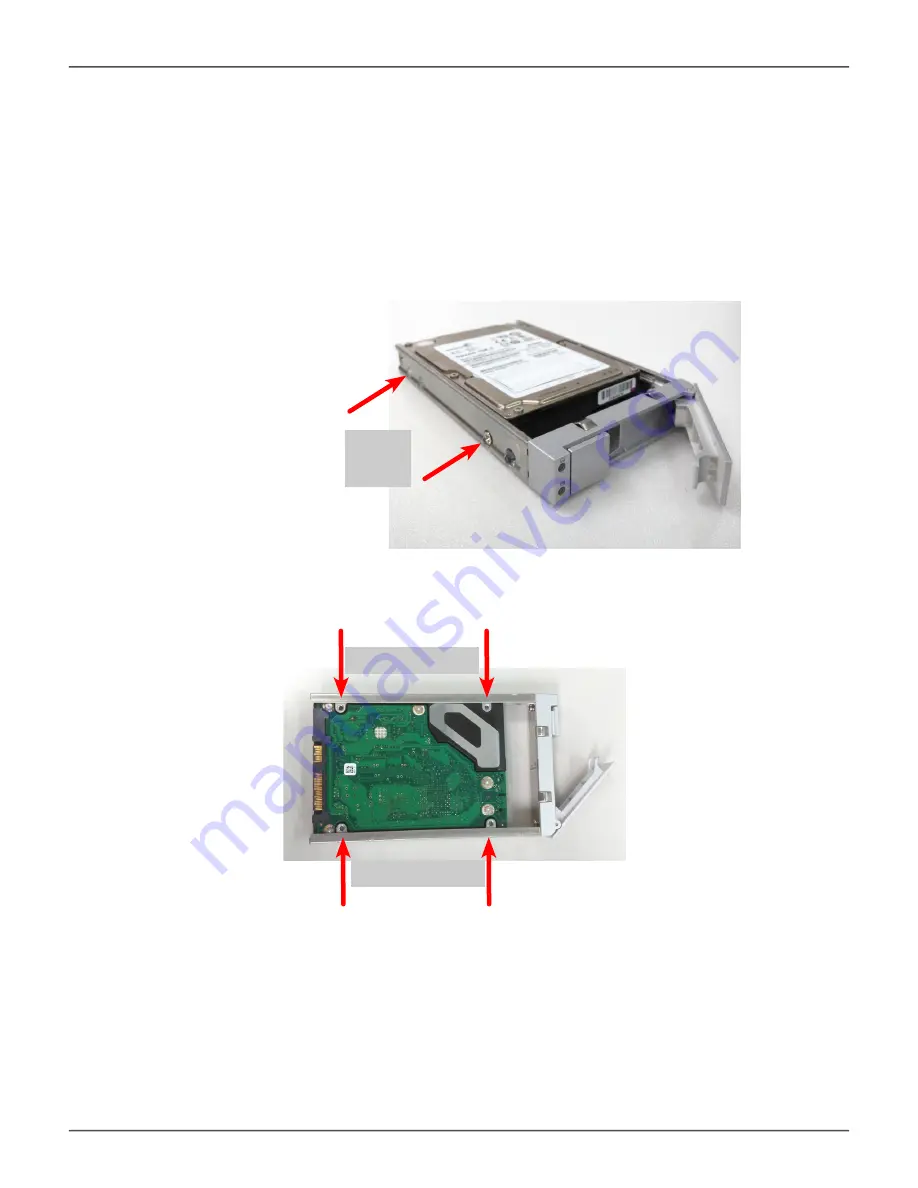
2.5” drive carrier with HDD installed, front view
drive
mounting
screws
drive mounting screws
drive mounting screws
2.5” drive carrier with HDD, ‘left’ side with HDD undercarriage exposed
4. Position the drive in the carrier so the mounting holes line up.
5. Insert the screws through the proper holes in the carrier and into the drive or adapter.
•
Install four screws per drive.
•
Snug each screw. Be careful not to over tighten.
6. With the drive carrier handle in open position, gently slide the drive carrier into the enclosure. The drive
carrier should be oriented so the the “top” of the 2.5” HDD is on the right, and the “bottom” of the HDD is
on the left. The LED indicators will be at the top.
25
12G SAS JBOD
User Guide


