background image

94

normalmente  provocado  por  la  caída 

de  la  pieza  de  trabajo  en  la  hoja  o  el 

contacto accidental con la hoja.

Pieza de Trabajo o Material

El elemento en el que la operación está 

siendo hecha.

Mesa de Trabajo

Superficie en la que descansa la pieza 

de trabajo mientras hace una operación 

de corte, taladrado, cepillado o lijado.

GARANTÍA

1. Este producto ha sido fabricado con

1.

PROMAKER

®

, mediante su garantía

PX2

  para  herramientas  eléctricas 

consta de las siguientes características:

Cubre  los  productos  durante 

2  años

  a  partir  de  la  fecha  de

compra  contra  cualquier  defecto

en  su  funcionamiento,  por  fallas

en los materiales o mano de obra

empleada en su fabricación.

Ofrece 

2  años

  de  servicio  de

mantenimiento  y  mano  de 

obra  gratuita  para  cambio  de 

consumibles.

Otorga  un  periodo  de  prueba  de

2  meses

  donde  puede  canjear

la  herramienta  por  una  de  mayor

capacidad  si  el  rendimiento  no

cumple  con  su  requerimiento,

abonando la diferencia del precio.

Todos los atributos ofrecidos por la

garantía son válidos presentando la

factura de compra original.

2. Para el servicio de garantía, por favor

póngase  en  contacto  con  el  Centro  de

Servicio  Autorizado,  Presente  la  tarjeta

de  garantía  y  la  factura  original  para  el

servicio de garantía.
3. La presente Garantía NO aplica en:

Daños  por  transporte  después  de

las ventas.

Servicios  no  proporcionados  por

nuestros    centros  de  servicio 

autorizado.

Accesorios  y  piezas  de  repuesto,

si los hay, incluidos en el embalaje

(Paquete).

El  daño  producido  por  el  uso

comercial  o  industrial  indebido,  ya

que esta máquina ha sido diseñada

para  resistir  jornadas  de  trabajo

con  descansos  para  no  exponerlo

a sobrecalentamiento.

EC DECLARACIÓN DE 

CONFORMIDAD

Declaramos que la máquina descrita a 

continuación cumple con las Directrices 

básicas  de  seguridad  pertinentes, 

tanto en su diseño básico como en su 

construcción,  así  como  en  la  versión 

puesta  en  circulación  por  nosotros. 

Esta  declaración  dejará  de  ser  válida 

si  la  máquina  se  modifica sin  nuestra 

previa aprobación.

Producto: Sierra de Banco

Modelo Tipo: PRO-SB1800

Summary of Contents for PRO-SB1800

Page 1: ...Table Saw User s Manual Model No PRO SB1800 English 2 I Español 50 ...

Page 2: ...ER TOOL Read the user manual carefully Learn the applications and limitations of the saw as well as the specific potential hazards related to this tool PROTECT YOURSELF AGAINST ELECTRIC SHOCK BY AVOIDING BODY CONTACT WITH GROUNDED SURFACES For example pipes radiators stoves refrigerators KEEP GUARDS IN PLACE and in good working order REMOVE THE ADJUSTMENT WRENCHES Make a habit of checking that the...

Page 3: ... recommended for an extension cord 25 feet or less in length When in doubt use the heaviest gauge The smaller the gauge number the heavier the wire DRESS PROPERLY Do not wear loose clothing gloves ties or jewelry They can get caught and lure you into moving parts Rubber gloves and non slip footwear are recommended when working outdoors Also use hair protection to contain long hair ALWAYS WEAR SAFE...

Page 4: ...ource Keep the cord away from heat oil and sharp edges WHEN OPERATING AN OUTDOOR POWER TOOL USE AN EXTENSION CORD MARKED W A or W These cables are designed for outdoor use and reduce the risk of electric shock KEEP BLADES CLEAN SHARP AND IN SUFFICIENT PLACEMENT Sharp blades minimize stalling and kickback KEEP HANDS AWAY FROM CUTTING AREA Keep your hands away from the leaves Do not try to grip the ...

Page 5: ...ay cause the risk of personal injury Instructions for the safe use of accessories are included with the accessory MAKE SURE THE WORK AREA IS BRIGHTLY LIGHTED to view the work piece and that no obstructions interfere with safe operation BEFORE performing any work using the table saw ALWAYS TURN THE SAW OFF before unplugging to avoid accidental starting when plugged in again USE ONLY SHEETS within t...

Page 6: ...the current drawn by the tool An excessively small extension cord will cause a drop in line voltage resulting in a loss of power and causing the motor to overheat Use the chart provided below to determine the minimum wire size required in an extension cord Only round cables listed by Underwriter s Laboratories UL should be used Amperage on the face plate of the tool Cable length 0 2 0 2 1 3 4 3 5 ...

Page 7: ...ed Plugs To reduce the risk of electric shock this equipment has a polarized plug in Fig 1 one blade is wider than the other This plug will fit in a polarized outlet only one way If the plug does not fit fully in the outlet reverse the plug If it still does not fit contact a qualified electrician to install the proper outlet Do not change the plug in any way 120 V POLARIZED OUTLET Fig 1 FEATURES K...

Page 8: ...eep the cut open and prevent kickback When it is in the middle of sawing or in the up position it is higher than the saw blade When it is in the no saw or down position it is below the teeth of the saw blade SCALE Located on the front rail the easy to read scale provides accurate measurements for fine cuts SWITCH MOUNTING This saw has an easily accessible power switch located under the front rail ...

Page 9: ... turn off switch O and remove key This action prevents the tool from accidentally starting when the light returns WARNING ALWAYS make sure that your workpiece is not in contact with the blade before operating the switch to start the tool Failure to heed this warning can cause the workpiece to be thrown towards the operator and result in serious personal injury WARNING To reduce the risk of acciden...

Page 10: ... is adjusted at the factory for a precise cut After mounting check for accuracy If your transportation has influenced the settings refer to the specific procedures explained in this manual WARNING IIf any part is damaged or missing do not operate this tool until the parts are replaced Using this product with damaged parts or missing could result in serious personal injury WARNING Do not try to mod...

Page 11: ...hardware firmly with socket rachet TO INSTALL THE HANDLE See Figure 7 Insert the screw into the handle using a Phillips head screwdriver Then insert the screw attached to the handle into the hole in the bevel height adjustment handwheel Place the nylon nut on the back of the hole and tighten the screw Tighten until it stops so that the handle turns freely when you turn the steering wheel Remember ...

Page 12: ...the entire cut Remove the insert from the table Raise the saw blade by turning the bevel height adjustment wheel to the right Unlock the release lever by pulling it up Hold the dividing knife and pull it to the right side of the saw to release the dividing knife from the spring loaded divider clamp Pull the dividing knife upward until the internal pins are engaged and the dividing knife is above t...

Page 13: ...el height adjusting wheel clockwise Place rthe dividing knife in the up position To loosen the saw blade Insert the closed end wrench into the saw blade washer Insert the key of the closed end saw blade over the disc nut Holding both keys firmly pull the closed end key toward the front of the machine To tighten the blade Insert the closed end wrench into the washer on the saw blade Insert the clos...

Page 14: ...arallel to the table see figure 15 If the blade guard is not parallel to the table the dividing knife is not in the up position Lock the guard in place by pressing the safety lever down NOTE Blade alignment can be adjusted for different blade widths See To Check and Align the Divider Knife and Saw Blade Check blade guard assembly for clearance and free movement TO CHECK AND ALIGN THE DIVIDER KNIFE...

Page 15: ...cally To adjust horizontally and vertically Remove the anti kickback pawls and blade guard assembly Hold the output support with both hands and pull it out until it is fully extended From the rear of the saw loosen the screws that hold the mounting bracket Reposition the dividing knife to the left or right as necessary to align the dividing knife with the saw blade Once properly aligned retighten ...

Page 16: ... cutting bevel cutting and compound cutting Manufacture of cabinets and carpentry NOTE This table saw is designed to cut only wood and wood composition products BASIC OPERATION OF THE TABLE SAW The polarized plug must be plugged into an outlet that is properly installed and grounded in accordance with all local codes and ordinances Improper connection of equipment can cause electric shock Do not m...

Page 17: ... rods and or push blocks Keep your body in a balanced position to be ready to resist kickback should it occur Never stand directly in line with the blade Using a wooden board will help hold the work piece firmly against the saw table or fence Clean the saw the blade guard under the table insert and any areas where dust from the saw or workpieces can collect Use the correct type of blade for the cu...

Page 18: ...y guide to the cutting guide Place the wood against the rip fence and firmly on the saw table From the rear of the cut guide secure the wood to the guide using 1 1 2 inch wood screws HOW TO MAKE A A GUIDE TO STRIP THE NARROW WORKPIECE See Figure 21 If ripping a narrow workpiece places your hands too close to the blade a guide will need to be made and used To make a guide Attach a handle to a long ...

Page 19: ...otating completely before removing the material Readjust the cutting guide and spaced rips in the workpiece to allow approximately 1 4 inch in the fingers and 1 8 inch gaps between the fingers WARNING Mount the wooden board in front of the saw blade If positioned incorrectly it can cause kickback of the wood board by squeezing the pieceof work and causing union of the blade in the saw cut Failure ...

Page 20: ...ade Bevel cross cuts are made through the wood grain and bevel cut cuts are made through the grain Compound or chamfer miter cuts are made with a blade at an angle on wood leaning to the blade Be completely familiar with making cross cuts cuts rip bevel cuts and miter cuts before attempting a compound miter cut CUTTING TIPS Rebate cuts are partial cuts that can be rip cuts or cross cuts Carefully ...

Page 21: ...ake sure the cutting guide is parallel to the blade before beginning any operation TO USE THE CUTTING GUIDE See Figure 29 Place the rear lip on the rear of the saw table and pull slightly towards the front of the unit Lower the front end of the cut guide onto the guide surfaces at the top of the front rail With the cutting guide flat on the saw table push the guide toward the front rail to align t...

Page 22: ...ter gauge grooves one on each side of the blade When making a 90 cross cut you can use any of the miter gauge grooves When making a chamfered cross cut blade angled relative to table the miter gauge should be located in the slot on the right so that the blade is angled away from the miter gauge and your hands The miter gauge can be rotated 60 to the right or left Release the lock knob With the mit...

Page 23: ...he same the sheet is square If the distances are different Place the dividing knife in the down position Loosen the set screws located on the top of the saw table WARNING To reduce the risk of kickback injury align the guide cutting with the blade after of any blade setting Always make sure the cutting guide is parallel to the blade before starting any operation MAKE CUTS This table saw can make a...

Page 24: ...ce the cutting workpiece on the left side of the blade and first make a test cut on the scrap wood MAKING A CROSS CUT See Figures 34 35 Remove the cutting guide Adjust the blade to the correct depth for the workpiece Set the miter gauge to 0 and tighten the locking knob Make sure the wood is clear of the blade before starting the saw Turn the saw Allow the blade to reach full speed before moving t...

Page 25: ...ide Allow the blade to reach full speed before feeding the workpiece onto the blade Once the blade has made contact with the workpiece use the hand closest to the cutting guide to guide it Make sure the edge of the workpiece remains in solid contact with both the cutting guide and the table surface If ripping a narrow part use a push rod and or push blocks to move the part through the cut and past...

Page 26: ...ck Placing the miter gauge to the left of the blade will result in kickback and the risk of serious personal injury Remove the cutting guide Unlock the bevel locking knob Adjust the bevel angle to the desired setting Lock the bevel lock knob Position the blade to the correct depth for the workpiece Set the miter gauge to 0 and tighten the locking knob Make sure the wood is clear of the blade befor...

Page 27: ...orkpiece on the table with the edge flush against the cutting guide Allow the blade to reach full speed before feeding the workpiece onto the blade Once the blade has made contact with the workpiece use the hand closest to the cutting guide to guide it Make sure the edge of the workpiece remains in solid contact with both the cutting guide and the table surface If ripping a narrow part use a push ...

Page 28: ...or across the grain cross cut The use A non transverse cut is essential for cutting grooves DO NOT DO NOT make non bevel cuts on this machine This is the only kind of cutting that is made without the blade guard assembly installed Make sure the blade guard assembly is reinstalled when this type of cut is completed Read the appropriate section that describes the type of cut in addition to this sect...

Page 29: ...ing In addition during over a period of time readjustment will likely be necessary due to wear To avoid unnecessary arrangements and adjustments it is good practice to check your settings carefully with a carpenter s square and make test cuts in scrap wood before making finish cuts in good workpieces Do not make any adjustments until you have checked with a carpenter s square and made test cuts to...

Page 30: ...ce the blade with an accessory blade follow the instructions provided with the accessory TO ADJUST BLADE AT 0 AND 45 See Figures 46 48 The saw angle settings have been set at the factory and unless shipping damage should not require adjustment during assembly After extensiveuse theymayneedtobechecked Unplug the saw Raise the blade Remove the blade guard assembly If the blade is not perfectly verti...

Page 31: ...y moved to the left side of the slot Lock the angle by pushing the bevel lock lever If the blade is not at an exact 45 angle loosen the 45 adjusting screw and the bevel lock lever Set the bevel indicator to 45 Make a test cut TO VERIFY THE ALIGNMENT OF THE CUTTING GUIDE TO THE BLADE Unplug the saw Raise the lock lever to allow the cutting guide to move Place a carpenter s square next to the blade ...

Page 32: ...grease etc WARNING Do not allow brake fluids gasoline petroleum based products oils etc to come into contact with plastic parts at any time Chemicals can damage weaken or destroy plastic which can lead to serious personal injury Periodically check all clamps nuts bolts and screws for tightness and condition Make sure the table insert is in good condition and in position Check tthe mounting of the ...

Page 33: ... away from rip fence when ripping Blade not properly sharpened or set Resharpen or set blade Saw does not make accurate 90 or 45 cuts Positive stops inside cabinet need adjusting Bevel Cuts Miter gauge is misaligned Miter Cuts Adjust positive steps Adjust the miter gauge Hight bevel adjusting handwheel is hard to turn Gears or screw post inside cabinet are clogged with saw dust Clean the gears or ...

Page 34: ...ING If the power cord of this power tool is damaged it should only be replaced by a qualified technician Follow all safety precautions when diagnosing or servicing the tool Disconnect the power supply before repair PLEASE READ THE FOLLOWING CAREFULLY THE MANUFACTURER AND OR DISTRIBUTOR HAS SUPPLIED THE PARTS LIST AND ASSEMBLY DIAGRAM IN THIS MANUAL ONLY AS A REFERENCE TOOL NEITHER THE MANUFACTURER...

Page 35: ...ap 61 Nut 19 Self tapping screws 62 Knob ring 20 Carbor brush 63 Carriage bolt 21 Brush holder 64 Cabinet 22 Screw 65 Big heel block 23 Spring washer 66 Small heel block 24 Washer 67 Push stick 25 Motor house 68 Cross screws 26 Strain relief 69 Socket screw 27 Motor connect line 70 Bevel indicator 28 Gear housing 71 Mount plate 29 Riving knife bracket 72 Washer 30 Set screw 73 Spring 31 Hex bolt 7...

Page 36: ...Washer 402 Clamp bushing 104 Bevel scale 403 Riving knife 105 90 angle adjustment wheel 404 Riving knife clamp 106 Screw 405 Riving lock lever 107 Rack 406 Locking pin 108 Nut 501 Pin 109 45 angle adjustment wheel 502 AKP left 110 Logo 503 Button board 111 Square nut 504 Torsion spring 112 Hex bolt 505 Anti kickback paw 113 Legs 506 AKP right 114 Foot 601 Rip fence lock lever 115 Cross struts C 60...

Page 37: ...37 ...

Page 38: ...rd Device used to help control the workpiece by holding it firmly against the table or fence during any ripping operation FPM or SPM Feet per minute or strokes per minute used in reference to the movement of the blade Free hand Make a cut without the workpiece being guided by a fence miter gauge or other supports Rubber A sticky residue based on the sap of wood products Heel Alignment of the blade...

Page 39: ... The Divider Spreader Divider Knife table saw A piece of metal slightly thinner than the blade that helps keep the cut open and also helps prevent kickback Saw Blade Path The area above below behind or in front of the blade It is applied to the workpiece the area that will be or has been cut by the blade Placement The distance that the tip of the saw blade tooth is bent or adjusted out of the face...

Page 40: ...arranty service please contact the Authorized Service Center present the warranty card and original invoice for warranty service 3 This Warranty does NOT apply tor Transportation damage after sales Services not provided by our authorized service centers Accessories and spare parts if any included in the packaging Package EC DECLARATION OF CONFORMITY We declare that the machine described below comp...

Page 41: ...NOTES ...

Page 42: ...NOTES ...

Page 43: ...NOTES ...

Page 44: ...NOTES ...

Page 45: ...NOTES ...

Page 46: ...NOTES ...

Page 47: ...NOTES ...

Page 48: ...www promakertools com ...

Page 49: ...Sierra de Banco Manual del Usuario Modelo No PRO SB1800 ...

Page 50: ...y ayudará a usted a prevenir cualquier problema CONOZCA SU HERRAMIENTA ELÉCTRICA Lea cuidadosamente el manual del usuario Aprenda las aplicaciones y las limitaciones de la sierra así como los peligros potenciales específicos relacionados a esta herramienta PROTÉGASE CONTRA DESCARGA ELÉCTRICA EVITANDO EL CONTACTO CORPORAL CON SUPERFICIES A TIERRA Por ejemplo tuberías radiadores estufas refrigerador...

Page 51: ...ce para un propósito no previsto UTILICE EL CABLE DE EXTENSIÓN ADECUADO Asegúrese de que el cable de extensión esté en buenas condiciones Utilice sólo un cable lo suficientemente pesado como para transportar la corriente que su producto consumirá Un cable de tamaño inferior a la normal causará una caída en el voltaje de línea lo que resultará en pérdida de potencia y sobrecalentamiento Un tamaño d...

Page 52: ... móviles la unión de las piezas móviles la rotura de piezas el montaje y cualquier otra condición que pueda afectar su funcionamiento Una guarda u otra pieza que estén dañados deben ser reparados o reemplazados por un centro de servicio autorizado para evitar el riesgo de lesiones personales USE LA DIRECCIÓN CORRECTA DE COLOCACIÓN Sólo coloque la pieza de trabajo hacia la hoja o cortadora contra l...

Page 53: ...r una hoja atascada de la sierra sin primero apagar la sierra y desconectar la sierra de la fuente de alimentación PROPORCIONE UN APOYO ADECUADO a la parte trasera y los lados de la mesa de la sierra para piezas de trabajo anchas o largas EVITE CONTRAGOLPES piezas de trabajo echadas hacia usted por a Mantener la hoja afilada b Mantener la guía de corte paralela a la hoja de la sierra c Mantener el...

Page 54: ... la guarda de la hoja de sierra y el cuchillo divisor para cada operación para la cual se pueda usar incluyendo todo aserrado a través de la pieza de trabajo c Mantenga las manos fuera de la línea de la hoja de sierra d Utilice una varilla de empuje cuando sea necesario e Preste especial atención a las instrucciones para reducir el riesgo del contragolpe f No realice ninguna operación a mano libre...

Page 55: ...nsión excesivamente pequeño causará una caída en el voltaje de la línea dando como resultado una pérdida de potencia y causando que el motor se sobrecaliente Utilice el cuadro proporcionado a continuación para determinar el tamaño de cable mínimo requerido en un cable de extensión Sólo los cables redondos listados por Underwriter s Laboratories UL deben ser utilizados Amperaje en la placa frontal ...

Page 56: ...a línea destinada sólo para las luces no puede llevar correctamente un motor de la herramienta eléctrica El cable que es lo suficiente ente pesado para una corta distancia será demasiado ligero para una mayor distancia Una línea que puede soportar una herramienta eléctrica puede no ser capaz de soportar dos o tres herramientas PARA TODAS LAS HERRAMIENTAS DOBLE AISLADAS Piezas de Sustitución Al dar...

Page 57: ...ar en lesiones personales GUARDA DE HOJAS Mantenga siempre la guarda de la hoja desmontable sobre la hoja de la sierra para cortes de aserrado VOLANTE DE AJUSTE DE ALTURA BISEL Situado en la parte frontal del armario utilice este volante para bajar y subir la hoja de ajustes de altura o reemplazo de la hoja Este volante también facilita el ajuste para ángulos biselados GUÍA DE INGLETES La guía de ...

Page 58: ... de la lámina de plástico MONTAJE DEL INTERRUPTOR Vea la Figura 3 Esta sierra está equipada con un montaje de interruptor que tiene una característica integrada de bloqueo Esta característica está diseñada para evitar el uso no autorizado y posiblemente peligroso por niños y otros PARA ENCENDER SU SIERRA Con la llave del interruptor insertada en el interruptor levante el interruptor para encenderl...

Page 59: ...AMIENTAS NECESARIAS PIEZAS SUELTAS DESEMPAQUE Este producto requiere montaje Levante con cuidado la sierra del cartón y colóquela sobre una superficie de trabajo nivelada NOTA Esta herramienta es pesada Para evitar lesiones en la espalda mantenga las rodillas dobladas y levante con las piernas no la espalda y obtenga ayuda cuando sea necesario ADVERTENCIA No utilice este producto si alguna de las ...

Page 60: ...ación de este tipo es un uso indebido y podría dar lugar a una condición peligrosa que podría causar lesiones personales graves ADVERTENCIA No conecte a la fuente de alimentación hasta que el montaje esté completo El incumplimiento de esta norma puede dar lugar a un arranque accidental y posibles lesiones personales graves ADVERTENCIA Nunca se coloque directamente en línea con la cuchilla o permit...

Page 61: ... 7 Ingrese el tornillo en el mango ayudándose con un destornillador de estrella phillips Luego introduzca el tornillo sujeto al mango en la perforación del volante de ajuste de altura bisel Coloque en la parte de atrás de la perforación la tuerca de nylon y apriete el tornillo Apriete hasta que haga tope de tal forma que el mango gire libremente al accionar el giro del volante Recuerde colocar la ...

Page 62: ...visor de la abrazadera divisora con resorte Tire del cuchillo divisor hacia arriba hasta que las clavijas internas estén enganchadas y el cuchillo divisor esté por encima de la hoja de sierra Bloquee la palanca de liberación empujando la palanca hacia abajo Vuelva a instalar el inserto de la mesa Para colocar en el cuchillo divisor en la posición abajo para cortes ranurados Retire el inserto de la...

Page 63: ...ción de arriba Para aflojar el disco de sierra Inserte la llave de extremo cerrado en la arandela del disco de sierra Inserte la llave del disco de sierra de extremo cerrado sobre la tuerca del disco Sosteniendo ambas llaves firmemente tire de la llave de extremo cerrado hacia la parte delantera de la máquina Para apretar el disco de sierra Inserte la llave de extremo cerrado en la arandela del di...

Page 64: ... los cortes completos Desconecte la sierra Levante el disco de la sierra girando el volante de ajuste de altura bisel hacia la derecha Coloque el cuchillo divisor en la posición arriba Vuelva a instalar el inserto de la mesa Para instalar trinquetes anti contragolpe Pulse y mantenga pulsado el botón en el lado derecho de los trinquetes anticontragolpe Alinee la ranura en los trinquetes sobre el ag...

Page 65: ...gura 15 Si la guarda de la hoja no está paralelo a la mesa el cuchillo divisor no está en la posición arriba Bloquee la guarda en su lugar presionando la palanca de seguridad hacia abajo NOTA La alineación de la hoja se puede ajustar para diferentes anchos de hoja Consulte Para Comprobar y Alinear el Cuchillo Divisor y la Hoja de la Sierra Compruebe que el montajede la guarda de la hoja tenga holg...

Page 66: ...oja de sierra un ajuste es necesario El cuchillo divisor debe estar alineado de frente a atrás horizontalmente y de arriba a abajo verticalmente Para ajustar horizontal y verticalmente Retire los trinquetes anti contragolpe y el montaje de la guarda de la hoja Sujete el soporte de salida con ambas manos y tire de él hasta que esté completamente extendido Desde la parte trasera de la sierra afloje ...

Page 67: ...icacióndegabinetesycarpintería NOTA Esta sierra de mesa está diseñada para cortar sólo madera y productos de composición de madera FUNCIONAMIENTO BÁSICO DE LA SIERRA DE LA MESA El enchufe polarizado debe enchufarse en un tomacorriente que esté instalado correctamente y conectado a tierra de acuerdo con todos los códigos y ordenanzas locales Una conexión incorrecta del equipo puede provocar una des...

Page 68: ...za en el corte Utilice siempre hojas limpias afilada y bien colocadas Nunca haga cortes con hojas desafiladas Para evitar unión de la hoja apoye el trabajo correctamente antes de comenzar un corte Al hacer un corte use una presión constante y uniforme Nunca fuerce los cortes No corte madera mojada o deformada Tengamuchocuidadoalcortaralgunos productos de madera preacabados o de composición ya que ...

Page 69: ... ser hechos en varios tamaños y formas de la madera desechada y utilizados en un proyecto específico La varilla debe ser más estrecha que la pieza de trabajo con una muesca de 90 en un extremo y la forma de un agarre en el otro extremo Un bloque de empuje tiene un mango sujetado por tornillos empotrados desde la parte inferior Utilice los bloques de empuje para cortes estrechos y todos los cortes ...

Page 70: ...Para hacer una guía Sujete un mango a una pieza de madera larga y recta y asegúrela desde la parte inferior utilizando tornillos rebajados Corte un tope en forma de L en el lado de la guía Para usar una guía Coloque la pieza de trabajo sobre la mesa con el borde a ras contra la guía y contra el tope Sujetando el mango de la guía y utilice un bloque de empuje haga el corte al hilo como se describe ...

Page 71: ...cortes al hilo espaciados en la pieza de trabajo para permitir aproximadamente 1 4 de pulgada en los dedos y espacios de 1 8 pulgadas entre los dedos ADVERTENCIA Monte el tablero de madera en frente de la hoja de sierra Si se coloca incorrectamente puede causar un contragolpe del tablero de madera apretando la pieza de trabajo y causando unión de la hoja en el corte de la sierra El incumplimiento ...

Page 72: ...ando hace corte al hilo de una pieza larga y estrecha de la madera para evitar que sus manos se acerquen a la hoja Los cortes biselados se hacen con una hoja angulada Los cortes transversales biselados se hacen a través del grano de madera y los cortes de corte biselado se hacen con el grano Los cortes de inglete compuestos o biselados se hacen con una hoja en ángulo sobre madera inclinada a la ho...

Page 73: ...Un corte de 90 tiene un bisel de 0 y un corte de 45 tiene un bisel de 45 Desconecte la sierra Mueva el volante de ajuste de altura hacia la derecha para biselar hasta un ángulo de 45 A continuación apriete la perilla de bloqueo de bisel ADVERTENCIA Para reducir el riesgo de lesiones asegúrese siempre de que la guía de corte esté paralela a la hoja antes de comenzar cualquier operación PARA USAR LA...

Page 74: ...de la hoja Vuelva a instalar el montaje de la guarda de la hoja cuando el ajuste esté completo Empiece con la hoja a un ángulo cero vertical Desconecte la sierra Afloje la guía de corte al levantar la palanca de bloqueo Usando una escuadra de carpintero ajuste la guía de corte de 2 pulgadas desde el borde extremo de la hoja Afloje el tornillo del indicador de escala y alinee con la marca de 2 pulg...

Page 75: ... los dientes de la hoja en la parte delantera de la hoja Coloque una escuadra de carpintero de combinación junto con la parte delantera de la mesa de la sierra y el lado de la hoja de sierra como se muestra en la figura 31 Gire la hoja de manera que el diente marcado esté en la parte delantera Mueva la escuadra de carpintero de combinación hacia atrás y mida de nuevo la distancia Si las distancias...

Page 76: ...io libre adecuado antes de conectar la sierra a la fuente de alimentación Colóquese ligeramente hacia al lado de la trayectoria de la hoja y para reducir la probabilidad de lesión si se produce un contragolpe ADVERTENCIA No utilice hojas con una clasificación inferior a la velocidad de esta herramienta El incumplimiento de esta advertencia podría resultar en lesiones personales Utilice el medidor ...

Page 77: ... que la guarda de la hoja esté instalado y funcionando correctamente para evitar posibles lesiones graves ADVERTENCIA Los cortes afilados sólo deben hacerse con una guía especial que está disponible comercialmente No intente un corte manual afilado en esta sierra El incumplimiento de estas instrucciones podría provocar lesiones personales graves Coloque la hoja a la profundidad correcta para la pi...

Page 78: ...lla de bloqueo Asegúrese de que la madera esté libre de la hoja antes de encender la sierra Encienda la sierra Deje que la hoja alcance la velocidad máxima antes de mover la pieza de trabajo hacia la hoja Sujete firmemente la pieza de trabajo con ambas manos en el medidor de inglete y introduzca la pieza de trabajo en la hoja NOTA La mano más cercana a la hoja debe colocarse en la perilla de bloqu...

Page 79: ... la sierra Deje que la hoja alcance la velocidad máxima antes de mover la pieza de trabajo hacia la hoja Sujete firmemente la pieza de trabajo con ambas manos en el medidor de inglete y introduzca la pieza de trabajo en la hoja NOTA La mano más cercana a la hoja debe colocarse en la perilla de bloqueo del calibre de inglete y la mano más alejada de la hoja debe colocarse sobre la pieza de trabajo ...

Page 80: ...a la guía de corte para guiarla Asegúrese de que el borde de la pieza de trabajo permanezca en contacto sólido tanto con la guía de corte como con la superficie de la mesa Si corta al hilo una pieza estrecha utilice una varilla de empuje y o bloques de empuje para mover la pieza a través del corte y pasando la hoja Cuando se hace el corte apague la sierra Espere a que la cuchilla se detenga comple...

Page 81: ...nes personales graves Los cortes no completos hechos con una hoja estándar de 10 pulgadas se pueden hacer con el grano al hilo o a través del grano corte transversal El uso de un corte no transversal es esencial para cortar ranuras NO haga cortes no biselados en esta máquina Este es el único tipo de corte que se hace sin el montaje de la guarda de la hoja instalado Asegúrese de que el montaje de l...

Page 82: ...nectada de la fuente de alimentación y el interruptor esté en la posición OFF APAGADA El incumplimiento de esta advertencia podría resultar en lesiones personales graves La sierra de mesa se ha ajustado en la fábrica para hacer cortes muy precisos Sin embargo algunos de los componentes podrían haberse salido de la alineación durante el transporte Además durante un período de tiempo el reajuste pro...

Page 83: ...oloque la arandela de la hoja y la tuerca de la hoja sobre el tornillo del eje Asegúrese de que la cúpula de la arandela de la hoja se enfrente a la hoja y que todos los elementos estén ajustados con el tornillo del eje Asegúrese de que la tuerca de la cuchilla esté firmemente apretada No lo apriete demasiado Bloquee la palanca de liberación Gire la hoja manualmente para asegurarse de que gire lib...

Page 84: ...a izquierda Bloquee el ángulo empujando hacia abajo la palanca de bloqueo de bisel y vuelva a apretar el tornillo de ajuste Gire el mango hasta que el indicador de bisel apunte a cero Si el mango se gira tanto como sea posible y no indica cero correctamente es posible que tenga que ajustar el indicador de bisel NOTA Será necesario remover la palanca para ajustar el indicador de bisel Si la hoja no...

Page 85: ...ra desechada Si los cortes no son ciertos repita el proceso MANTENIMIENTO ADVERTENCIA Cuando realice reparaciones utilice únicamente piezas de repuesto idénticas El uso de cualquier otra pieza puede crear un peligro o causar daños en el producto ADVERTENCIA Siempre use gafas de seguridad o anteojos protectores con protección lateral al usar herramientas eléctricas o al soplar el polvo Si la operac...

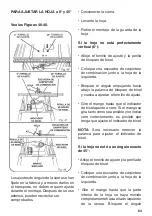
Page 86: ... SOLUCIÓN DE PROBLEMAS PROBLEMA CAUSA SOLUCIÓN Vibración excesiva La hoja está fuera de equilibrio La hoja está dañada La sierra no está montada de forma segura La superficie de trabajo está desigual La hoja está deformada Reemplace la hoja Reemplace la hoja Apriete todos los herrajes Reposicione en una superficie plana Compruebe la instalación de la hoja Reemplace la hoja si es necesario La guía ...

Page 87: ...queo no está completa mente a la posición izquierda Mueva la palanca de bloqueo hacia la izquierda Motor tiene dificultad para hacer un corte al hilo La hoja no es adecuada para corte al hilo Cambie la hoja la hoja para cortar al hilo normalmente tiene menos dientes MANTENIMIENTO Y SERVICIO Los procedimientos que no se explican específicamente en este manual deben ser realizados técnico ADVERTENCI...

Page 88: ... HACER ALGUNAS REPARACIONES AL PRODUCTO O QUE ÉL O ELLA ESTÉ CALIFICADO A PARA REEMPLAZAR CUALQUIER PIEZA DEL PRODUCTO EL FABRICANTE Y O EL DISTRIBUIDOR DECLARA EXPRESAMENTE QUE TODOS LAS REPARACIONES Y SUSTITUCIONES DE PIEZAS DEBEN SER REALIZADAS POR TÉCNICOS CERTIFICADOS Y LICENCIADOS Y NO POR EL COMPRADOR EL COMPRADOR ASUME TODO EL RIESGO Y RESPONSABILIDAD QUE SURJA DE SUS REPARACIONES AL PRODU...

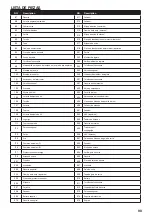
Page 89: ...oscante 62 Anillo perilla 20 Cepillo de carbón 63 Gabinete 21 Portacepillo 64 Cabinet 22 Tornillo 65 Bloque de talón grande 23 Arandela de resorte 66 Bloque de talón pequeño 24 Arandela 67 Varilla de empuje 25 Caja de motor 68 Tornillos cruzados 26 Alivio de tensión 69 Tornillode casquillo 27 Linea de conexión del motor 70 Indicador de bisel 28 Caja de engranajes 71 Placa de montaje 29 Soporte del...

Page 90: ...402 Buje de abrazadera 104 Escala de bisel 403 Cuchillo divisor 105 Volante de ajuste de 90 404 Abrazadera del cuchillo divisor 106 Tornillo 405 Planaca de bloqueo del cuchillo divisor 107 Estante 406 Pasador de bloqueo 108 Tuerca 501 Pasador 109 Volante de ajuste de 45 502 AKP izquierdo 110 Logotipo 503 Tablero de botones 111 Tuerca cuadrada 504 Resorte de torsión 112 Perno hexagonal 505 Trinquet...

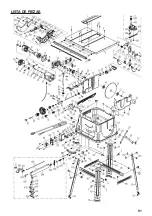
Page 91: ...91 LISTA DE PIEZAS ...

Page 92: ...ajo Corte de Dado Un corte parcial que produce un acabado de lados cuadrados o punto más bajo en la pieza de trabajo Requiere una cuchilla especial Tablero de Madera Dispositivo utilizado para ayudar a controlar la pieza de trabajo sujetándola fi memente contra la mesa o la guía durante cualquier operación de corte al hilo FPM o SPM Pies por minuto o golpes por minuto usados en referencia al movim...

Page 93: ...sor de la pieza de trabajo para hacer piezas más delgadas Resina Una sustancia pegajosa basada en la savia que se ha endurecido Revoluciones Por Minuto RPM El número de vueltas completadas por un objeto giratorio en un minuto Cortar Al Hilo Una operación de corte a lo largo de la longitud de la pieza de trabajo El Cuchillo Divisor Esparcidor Divisor sierras de mesa Una pieza de metal ligeramente m...

Page 94: ...do la diferencia del precio Todos los atributos ofrecidos por la garantía son válidos presentando la factura de compra original 2 Para el servicio de garantía por favor póngase en contacto con el Centro de Servicio Autorizado Presente la tarjeta de garantía y la factura original para el servicio de garantía 3 La presente Garantía NO aplica en Daños por transporte después de las ventas Servicios no...

Page 95: ...NOTAS ...

Page 96: ...www promakertools com ...

Reviews: