22
TO
ATTACH THE CUTTING GUIDE
SCALE INDICATOR TO THE BLADE
See Figure 29.
Use the indicator on the cutting guide
to position the guide along the scale on
the front rail.
NOTE:
To make this adjustment, the
anti-kickback pawls and blade guard
assembly must be removed. Reinstall
the blade guard assembly when the
adjustment is complete.
Start with the blade at a zero (vertical)
angle.
• Unplug the saw.
• Loosen
the cutting guide by lifting
the lock lever.
• Using a framing square, set the rip
fence 2 in. from the blade tip edge.
• Loosen the screw on the scale
indicator and align with the 2 in. mark
as shown.
•
Tighten the screw and check the
dimension and cutting guide.
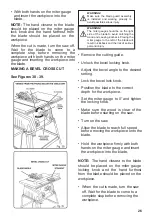
TO USE THE MITER G
UIDE
See Figure 30.
The miter gauge provides greater
precision when cutting at an angle. For
very close tolerances, test cuts are
recommended. There are two miter
gauge grooves, one on each side of
the blade. When making a 90 ° cross
cut, you can use any of the miter
gauge grooves. When making a
chamfered cross cut (blade angled
relative to table) the miter gauge
should be located in the slot on the
right so that the blade is angled away
from the miter gauge and your hands.
The miter gauge can be rotated 60 ° to
the right or left.
•
Release
the lock knob.
•
With the miter gauge in the miter
gauge slot, turn the gauge until the
desired angle is reached on the scale.
• Retighten the lock
ing
knob.
WARNING!
The blade must be parallel to the miter
gauge slot so the wood does not stick
together resulting in kickback. Otherwise,
serious personal injury could result. Do
not loosen any screws for this adjustment
until you have checked with a carpenter's
square and made test cuts to make sure
any adjustments are necessary. Once the
screws are loosened, these items must be
removed.
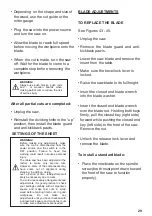
• Unplug the saw.
• Remove the blade guard and
anti-kickback pawls. Raise the
blade by
turning the height/ bevel
adjusting handwheel.
Summary of Contents for PRO-SB1800
Page 1: ...Table Saw User s Manual Model No PRO SB1800 English 2 I Español 50 ...
Page 37: ...37 ...
Page 41: ...NOTES ...
Page 42: ...NOTES ...
Page 43: ...NOTES ...
Page 44: ...NOTES ...
Page 45: ...NOTES ...
Page 46: ...NOTES ...
Page 47: ...NOTES ...
Page 48: ...www promakertools com ...
Page 49: ...Sierra de Banco Manual del Usuario Modelo No PRO SB1800 ...
Page 91: ...91 LISTA DE PIEZAS ...
Page 95: ...NOTAS ...
Page 96: ...www promakertools com ...


