


18
19
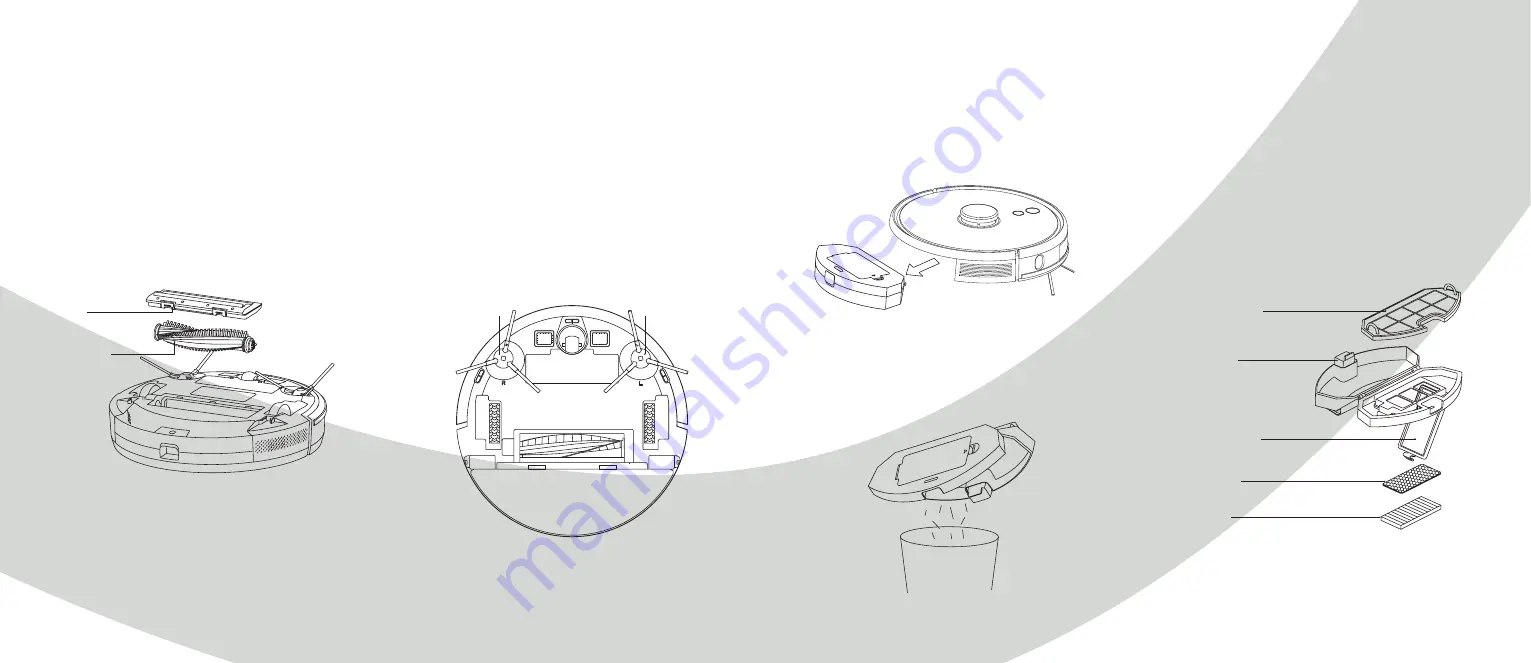
Cleaning and maintenance
Main brush
Clean the main brush regularly.
1. Turn the robot over and press the buckle on the cover to take
out the main brush.
2. Remove dust and hairs outside and inside the main brush,
using the cleaning brush.
3. Reassemble the main brush and the cover. Push the brush into
the robot and press the cover in place on top of it.
Buckle
R (right side brush)
L (left side brush)
Main brush
Side brushes
Clean the side brushes regularly.
1. Turn the robot over and pull out the side brushes upwards.
2. Remove dirt and hairs and reassemble the brushes.
3. Make sure the left side brush (L) and the right side brush (R)
correspond, respectively, to the L and R markings on the
bottom of the robot. Press the side brushes onto the robot to
reinstall them.
Cleaning and maintenance
Dustbin
Clean the dustbin regularly.
1. Press the button and pull out the dustbin.
2. Open the dustbin. Pour out all the dust and clean the bin.
Filters
Clean the filters regularly.
1. Remove the filter gauze, filter sponge and HEPA.
2. Clean the filters in clean water.
3. Shake off the water and wait for the filters to dry completely.
4. When they are dry, install them in the correct order: filter
gauze - sponge - HEPA. See illustration below
Filter gauze
Button
Filter cover
Sponge
HEPA
Summary of Contents for SMART HOME W411-E J300
Page 1: ...1 PROKORD SMART HOME W411 E...
Page 15: ...28 For a smarter way of life...


