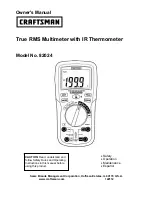
MULTIMETRE MEDIUM
EN - 1
PIN-116
We thank you for the purchase of this Profile
product. Note: It is important that you read this
manual before using the product And be sure to
save this manual for possible use later.
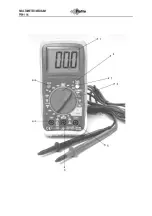
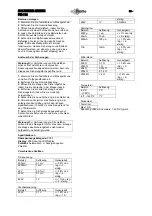
Operating controls and connections
(See figure 1)
1. LCD
2. Function
switch
3. COM (negative) input connection
4. 10A (positive) input connection for 10A DC or
AC measurement
5. Positive input connection
6. HOLD
button
7. background
lighting
Symbols and messages
Continuity
BAT Battery nearly empty
Diode
AC
Alternating current or voltage
DC
Direct current or voltage
μ
Micro
(Ampère)
m Milli
(Ampère)
k Kilo
(Ampère)
Ω
Ohm
Operation
Warning
: Risk of electrocution. Circuits with high
voltages (both direct and alternating) are very
dangerous and must be very carefully measured.
1. ALWAYS switch the function switch to the OFF
position when the metre is not being used. This
metre has an auto-power-off function that
automatically switches the metre off when it has not
been used for 15 minutes.
2. When "1" appears on the display during a
measurement the value exceeds the range you
have selected. Choose a higher range.
Note.
: With some low AC and DC ranges the
display may show a random, varying measured
value although the testing wires are not connected
to an appliance. This is normal and caused by the
high input sensitivity. The measured value will
stabilise and a correct measurement will be shown
on connection to a circuit.
Display background lighting
Press the
(7)
key >1 second to switch the display
background lighting on or off. The background
lighting will be automatically switched off after 10
seconds.
Hold
With the Hold function you can hold the current
value on the display. Press the HOLD key
(6)
briefly
to hold the value and press HOLD again briefly to
close the function.
DC voltage measurements
Caution!
Do not measure DC voltages when a
motor in the circuit is switched ON or OFF. This can
cause large voltage peaks that could damage the
metre.
1.
Switch the function switch to the V DC position.
Insert the banana plug of the black testing wire in
the negative
(3)
COM connection and the plug of the
red wire in the positive
(5)
V connection or in the
positive 10A connection for measurements of 10A
or lower.
2.
Touch the circuit to be tested with the test probes.
Ensure correct polarity (red wire to positive, black
wire to negative).
3.
Read off the voltage on the display. The display
will show the correct decimals and value. When the
polarity is reversed the display will show (-) minus
for the value.
AC voltage measurements
Caution!
Do not measure AC voltages when a
motor in the circuit is switched ON or OFF. This can
cause large voltage peaks that could damage the
metre.
1
. Switch the function switch to the V AC position.
2
. Insert the banana plug of the black testing wire in
the negative
(3)
COM connection and the plug of the
red wire in the positive
(5)
V connection.
3
. Touch the circuit to be tested with the test probes.
Read off the voltage on the display. The display will
show the correct decimals, value and symbol.
Resistance measurements
Warning!
To prevent electric shocks one must cut
the power supply to the unit to be tested and
discharge all capacitors before resistance
measurements are conducted. Remove the
batteries and take the plugs out of the plug socket.
1
. Switch the function switch to the
Ω
position.
2
. Insert the banana plug of the black testing wire in
the negative
(3)
COM connection and the banana
plug of the red testing wire in the
(5)
positive
connection.
3
. Touch the circuit or part to be tested with the test
probe tips. It is best to disconnect a side of the part
to be tested so the rest of the circuit does not
interfere with the resistance measurement.
4
. Read off the resistance on the display. The
display will show the correct decimals, value and
symbol.
Connection control
Warning!
To avoid electric shocks never measure
connections with live circuits or wires.
1.
Switch the function switch to the position.


