


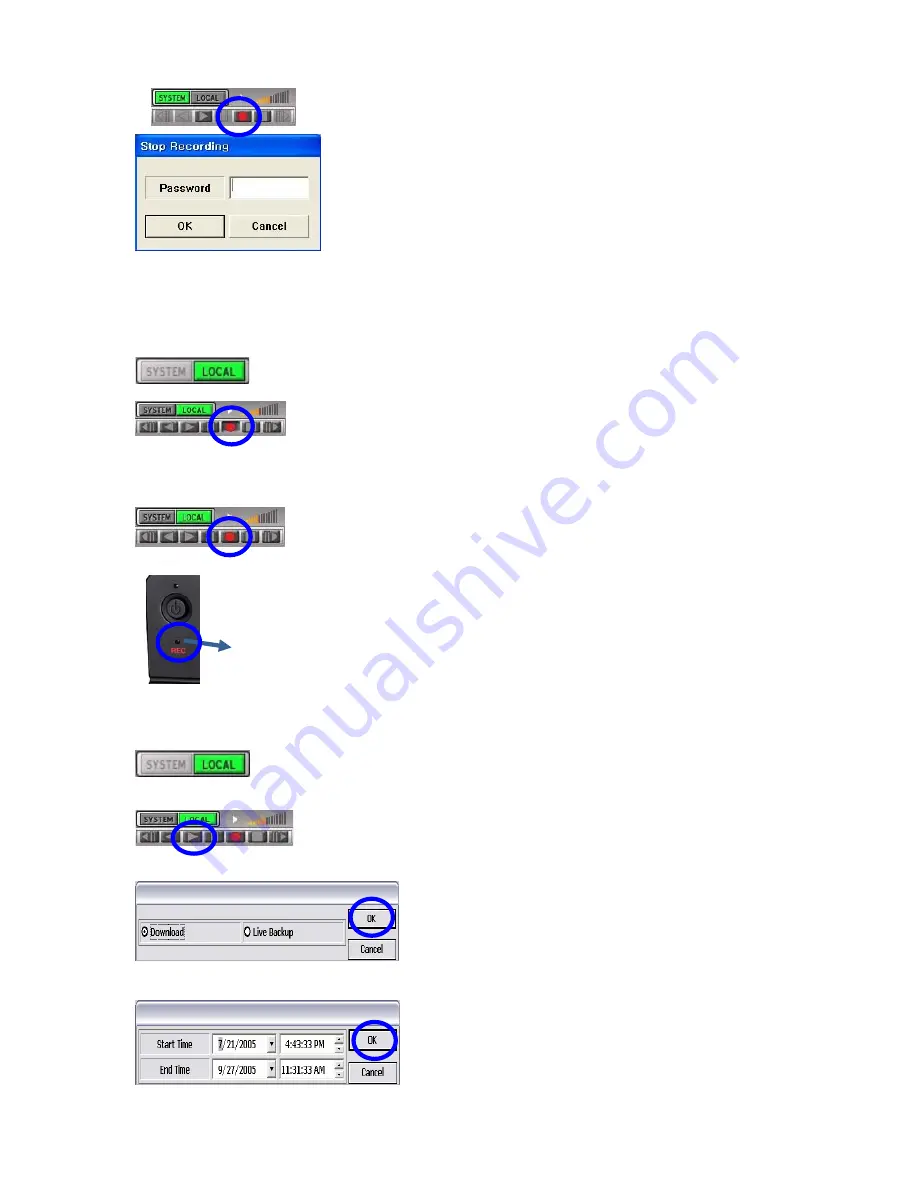
2) Local recording
•
To check if the DVR is recording you can also check the light on the front left side
below the power button. Light must be flashing or solid red.
•
Flashing red light – motion recording mode.
•
Solid Red - continues record mode.
Local playback
NOTE :
To turn
OFF
‘recording’, push the red recording button.
Shadow button will disappears and system will ask for a
password. To stop DVR from recording input Admin
password. And, check if the system is out of
recording mode.
To save the live video onto client PC Hard Drive:
1)
press the recording button when the
LOCAL
icon is on green.
2)
When button is shown as seen in blue circle is
shadowed, then, recording data is saving on the
client HDD.
* Both admin and user can do local recording.
When “Local” button is activated and Play (
▶
)
button is pushed.
You will be given two different ways of
downloading videos.
When “OK” button is pressed:
Set
start & end time
will be displayed. Please
check either ‘Download’ or ‘Live Backup’.
•
Download
- transmits recorded data from
DVR HDD to Client PC .
•
Live Backup
– saves the live image on the
client PC.
After clicking “OK” button, available list will be
displayed with the time specified.
Summary of Contents for PD-DVR4CD-500
Page 1: ......
Page 44: ...Select a number from the Start Time list Select the number among list for End Time...
Page 63: ...3 Select Disk Management 4 Click right mouse button and select New Partition...
Page 64: ...5 Follow New Partition Wizard procedure as below 6...
Page 65: ...7 Maximum is 30GB at FAT32 file format 8...
Page 66: ...9 10 At this stage New Partition has been made...
Page 68: ...Appendix 7 SPECIFICATION...
Page 69: ...Design and product specifications subject to change without notice...


