background image


10 


This stage should last for a minimum of 12 minutes though most people start at about 15-20 minutes. 


3

The Cool Down Phase 

This  stage is  to  let  your  Cardio-vascular  System  and  muscles  wind  down.  This  is  a  repeat  of  the  warm  up 

exercise e.g. reduce your tempo, continue for approximately 5 minutes. The stretching exercises should now 

be repeated, again remembering not to force or jerk your muscles into the stretch. 

As you get fitter you may need to train longer and harder. It is advisable to train at least three times a week, 

and if possible space your workouts evenly throughout the week. 


4

Fault Finder 

If you do not receive numbers appearing on your computer, please ensure all connections are correct. 


MUSCLE TONING 

To tone muscle while on your EXERCISE CYCLE, you will need to have the resistance set quite high. This will 

put more strain on your leg muscle and may mean you cannot train for as long as you would like. If you are 

also trying to improve your fitness you need to alter your training program. You should train as normal during 

the warm up and cool down phase, but towards the end of the exercise phase you should increase resistance 

making your legs work harder. You will have to reduce your speed to keep your heart rate in the target zone. 


WEIGHT    LOSS 

The important factor here is the amount of effort you put in. The harder and longer you work, the more calories 

you will burn. Effectively this is the same as if you were training to improve your fitness, the difference is the 

goal. 


USE 

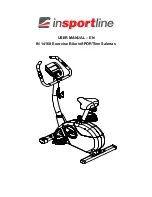
The seat height can adjust by  removing the adjustment knob and raising or lowering the seat. There are 7 

holes  in  the  seat  post  allowing  for  a  range  of  heights.  Once  the  correct  height  has  been  chosen,  refit  the 

adjustment knob and tighten. 

The  tension  control knob allows  you  to  alter  the  resistance  of  the  pedals.  A high  resistance  makes  it more 

difficult to pedal, a low resistance makes it easier. For the best results, please set the tension properly while 

the bike is in use. 


Summary of Contents for EXERCISE CYCLE

Page 1: ...PRO FITNESS EXERCISE CYCLE...

Page 2: ...machine according to this manual 8 This product is intended for use in clean dry conditions You should avoid storage in excessively cold or damp places 9 Wish you enjoy your exercise IMPORTANT 1 Pleas...

Page 3: ...ng session without warming up Contents Section Page Before you start 3 Safety Storage Weight Limit 4 Exploded diagram 5 Parts List For Exploded Diagram 6 Exercising information 9 Assembly step 11 Inst...

Page 4: ...er to assemble this product with the help of a friend as some of the components may be large heavy or awkward to handle alone Open the Carton Carefully open the carton that contains your product takin...

Page 5: ...uct is positioned on a solid flat surface If necessary use a rubber mat underneath to reduce the possibility of slipping in use Please make sure that all fastening pieces are firmly locked and all par...

Page 6: ...5...

Page 7: ...0 Handlebar stem 1 11 Tension control knob 1 12 Crank 2 13 Bolt M8 15mm 4 14 Washer 3 15 Adjustable Knob 1 16 Handle bar 1 17 Foam Grip 2 18 End cap 7 8 2 19 Computer 1 20 Seat 1 21 Seat post stem 1 2...

Page 8: ...7...

Page 9: ...8 REMARK some parts were pre assembled already...

Page 10: ...uld be held for approximately 30 seconds do not force or jerk your muscles into a stretch if it hurts STOP stretching exercises as following show SIDE BENDS FORWARD BENDS OUTER THIGH INNER THIGH CALF...

Page 11: ...in for as long as you would like If you are also trying to improve your fitness you need to alter your training program You should train as normal during the warm up and cool down phase but towards th...

Page 12: ...in Base Frame 3 using Bolt 4 Arc washer 9 Dome Nut 5 Screw the right pedal into the right Crank 12 using the supplied spanner turning in clockwise direction The left pedal must be attached to the left...

Page 13: ...12 3 Attach the seat post stem 21 to the saddle 20 using 3 sets of nut 22 and washer 14...

Page 14: ...d a flat washer 6 to make it tightly and then cover the handle bar bracket trim 28 as shown in the image 4 Slide the seat post stem 21 into the main Base frame 3 and select the desired height by screw...

Page 15: ...6 Set the Meter Mount Bracket 27 onto the Handlebar stem 10 Connect tension wire B with computer wire A and then slide the computer into the bracket 27 Exercise Computer SPECIFICATIONS TIME 00 00 99...

Page 16: ...blinking 4 FUNCTION SETTING TIME By pressing the SELECT key until the pointer advance to time Press the SELECT key once to lock on the TIME function the colon stop blinking SPEED Press the SELECT key...

Reviews: