WWW.PRO-DIG-USA.COM
6.
1.
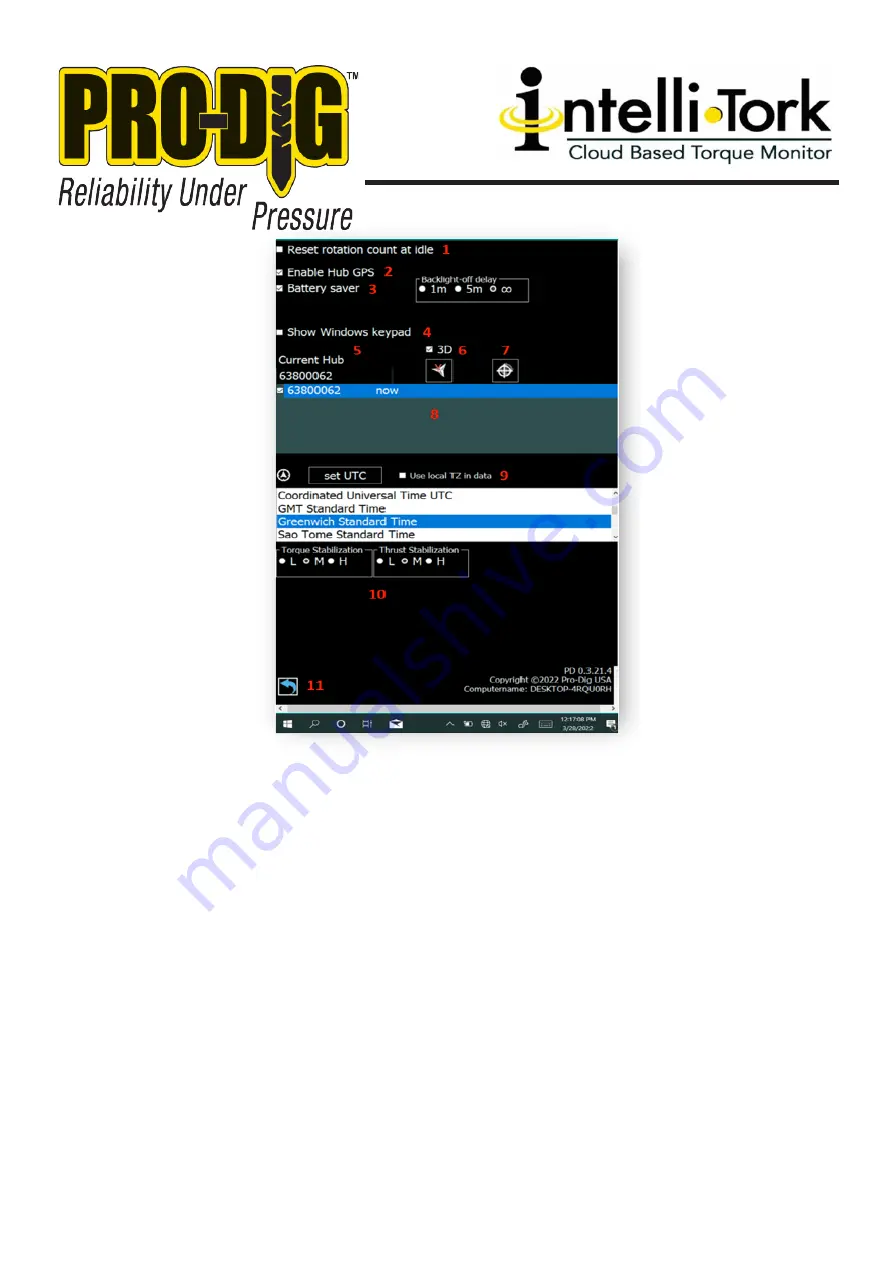
Check Box to reset rotation count when idle.
2.
Check Box to enable the GPS functionality of the Intelli-Tork.
3.
Check Box to help save the tablet battery. Select user prefered Backlight Off Delay.
4.
Check Box to display Windows key pad.
5.
Current hub or last hub that the user has connected to is displayed in the field. Select current
hub field and enter serial number of the Intelli-Tork that is stamped into the rounded edge of
the flange. Return to the main menu and press the connect icon.
6.
Check Box to set the vertical zero to 90 degrees. Press axis icon selecting X, Y, or Z to monitor
the installation angle relative to the choosen axis.
7.
Gyro calibration button. Tap once to begin a calibration for the RPM, rotations and angle
parameters. Ensure the unit is level and stationary prior to calibration. Wait 10 seconds for
the calibration to complete.
8.
Displays the serial number of Intelli-Torks that the tablet has recently been paired with.
9.
When the user selects the Set UTC icon the GPS obtains global positioning information rela-
tive to your location. Once the connection is established select Look up TZ to capture the
correct time stamp for the log files. A clear view of the sky is required for GPS lock. Check
the “Use local TZ in data” box to display the selected time zone in data logs.
10.
Torque and Thrust Stabilization can be independantly set to Low, Medium, or High. This will
effectively smooth out the displayed values as seen from the main menu.
11.
Return to Main Menu.


