


283
D
Standard And Heavy-Duty
Media Cutter Installation
Prepare The Printer
NOTE: Before you begin, please note that steps 1 through 3 below are
applicable for both the standard and heavy-duty media cutters. When
you get to step 4, you will directed to separate instructions specific to
the standard or heavy-duty cutter.
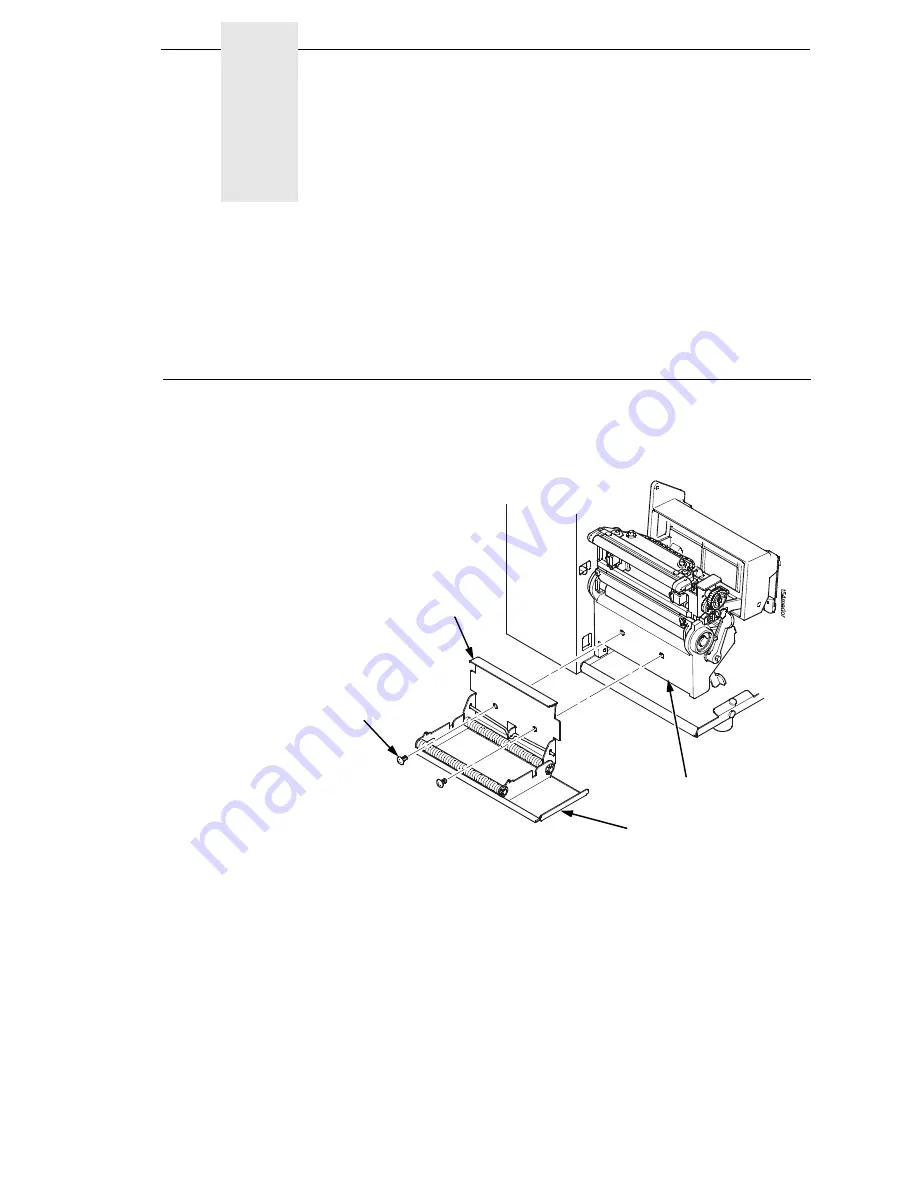
Figure 1. Peel/Tear Assembly
1.
Set the printer power switch to O (OFF).
2.
Open the peel/tear door by pulling it upward, then forward.
3.
Using the appropriate metric hex key, remove the two screws attaching
the peel/tear assembly to the lower support assembly.
NOTE: Keep the two screws you have removed; you will use them to attach
the cutter assembly to the lower support assembly.
4.
To install a standard cutter, go to “Installing The Standard Cutter” on
page 284. To install a heavy-duty cutter, go to “Installing The Heavy-
Duty Cutter” on page 286.
Screw (2)
Peel/Tear
Assembly
Lower Support Assembly
Peel/Tear Door
Summary of Contents for T5000 Series
Page 1: ...R User s Manual T5000 Thermal Printer ...
Page 2: ......
Page 10: ......
Page 16: ...Table of Contents ...
Page 76: ...76 Chapter 3 Overview Figure 3 Sample Configuration Printout ...
Page 77: ...77 Sample Configuration Printout cont ...
Page 268: ...268 Chapter 5 Solving Other Printer Problems ...
Page 288: ...288 Appendix D Removing The Media Cutter ...
Page 292: ...292 Appendix E Installing The Media Cutter Tray ...
Page 298: ...298 Appendix F ...
Page 311: ......


