background image

27

This page left intentionally blank.

Summary of Contents for PrintMaster 700 Series

Page 1: ...PrintMaster 700 Series Printer...

Page 2: ......

Page 3: ...s voltage Always disconnect the printer from the mains before opening the device to perform maintenance work or remedy errors Do not expose the printer to high temperatures direct sunlight or dust Kee...

Page 4: ...nfiguring your PM700 Tractor Assignment Tractor Switching applies to PM702 series only Unlike previous Printek models there is no automatic tractor selection or tractor switching in the PM700 series p...

Page 5: ...arting on page 23 In the case of the host based approach typically selected when multiple printer parameters need to be configured the PM700 has an on board web page which is accessed using an Etherne...

Page 6: ...gital Equipment Corporation Centronics is a trademark of Centronics Data Computer Corporation DOS is a trademark of Microsoft Corporation SAP is a trademark of SAP AG All references to Windows are tra...

Page 7: ...rol Panel Operation 17 4 1 This section left intentionally blank 17 4 2 Operation of the LCD Panel 23 4 2 1 The LC display 23 4 2 2 Online mode 24 4 2 3 Offline mode 24 4 2 4 Setup mode 25 4 2 5 Power...

Page 8: ...Notification 70 6 3 24 Logical Printers 72 6 3 25 String Replacement Example Plain Text 73 6 3 26 Logout of Ethernet 74 6 3 27 Restart Ethernet 74 6 3 28 Virtual Control Panel 75 7 Addendum 76 7 1 Ch...

Page 9: ...aning the Paper Rollers 114 10 2 Troubleshooting 115 10 2 1 Print Quality Problems and Solutions 115 10 2 2 Paper Handling Problems and Solutions 116 10 2 3 Operating Problems and Solutions 116 Symbol...

Page 10: ...1 1 Printer at a glance 1 1 Unpacking the printer Besides this manual the package will contain a power cord a ribbon cartridge a tractor and 6 pieces of U wire paper support 1 2 Remove transport locks...

Page 11: ...2 1 3 Prepare your printer n Front View n Rear View...

Page 12: ...3 n For Fanfold n For Cut Sheets...

Page 13: ...and reduce the noise 8 Head Gap Lever Adjusts the gap between the print head and various form thickness 9 Paper Path Lever Selects various paper sources 10 Upper Friction Guides the form when cut she...

Page 14: ...tances 2 Do not expose the printer to direct sunlight If you cannot avoid placing the printer near a window protect it from the sunlight with a curtain 3 When connecting a computer to the printer make...

Page 15: ...nd connect the parallel cable between the printer and the computer Lock the connector with the 2 clips on the printer interface connector tighten up the 2 screws on the other end connecting to the com...

Page 16: ...power cord to the printer power socket as shown in the diagram Connect the printer to the correct voltage power source The socket outlet shall be installed near the equipment and shall be easily acce...

Page 17: ...8 2 3 Installing the ribbon cartridge 1 Switch off the power 2 Unfold the top cover and follow the steps 1 2 3 4 in the below picture 3 Flip the upper friction assembly...

Page 18: ...mask 6 Turn the knob on the left hand side several times in order to tighten the fabric and the fabric will slide downwards into the correct position between printhead and ribbon mask after the moving...

Page 19: ...the left side of the printer inside the top cover Take care to adjust the print gap lever to a suitable position whenever you change the number of copies being printed Using the wrong print gap may c...

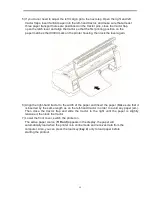
Page 20: ...see 3 1 4 It is recommended to align the left paper guide exactly to the mark I This marks the left edge of the stationery Slide the right guide to the position of the right edge of the stationery 5 I...

Page 21: ...one of the desired tractor positions 2 Move the paper path lever to the desired position 3 Adjust the head gap lever if necessary 4 Open the front cover by tilting the cover from bottom to the top and...

Page 22: ...k the lever again 6 Align the right hand tractor to the width of the paper and insert the paper Make sure that it is inserted by the same length as on the left hand tractor in order to avoid any paper...

Page 23: ...14 3 2 2 2 Rear tractors for fanfold...

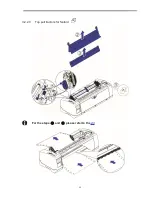
Page 24: ...15 3 2 2 3 Top pull tractors for fanfold For the steps and please refer to the 2 3...

Page 25: ...so you can see the transparent ribbon guide in front of the print head 4 Install the paper into the pull tractor 5 Move the paper with the hand wheel so the perforation of the fanfold paper lies exact...

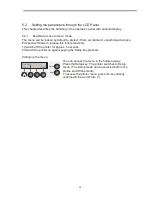
Page 26: ...esignated on the Panel label Some other special settings need pressing multiple switches simultaneously or holding some keys when powering on the printer This Chapter will describe the functions of th...

Page 27: ...18 This page left intentionally blank...

Page 28: ...19 This page left intentionally blank...

Page 29: ...20 This page left intentionally blank...

Page 30: ...21 This page left intentionally blank...

Page 31: ...22 This page left intentionally blank...

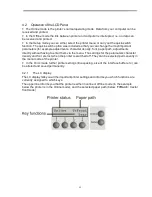
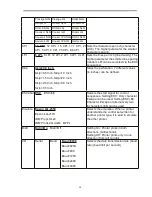
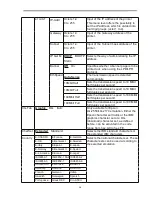
Page 32: ...djustments directly without having to enter them via the menu The settings for the parameters character density and font are lost when the printer is switched off They can be selected permanently in t...

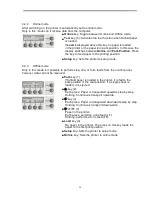
Page 33: ...nly in this mode is it possible to perform step line or form feeds from the control panel however data cannot be received Park key 1 If fanfold paper is loaded in the printer it is fed to the park pos...

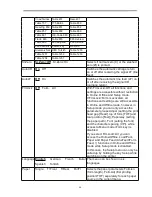
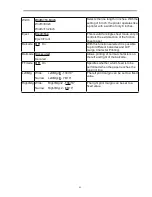
Page 34: ...up key pressed 4 2 5 Power on functions If you keep one of the following keys pressed during power on until the printer has completed initialization the corresponding function is activated If you keep...

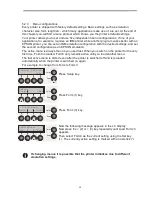
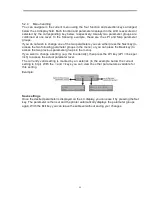
Page 35: ...ade by escape sequences have priority over settings made in menu mode therefore they will override these Programming via the interface gives you far greater freedom for designing your printed pages ho...

Page 36: ...27 This page left intentionally blank...

Page 37: ...28 This page left intentionally blank...

Page 38: ...oceed as follows to release this lock temporarily 1 Switch off the printer for approx 5 seconds 2 Switch the printer on again keeping the Setup key pressed Calling up the menu You can access the menu...

Page 39: ...used last When you switch on the printer for the very first time Form0 is loaded Form0 only remains active until you load another menu The last active menu is stored even after the printer is switched...

Page 40: ...31 Menu Printout...

Page 41: ...r groups in the menu or you can press the Back key to access the two previous parameter groups in the menu If you want to change a setting e g the line density then press the LPI key LPI lines per inc...

Page 42: ...ting in the menu Press the next key 4 several times until the display indicates Language Press the Language key 3 The display now changes to Parameter mode and indicates English in the top line The lo...

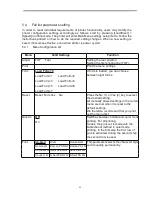
Page 43: ...ace 2 Only if ENQ STX ETX ACK or ACK NAK protocol is selected FORM Back Next Print Form Reset Font CPI LPI Skip ESCChar Emulate Bidir I O Serial1 Interf Buffer ETH INT Baud1 Format1 Special1 2 Protoco...

Page 44: ...oad Form 2 Load Form 3 Load Form 4 Load Form 5 Load Form 6 Load Form 7 A form is loaded you can choose between eight forms Reset Reset Form Yes No Press the No 1 or Yes 2 key to select the desired set...

Page 45: ...nch Skip 2 0 Inch Skip 2 5 Inch Skip 3 0 Inch Skip 3 5 Inch Skips the perforation 7 different values in inches can be defined ESCChar ESC ESC Selects the start signal for control sequences Setting ESC...

Page 46: ...o select the type of protocol i e a certain set of rules and procedures for ensuring error free data exchanges between computer and printer DTR DTR DTR DTR Ready Defines the conductor to which the DTR...

Page 47: ...alf Sets the transmission speed to 100 MBit half duplex per second 100Mbit Full Sets the transmission speed to 100 MBit full duplex per second CG Tab Graphic DLL Italic Only available for Epson LQ 255...

Page 48: ...ne Offline and Setup mode If FrmLock Form is activated all functions and settings are still accessible in Online and Offline mode however in Setup mode you can only access the parameter groups Adjust...

Page 49: ...alue is selected by the Line function or ESC sequences which does not correspond to a standard format FormAdj FormAdj 0 220 72 Default 12 72 Sets the first print position of a form in n 72 inch separa...

Page 50: ...With this function selected it is possible to print different barcodes and LCP Large Character Printing Barmode Unsecured Secured Allows printing of normal characters on the left and right of the bar...

Page 51: ...equirements 11 inches are usual in the USA as opposed to 12 inches in Europe Paphand Physlm Physlm 0 30 10 Permanent physical setting of the left margin This parameter cannot be changed by emulation d...

Page 52: ...ng paper If Off the carriage s position is 4 If On Half of Value defined in Pagewid This function is OFF by default and is valid for all paper ways CX bid CX bid ON CX bid OFF CX bid ON sets the paral...

Page 53: ...Panel The Serial Number cannot be set via menu instead you need to use the WebPanel AssetN 10 digits empty With the AssetN function you have the possibility to change the 10 digit asset number of the...

Page 54: ...ou to do something a message will appear in the LC display LED s display message reference below table 5 6 1 It also displays the status during an operation e g Initializing Below you will find a list...

Page 55: ...Loading default Factory defined parameters will be reloaded in all available menus after switching on the printer Load paper from The printer has detected paper end during operation printer was switc...

Page 56: ...ng The printer requires Ethernet 10Base TX or 100Base TX interface Category 5e or 6 Ethernet cable with RJ 45 socket connectors 6 1 4 Connecting the Printer Connect the Ethernet cable to the network i...

Page 57: ...printer network interface Upon receipt of the IP address the printer accepts and uses this new IP address and subnet mask and default gateway if any 2 Once an IP address has been assigned the printer...

Page 58: ...r the default Gateway and Subnet mask in the same way Gateway is available from the screen you are returned to Press Next to select Subnet Enter the IP address get method under the selection IP Get M...

Page 59: ...he printer through a web browser i e Internet Explorer Firefox etc The browser needs to be configured with cache and history empty and the browser set up to check for new pages every time to insure th...

Page 60: ...The current status of your printer is displayed on the right hand side of the screen This is refreshed every 20 seconds whenever you refresh the page or click Printer Status The left side allows you t...

Page 61: ...thus the operation instruction not be started again 6 3 4 Printer Status Selecting this option refreshes the status display Displayed on this page are Processing state Loaded menu Error state Firmware...

Page 62: ...er Configuration Selecting this option allows you to configure specific parameters in the printer When one of these menu options is selected a new page will load showing the options which can be viewe...

Page 63: ...ferent font Select Font A new page appears Select the Font dropdown menu and choose the new font Select Send 1 Changes are not applied until Send is selected 2 To reset the changed value to the prior...

Page 64: ...field Select Send 1 Changes are not applied until Send is selected 2 If the entered value is out of range of the acceptable parameters the previous value will be re instated 3 To reset the changed val...

Page 65: ...56 6 3 6 Printer Actions Selecting the Printer Actions link will produce a page with a list of actions that can be performed on the printer...

Page 66: ...Loads the settings stored in a form into the printer as the current settings When the Load Configuration link is selected the following page will be displayed Select a form and confirm your selection...

Page 67: ...be displayed Select a form Select send 6 3 9 Retrieve Configuration From Printer Selecting this option will save all the printer settings of all menus in a file Uploading this file to other printers...

Page 68: ...Configuration File of another printer see Retrieve Configuration From Printer The complete configuration of this source printer will be transferred to your printer To upload the configuration file fir...

Page 69: ...me delay while the file is transmitted so it is important not to resend or click on the Send button until the process is complete If the process is successful the printer will reboot and the following...

Page 70: ...booting Since the printer will reboot with successful completion of this action the user will have to reconnect to the printer through the browser 6 3 13 Panel Lock On Off This link toggles the panel...

Page 71: ...d Using the Browse button find the firmware file to download Once the file is selected click on the Send button It is important to note the warning on this page There will be some delay while the file...

Page 72: ...is successful the printer will reboot and the following page will be displayed Since the printer will reboot with successful completion of this action the user will have to reconnect to the printer th...

Page 73: ...ecting this link will replace the information in the Printer Status area with networking information on the printer The Name Contact and Location information is set up from the General link within the...

Page 74: ...n page allows the user to set up and modify network connectivity information as well as setting up the password email notification and logical printers From this page it is also possible to Logout and...

Page 75: ...The General page sets up the timers and the labels for name contact and location of the printer The Print Server Name is by default and can be changed accordingly This name used for entering into Nam...

Page 76: ...tion for the printer After changing the particular parameters it is necessary to restart Ethernet from the Advanced Configuration page If the IP Address is changed and the Send button selected you wil...

Page 77: ...68 6 3 19 SNMP The SNMP page allows the user to set the Community Name and the Access The page looks like this...

Page 78: ...any other password is set the first time a user accesses a password protected page a window will open asking for verification with user and password information Once the password has been successfull...

Page 79: ...ne or more users The Reply address can be left as is unless there is reason to have to mail to the Reply address To activate the mail notification u Select which notifications are to be sent out u Cli...

Page 80: ...nt out The page looks like this In this example the Online message is set to Printer is Online and information on Description Location and Printer Name will be added to the email In this example the e...

Page 81: ...ned in each of the logical printers For entering binary data in these strings the backslash character is used followed by 2 hexadecimal digits Examples of this are 1b for an escape character 0a for li...

Page 82: ...he Enable checkbox will not send the pre or post strings The LPD Queue Name is the name of the print queue that comes from the host The Description can be changed by the user and does not have to matc...

Page 83: ...tart Ethernet Selecting this link will reboot the printer and disconnect the current printer connection It is used to reset certain TCP IP variables that were set in the General and TCP IP pages Once...

Page 84: ...window will show the current error state and display the contents of the printer s LCD display Selecting the buttons on the display will behave the same as if selecting the buttons on the printer itse...

Page 85: ...76 7 Addendum 7 1 Character Set standard character set 1 standard character set 2...

Page 86: ...77 IBM character set 1 IBM character set 2...

Page 87: ...78 OCR A character set 1 OCR A character set 2...

Page 88: ...79 OCR B character set 1 OCR B character set 2...

Page 89: ...GERMANY ESC R CHR 2 UK ESC R CHR 3 DENMARK 1 ESC R CHR 4 SWEDEN ESC R CHR 5 ITALY ESC R CHR 6 SPAIN 1 ESC R CHR 7 JAPAN ESC R CHR 8 NORWAY ESC R CHR 9 DENMARK 2 ESC R CHR 10 SPAIN 2 ESC R CHR 11 LATIN...

Page 90: ...Condensed printing OFF set by Sl or ESC Sl DC3 Deselecting the printer DC4 Double wide printing OFF set by SO or ESC SO DEL Delete line Epson Delete last character ESC Start character for programming...

Page 91: ...aracter set US ASCII ESC B n1 n8 Barcode Setup and print ESC C Defining the page length ESC MI F Assign character set G0 ESC G Selecting graphics mode ESC H Character set Swedish Finnish ESC K Charact...

Page 92: ...t character for programming sequence ESC y Right justification and centering OFF ESC z Bold ON ESC z Bold OFF ESC 1 MTPL command set ESC 10 Barcode interpretation OFF ESC 11 Start barcode interpretati...

Page 93: ...X LQ print quality ESC 0w Set 5 cpi ESC 0y Selecting Draft printing quality ESC 0z Superscript ON ESC 10m Font 0 Default Draft ESC 10y Right and center adjustment OFF ESC 10z Microscript ON ESC 11e S...

Page 94: ...ront ESC 22 ASF 2 Select feeder rear ESC 21m Double underlining ESC 23m Italics OFF ESC 24m Underline OFF ESC 26m Proportional font ON ESC 2g Clear all horizontal tabs in the current line ESC 2J Print...

Page 95: ...erlining ON ESC 55m Overlining OFF ESC 5n Request status report ESC 5w Set 12 cpi ESC 5y NLQ with 12 cpi ESC 5z Graphics normal ESC 6 Initialize the printer ESC 6 SP K Set horizontal pitch to 6 cpi ES...

Page 96: ...SP 0 Change character size ESC n1 n2 SP D Select font ESC n1 n2 SP G Set character line spacing ESC n1 n2 r Set top and bottom margin ESC n1 n2 s Set left and right margin ESC n a Set relative horizo...

Page 97: ...SC 6 Print ASCII codes dec 129 to dec 159 ESC 6 PC character set 2 expanded ESC 7 Suppress ASCII codes 129 to 159 ESC 7 PC character set 1 standard ESC a n Select orientation ESC A n Line spacing n 60...

Page 98: ...C X n m Set left and right margin ESC Y n1 n2 Set graphics print to 120 dpi ESC Z n1 n2 Set graphics print to 240 dpi ESC F Assign character set G3 ESC Character generator LS3R ESC Character generator...

Page 99: ...US DEVICE ON PJL USTATUS DEVICE OFF PJL USTATUS DEVICE VERBOSE PJL USTATUS JOB ON PJL USTATUS JOB OFF PJL USTATUS PAGE ON USTATUS unsolicited status commands PJL JOB NAME PJL JOB FILE PJL JOB START PJ...

Page 100: ...g type ratio etc If no header is defined the informaton in the bracket will be printed in Code 2 5 Matrix Please note that within the Barcode environment the barcode commands have priority in case of...

Page 101: ...numeric characters from 0 hex 30 to 9 hex 39 and alphanumeric values from A hex 41 to Z hex 5A are interpreted as barcode figures Lower cases from a hex 61 to z hex 7a are automatically converted to...

Page 102: ...60 7B 7C 7D 7E US ASCII 01 GERMAN 02 The character sets are selected via the following LCP sequence ESC P L S n ESC The value of n may range between 01 and 02 as ASCII characters see ID column in the...

Page 103: ...ode On Unsecured mode Secured mode LCP character set Sends a character as ASCII character n 0 255 decimal Barcode bracket Start code LCP Header Termination code Header LCP bracket Start code Barcode H...

Page 104: ...ree alternately When only one interface is used it is monitored by the printer If the printer is configured to use three interfaces simultaneously it monitors all interfaces for incoming data As soon...

Page 105: ...er is full the data input is blocked until the data buffer is empty Connector assignment Connector no Direction Printer PC Signal 1 2 3 4 5 6 7 8 9 10 11 12 13 14 15 16 17 18 19 30 31 32 33 34 35 36 S...

Page 106: ...DHCP BOOTP Static manually via the printer s control panel Configuration HTTP TCP IP Status SNMP TCP IP SMTP PING Management Web Panel HP Web Jet Admin E Mail notification with SMTP Pre string Post St...

Page 107: ...1 xxx The subnet mask to be used is 255 255 255 0 The address of the router or gateway is 0 0 0 0 if not available Example of several devices in an Ethernet 7 3 3 USB 2 0 I O Full Speed The USB inter...

Page 108: ...g Type RS232C interface Synchronization Asynchronous Transmission rate 600 Baud to 19200 Baud Signal status OFF log 1 3 V to 15 V ON log 0 3 V to 15 V Connection cable up to 15 m length Interface conn...

Page 109: ...100 1 The serial cable length must not exceed 15 meters 2 Make sure the Interface Setup selects serial interface and the settings are the same as PC communication port settings See example below...

Page 110: ...RDY SG 5 5 SG DSR 6 DTR 4 PC AT 25 Pin Printer 9 Pin FG 1 FG TxD 2 2 RxD RxD 3 3 TxD CTS 5 4 DTR RDY SG 7 5 SG DSR 6 DTR 20 It depends on the menu setting whether DTR or RDY Ready is active at Pin 4 I...

Page 111: ...FIFO buffer is empty again the interface signals READY level 0 12 V and XON hex 11 dec 17 Data transmission can be continued In addition the READY signal is influenced by the status of the printer On...

Page 112: ...ON HandThr OFF Acknowledgement informing the host that further data may be transmitted This protocol is used in addition to data flow control and printer status handling Block end character An ETX is...

Page 113: ...llowing options can be ordered for your printer 8 1 Options Tractor Unit Serial Interface Name Part no Serial Interface RS232C 9pin female 99994 Name Part no Second Tractor for push and pull position...

Page 114: ...Kit monochrome black fabric for narrow model on demand 99002 Refill Kit monochrome black fabric for wide model on demand 99072 8 3 Accessories Programming manuals The following programming manuals ar...

Page 115: ...Double width italics right justification shadowed auto centered double height bold proportionally spaced underlined overlined superscript subscript Scalable with special LQ 2170 fonts Character Size...

Page 116: ...IBM format Barcodes resident Selectable via programming Code 2 5 Industrial Code 2 5 Interleaved Code 39 Code EAN 8 with HRI human readable index Code EAN 8 without HRI Code EAN 13 with HRI Code EAN 1...

Page 117: ...nal IEEE 1284 nibble mode USB 2 0 Full Speed 12 MHz B type connector For details enter the Interface Specifications 7 3 above Input Data Buffer Up to 256KB Operation Panel 6 keys and LCD with 2 lines...

Page 118: ...109 Fuse T6 3AH 250V MTTR 15 minutes Continuous operation Throughput 422 p h in Draft mode according IEC 10561 1999 ECMA 132 MTBF 20 000 hours Certifications CE UL FCC ICES Energy Star...

Page 119: ...110 9 2 Non Scalable Fonts Code Pages and National Character Sets...

Page 120: ...111...

Page 121: ...4 38 1 4 D Max right tractor position to first printable character 38 1 4 38 1 4 E top margin 1 0 0 72 77 6 220 72 0 0 72 77 6 220 72 E1 top margin default setting 1 4 23 12 72 4 23 12 72 F form lengt...

Page 122: ...p margin 1 0 0 72 77 6 220 72 0 0 72 0 77 6 220 72 E top margin default setting 1 4 23 12 72 4 23 12 72 F form length 148 5 8 420 16 5 148 5 8 420 16 5 G bottom margin 0 0 0 0 H left margin default se...

Page 123: ...re that the power is off and then disconnect the printer power cord 2 Using a soft vacuum brush vacuum the exterior of the printer Also vacuum the cut sheet edge 3 Use a soft damp cloth to wipe the ex...

Page 124: ...essary The print head may need to be replaced Printing is erratic or the wrong characters are printed Many or unexpected characters are printed Make sure that the interface cable is securely connected...

Page 125: ...your paper and that the perforated holes of the paper fit directly over the tractor pins 10 2 3 Operating Problems and Solutions Problem Solution The power does not turn on Check whether the mains vol...

Page 126: ...2016 Printek LLC A Company 1517 Townline Road Benton Harbor MI Phone 800 368 4636 Fax 269 925 8539 www printek com...

Reviews: