>
Setting up the speakers
16
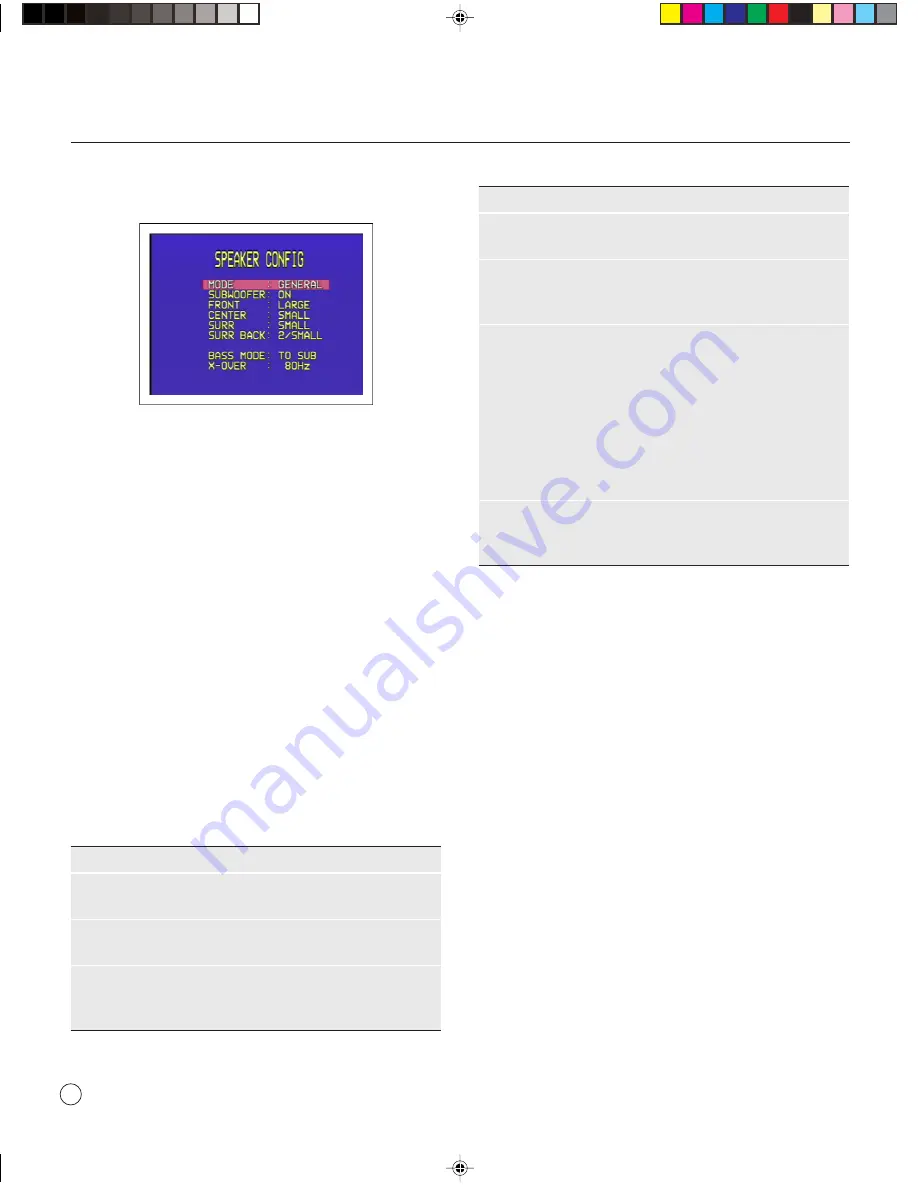
The
SPEAKER CONFIG
menu will be displayed:
To define the GENERAL layout
First define the
GENERAL
layout; the other layouts will all
be based on this.
•
With
MODE
highlighted use the
VOLUME
control on
the front panel or the
<
and
>
buttons on the remote
control to select
GENERAL
.
•
Use the
INPUT SELECTOR
on the front panel or the
A
and
V
buttons on the remote control to highlight each
menu option in turn.
•
Use the
VOLUME
control on the front panel or the
<
and
>
buttons on the remote control to select the
appropriate value for each option.
If you select
SMALL
for a channel, frequencies below the
X-OVER
setting are sent to the speaker(s) specified by the
BASS MODE
option.
The options are explained in the following table:
Option
Description
SUBWOOFER
Select
OFF
or
ON
to specify whether the layout
should include a subwoofer.
FRONT
Select
SMALL
or
LARGE
to specify whether the
front speakers can handle bass.
CENTER
Select
NONE
,
SMALL
, or
LARGE
to specify
whether there is a center speaker in the system,
and whether it is small or large.
Option
Description
(continued)
SURR
Select
NONE
,
SMALL
, or
LARGE
to specify
information about the surround speakers.
SURR BACK
Select
NONE
,
1/SMALL
,
1/LARGE
,
2/SMALL
,
or
2/LARGE
to specify the number and size of
the surround back speakers.
BASS MODE
Specifies how to handle the bass from channels
defined as
SMALL
.
TO SUB
sends it to the
subwoofer, along with the LFE channel.
TO
LARGE
divides it between the channels defined
as
LARGE
.
TO BOTH
sends it to both the
subwoofer and the channels defined as
LARGE
.
EXTRA
sends all bass information below the
X-
OVER
setting to the subwoofer, along with the
LFE channel.
X-OVER
Allows you to define the crossover frequency (40
— 200Hz) used for speakers defined as
SMALL
,
and by the
BASS MODE EXTRA
setting.
•
Press the
MENU
button on the front panel or remote
control to return to the
SETUP MENU
.
To define other layouts
You can now optionally define layouts
DD
,
DTS
, and
OTHER
which modify the
GENERAL
layout when the
source is Dolby Digital, DTS, or two-channel. For example,
you can add a subwoofer to the
DD
layout for use with
movie soundtracks.
SETTING THE SPEAKER DELAYS
The next step in setting up the loudspeakers is to set the
speaker delays to ensure that the sound image is correctly
focused.
Delaying the sound from a speaker by 1 millisecond is
equivalent to moving the speaker one foot (0.3m) further
away from the listener.
Because the center speaker is usually physically closer to the
listener than the main left and right speakers you should add
a delay to the center speaker to ensure that the sound from
§5 Setting up
26/7/02, 12:51 pm
16
Summary of Contents for SP31.7
Page 1: ...SP31 7 Multi Channel Processor User Guide 0 Preface 26 7 02 12 50 pm 1...
Page 4: ...Preface iv Saving the configuration Introduction 25 Index 0 Preface 26 7 02 12 51 pm 4...
Page 10: ...Using the SP31 7 Multi Channel Processor 6 2 Using 26 7 02 12 51 pm 6...
Page 14: ...Advanced use 10 3 Advanced 26 7 02 12 51 pm 10...
Page 18: ...Connecting the SP31 7 14 4 Connecting 26 7 02 12 51 pm 14...
Page 28: ...Configuring the display 24 7 Configuring 26 7 02 12 52 pm 24...


