Jet12/RevC/Feb03
www.pridemobility.com
33
6. Slide the wheel back onto the axle, reinstall the washer,
and tighten the nut.
7. Install the hubcap.
BATTERY REPLACEMENT
Note: If you installed the P clip, then you must disconnect
and remove the controller before replacing the rear battery.
To replace the battery:
1. Disconnect the battery box from the frame.
2. Remove the battery box.
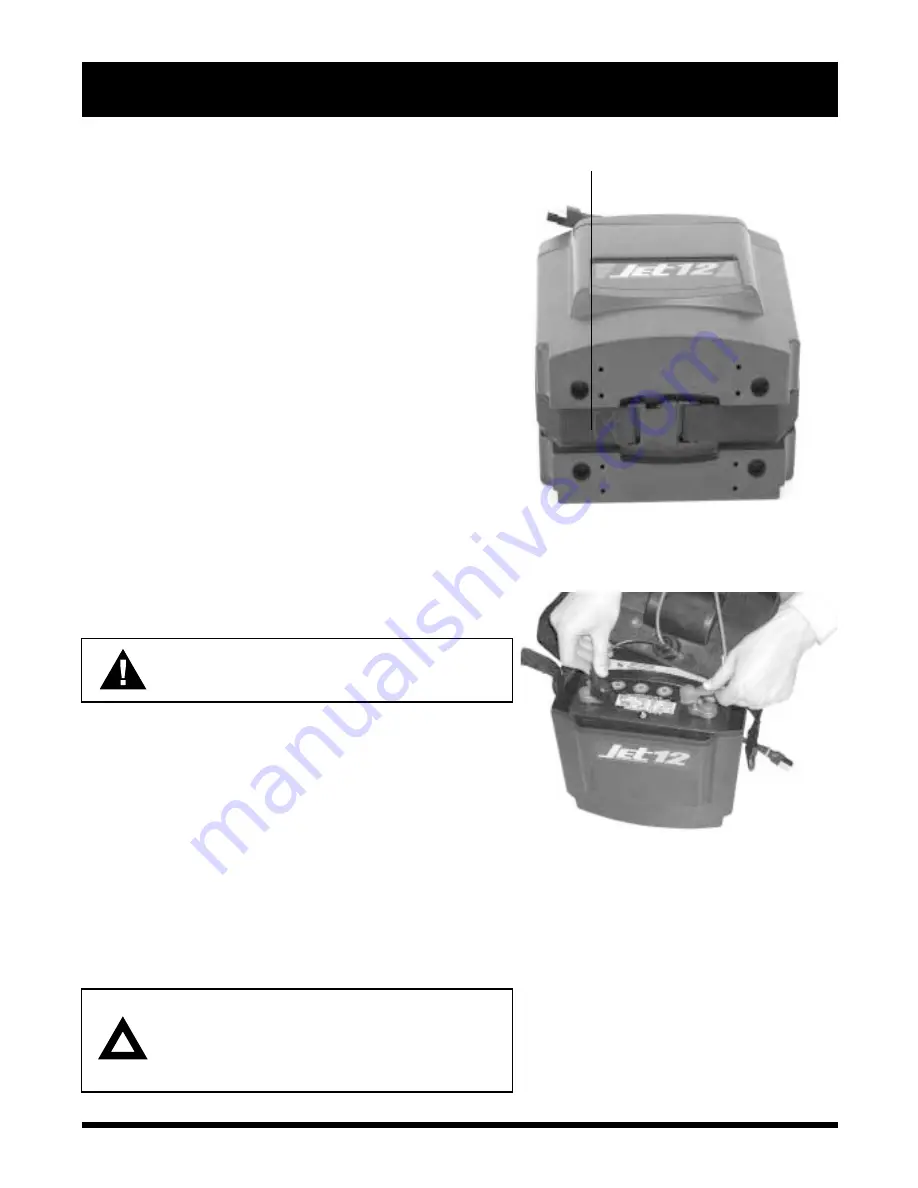
3. Place the battery case on its back. See figure 35.
4. Disconnect the battery box strap.
5. Place the battery box upright.
6. Open the top of the box.
7. Remove the boots from the battery terminals.
8. Disconnect the battery cables from the battery.
9. Remove the old battery.
10. Insert the new battery.
11. Connect the red connector to the positive (+) terminal
on the battery. See figure 36.
12. Connect the black connector to the negative (-) terminal
on the battery.
WARNING! Make sure you tighten the fas-
teners so that the connections are secure.
13. Place the top back onto the battery box.
14. Place the battery box on its back.
15. Connect the battery box strap.
16. Tuck the loose strap end under the strap.
MOTOR BRUSHES
The electric motors that power your Jet 12 use carbon
brushes. These brushes are susceptible to wear over a long
period of time. If worn, the motors run poorly or not at all.
We recommend that your authorized Pride provider inspect
the brushes every six months, or sooner if your Jet 12 runs
poorly.
CAUTION! If inspection determines exces-
sive wear on the brushes, they must be
replaced or motor damage will result. Fail-
ure to maintain the brushes could void the
Jet 12s warranty.
X . C A R E A N D M A I N T E N A N C E
Figure 35. Bottom of Battery Box
TUCK EXCESS UNDER STRAP.
Figure 36. Battery Boot Removal


