background image

Go-Go Elite Traveller Plus Technical Troubleshooting Guide

www.pridemobility.com

2

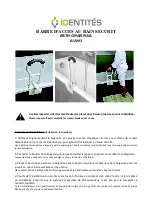
S A F E T Y   G U I D E L I N E S

WARNING! Indicates a potentially hazardous condition/situation. Failure to follow designated

procedures can cause either personal injury, component damage, or malfunction. On the

product, this icon is represented as a black symbol on a yellow triangle with a black border.

MANDATORY! These actions should be performed as specified. Failure to perform mandatory

actions can cause personal injury and/or equipment damage. On the product, this icon is

represented as a white symbol on a blue dot with a white border.

PROHIBITED! These actions are prohibited. These actions should not be performed at any

time or in any circumstances. Performing a prohibited action can cause personal injury and/

or equipment damage. On the product, this icon is represented as a black symbol with a red

circle and red slash.

The symbols below are used throughout this owner's manual and on the scooter to identify warnings and important
 information. It is very important for you to read them and understand them completely.

Summary of Contents for Go-Go Elite traveller

Page 1: ......

Page 2: ...ed Failure to perform mandatory actions can cause personal injury and or equipment damage On the product this icon is represented as a white symbol on a blue dot with a white border PROHIBITED These a...

Page 3: ...EY SWITCH NO SIGNS OF POWER 6 SECTION 2 KEY INSERTED INTO THE KEY SWITCH POWER ON BUT SCOOTER DOES NOT MOVE 10 SECTION 3 BEEP CODE DIAGNOSIS 11 BEEP CODE 3 Battery Voltage is too High 11 BEEP CODE 5 B...

Page 4: ...ealwitheachcodeforthatmodel Thetroubleshootingguideutilizesdiagramsthatarelocatedinthefrontandbackoftheguide Thesediagramsidentify main components by number 1 2 3 etc and all connectors by number with...

Page 5: ...oubleshooting Key 3 2 1 1 5 6 7 8 9 10 4 12 11 1 2 3 4 5 6 7 8 9 10 11 12 BATTERY HARNESSES SPEED POT THROTTLE POT MOTOR INTERFACE HARNESS BRAKE HARNESS MOTOR TRANSAXLE ASSEMBLY CONTROLLER POWER INTER...

Page 6: ...he system 4 Open the battery box See figure 2 _ WARNING Battery posts terminals and related accessories contain lead and lead compounds Wear goggles and gloves when handling batteries and wash hands a...

Page 7: ...ttery box circuit breaker harness DWR9983H010 If your multimeter does not indicate less than 1 ohm for both measurements then replace both battery box circuit breaker harnesses 10 Remove fuse 5c See d...

Page 8: ...18 Reinstall the battery box making sure connector 1h and connector 6a make contact See diagram 2 19 Unplug connector 5a from connector 4a See diagram 2 20 Measure voltage across pin 1 and pin 6 on c...

Page 9: ...next step If your multimeter indicates greater than 18VDC then replace the front to rear interface harness 5 and retest the system 24 Unplug connectors 6b and 6c from connector 7e See dia gram 2 25 M...

Page 10: ...o the powered on position measure resistance across pin 2 and pin 3 on connector 3a See figure 13 If your multimeter indicates less than 1 ohm then go to the next step If your multimeter indicates an...

Page 11: ...tage to drop Do not allow the battery voltage to fall into the red area on the battery condition meter 2 Make sure the client is only using the off board charger supplied with the Go Go Elite Travelle...

Page 12: ...l lever to the neutral center position Reinsert the key into the key switch and power up the scooter 2 Refer to BEEP CODE 7 Throttle Trip to determine if the throttle pot is faulty BEEP CODE 7 Throttl...

Page 13: ...way to the tortoise position 11 Measure resistance across pin 1 and pin 2 on connector 12a See figure 22 If your multimeter indicates about 25k ohms then go to the next step If your multimeter indicat...

Page 14: ...functioning properly Controller is not functioning properly Solution Use the following procedure to determine the source of the fault 1 Separate the front and rear halves of the scooter Refer to the...

Page 15: ...s then replace the S Drive controller 7 and retest the system Figure 29 Motor Brake Transaxle Removal 8c 8d 8e 2 If the brake or drive system is dragging the scooter may drive for a period of time bef...

Page 16: ...e pot or throttle control lever is not in the neutral position when turning the key switch on or that the throttle pot may be faulty Refer to BEEP CODE 6 Throttle Trip BEEP CODE 7 Throttle Trip Drive...

Page 17: ...9975H001 DWR9984H003 DWR9983H006 HORN BUTTON THROTTLE POT KEY SWITCH SPEED POT VOLT METER 3A FUSE HORN DRVASMB1859 TRANSAXLE MOTOR BRAKE BATASMB1045 BATTERY BOX DWR9983H009 DWR9983H011 DWR9983H010 CIR...

Page 18: ...c 7d 7e 7 1 2 3 4 5 6 7 8 9 10 11 12 BATTERY HARNESSES SHOWN ON DIAGRAM 2 SPEED POT THROTTLE POT MOTOR INTERFACE HARNESS BRAKE HARNESS MOTOR TRANSAXLE ASSEMBLY CONTROLLER POWER INTERFACE HARNESS FRONT...

Page 19: ...Free Service Hotline 877 800 1248 DealersOnly Press 7 for Technical Service then Press 1 for Help Desk or Press 2 for Quantum Rehab Tech or Press 3 for Power Chair Tech or Press 4 for Scooter Tech or...

Reviews: