27
3
Networking the RM-series Mixer
3.8
How to Update StudioLive RM Mixer Firmware
StudioLive™ RM-Series Mixers
Owner’s Manual
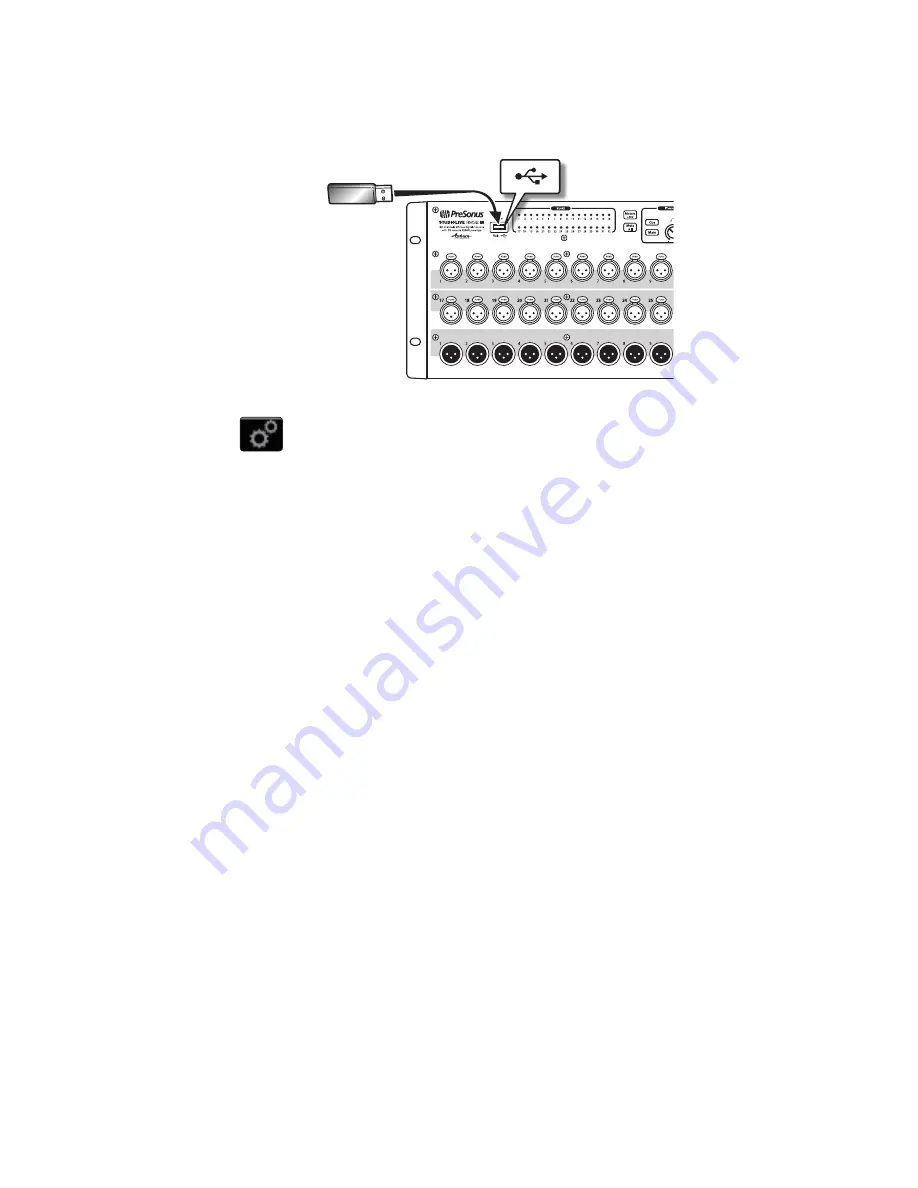
8. Remove your Wi-Fi LAN adapter (if inserted) and insert the
thumb drive into the USB slot on the front of your StudioLive
RM-series mixer. (Power on the mixer if it is not already on.)
9. Open UC Surface and connect to your StudioLive RM mixer. Click the Settings icon
at the top right of the UC Surface window (see the gears icon). Under the
Device Settings tab, click “Check Firmware Update.” The update process will take
about a minute to complete. When finished you will be prompted to power-cycle
the mixer.
Note (very important):
Once you have power-cycled the mixer after the initial
firmware update step, the mixer may need to finish some final components of
the firmware update. If this is the case, you will see the Channel LEDs on the front
of the mixer illuminate amber from left to right as the process is completed. This
process can take up to 10 minutes, so please be patient. Once the final portion of
the update is complete, all the Channel LEDs will illuminate green. When you see
this, power-cycle the mixer. This process may occur several times, depending on
what firmware version you are upgrading from and to. If your mixer does not do
this, do not be alarmed, as it may not be necessary for that particular update.
10. Restart UC Surface, revisit the Device Settings tab in the Global
Settings, and observe the firmware version reported. The last
four digits of the firmware version reported there should match
the version of the files you downloaded for your mixer.
Summary of Contents for StudioLive RM series
Page 4: ......


