Pregis AirSpeed SMART V3 Technical Manual Download Page 11


through  the  parameters  using  the  arrow  keys.    Pressing  the  down  arrow 
scrolls to the next parameter in the list.  Some parameters you can change; 

others  are  view  only.    When  a  changeable  parameter  is  at  the  top  of  the 
screen, it is identified by an underline immediately to the right of its value. 

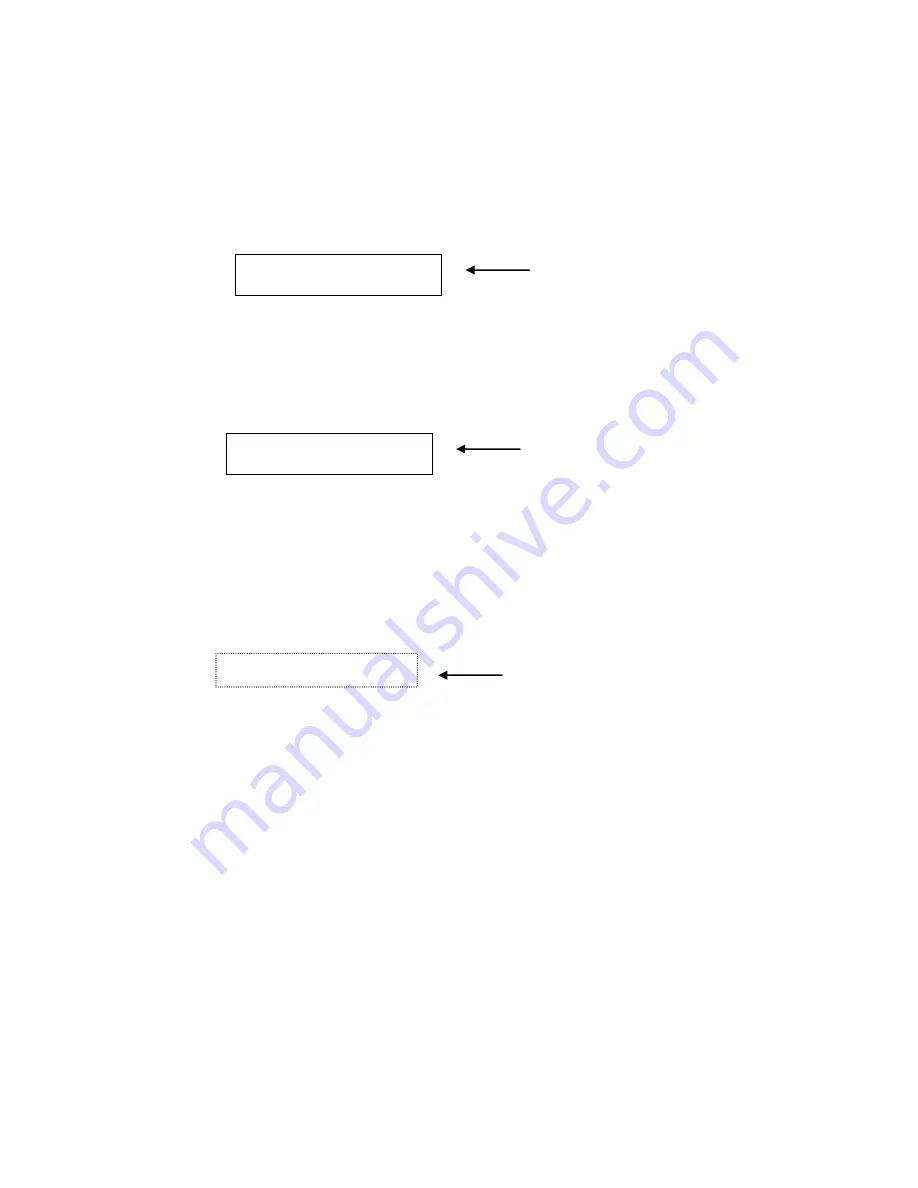
Figure 2 shows example.  


Figure 2 Underline shows editable field 

To  change  a  parameter  press  the  Enter  key,  the  underline  changes  to  a 
block.  You then use the arrow keys to adjust the parameter.   


Figure 3 Up and down arrows change value 

After changes, press the Enter key which returns you to the scroll mode.  

Figure 4 Display shows window into parameters 


While  in  scroll  mode  pressing  the  Menu  key  returns  you  to  the  General 

Operation screen.  Pressing the Play key starts the unit and returns you to 
the General Operation screen.  

TEMP LOW 


10_ 

TEMP HIGH 


90 

Underline after value 
denotes an editable 
value 

TEMP LOW 


10


TEMP HIGH 


90 

Solid block after value 
shows up and down 
arrow can change value 

VERSION 

     2.01 

BELT ODO 

3777 FT 

TEMP LOW 


  0 

TEMP HIGH 


100 

AIR LOW 


 20 

AIR HIGH 


100 

SPEED  


100 

START DELAY  

 55 

AIR OFFSET     100 MS 
BIN SENSOR   

OFF 

SENSOR DELAY 

1 S 

UNITS  

  ENGLISH 

LANGUAGE 

  ENGLISH 


Display shows two lines. 
Use up and down 
arrows to move. 

Summary of Contents for AirSpeed SMART V3

Page 1: ...Air Cushion Technology V2 AirSpeed SMART V3 Technical Manual...

Page 2: ...ii Revision History Rev Date Description 04 15 13 Original 1 05 02 13 Added detail in Section 4 2 on Bin Sensors 2 07 22 13 Updated advanced menu to match version 2 software...

Page 3: ...y Timeout 6 3 1 2 Special Processing after entering a valid password 6 3 2 Advanced Setup Screen 6 3 2 1 Exiting Advanced Setup 8 3 2 2 Individual Parameters 8 3 2 2 1 Version 8 3 2 2 2 Belt Odo 8 3 2...

Page 4: ...rom Idle to Run 14 5 3 4 Stopping Unit 14 5 3 5 Sample Display Idle 14 5 3 6 Sample Display Run 15 5 4 Selecting between Operational and Burn in Modes 15 SECTION 6 Loading New Software 16 6 1 Introduc...

Page 5: ...The new Pregis AirSpeed SMART operator s interface consists of a membrane keypad and a two line LCD display Optionally there is a foot switch and a bin sensor Figure 1 shows the front panel with the...

Page 6: ...the rotation of the film roller If the rotation stops for more than three seconds film is assumed to have been exhausted or jammed the unit immediately stops The lost film sensor can be ignored by se...

Page 7: ...effect Pressing Menu takes you to the Air Adjustment Screen or the Temperature Setting screen and then the Air Adjustment Screen if the Advanced Setup is active see Section 3 Pressing Play toggles the...

Page 8: ...lation Setting screen Pressing Play toggles the running state of the unit and remains at the Temperature Setting screen 2 2 1 1 Temperature Setting Timeout If you don t press a key for 60 seconds Temp...

Page 9: ...Up or Down arrow keys increment or decrement the setting respectively Pressing Enter returns to the General Operation screen Pressing Menu returns to the General Operation screen Pressing Play toggle...

Page 10: ...rts the unit and returns to the General Operation screen 3 1 1 Password Entry Timeout If you don t press a key for 30 seconds the Password screen times out and the unit returns to the General Operatio...

Page 11: ...change value After changes press the Enter key which returns you to the scroll mode Figure 4 Display shows window into parameters While in scroll mode pressing the Menu key returns you to the General...

Page 12: ...r 3 2 2 2 Belt Odo This is the belt odometer reading in feet To reset press and hold the enter key then press and hold the up key for five seconds when the number line is selected The odometer reading...

Page 13: ...t Delay Start delay is the time between turning on the sealer s heater and starting of the motor see Figure 5 Start delay can be 0 to 100 The Start delay is a percentage and denotes how hot the sealer...

Page 14: ...See section 4 2 for a detailed explanation of the bin sensors 3 2 2 10 Sensor Delay This parameter is the amount of time the bin sensor needs to be triggered before the SMART machine will stop 3 2 2...

Page 15: ...ng a bin sensor the setup up of the device controls the AirSpeed SMART The timer setting should be set to 0 00 for best results A setting other than 0 00 will lead to erratic machine cycles 4 2 1 Infr...

Page 16: ...s designed to turn ON when there is material present and OFF when there is no material Position the Ultrasonic sensor over the material Follow the instructions in Section 3 for selecting the US sensor...

Page 17: ...play is pressed the unit enters run mode While in run the unit operates the motor sealer and blower for about one minute and then rests for about one minute with the motor sealer and blower off The u...

Page 18: ...ns there until the play button is pressed At this time the unit changes to run and the operation discussed in the section 5 3 1 commences 5 3 4 Stopping Unit To stop the unit from cycling between rest...

Page 19: ...ay 5 4 Selecting between Operational and Burn in Modes The jumper plug JP2 on the cpu board is used to select between Operational and Burn in modes When the two pins of JP2 are shorted Burn in mode is...

Page 20: ...he unit and install the USB memory stick into the control board 4 Install jumper JP2 5 Power on the unit 6 After a few seconds the bootloader recognizes the USB stick and loads the new software 7 Afte...

Reviews: