


prepASH Operating Instructions
Precisa
Ref01.i
9
4 Commissioning
4.1 Unpacking
Observe the following points when you unpack the ashing device in order to avoid damage:
•
Check the ashing device for any external visible signs of damage immediately after you
unpack it. If you find that it has been damaged in transit, notify your Precisa service agent
immediately.
•
Read these Operating Instructions carefully before starting to work with the ashing device and
pay particular attention to the safety instructions (see section 2 "Safety" on page
Fehler!
Textmarke nicht definiert.
).
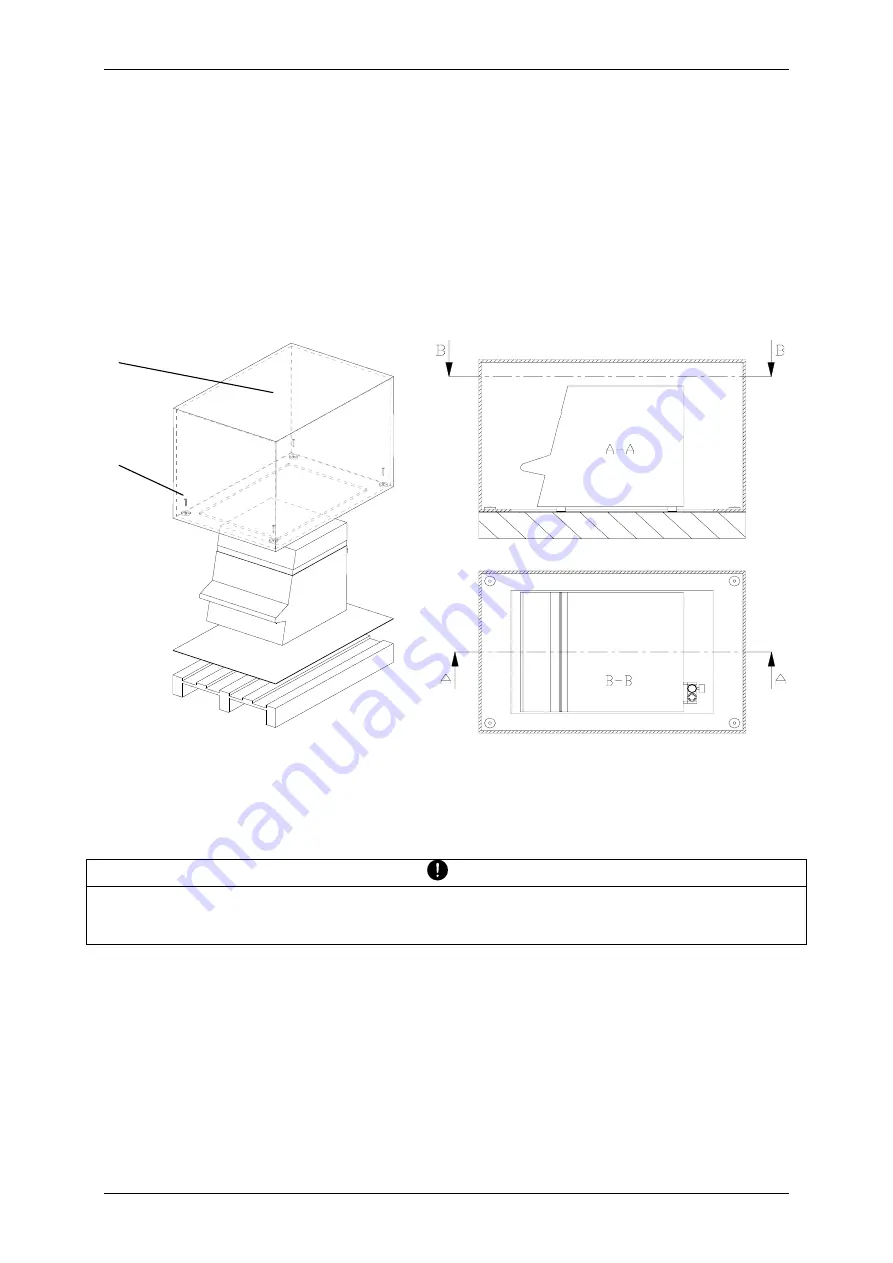
1
2
Unpacking the prepASH
1. Open the box (1) at the top
2. Remove all the padding and accessories
3. Undo the 4 screws (2) on the base of the cardboard box
4. Lift off the cardboard box
NOTE
Retain the packaging. If the device is delivered to the factory by a transport firm for repair after a
lengthy period of use, this may only be done in the original packaging. If devices are not properly
packaged, they may sustain considerable damage in transit.


