F A S T B A C K ® M O D E L 1 5 x s E U S E R ’ S M A N U A L , R E V . C — 7 / 1 9 / 0 2
9
9
IV
S P E C I A L F E A T U R E S
DIAGRAMA/SCHÉMA/FIGURE 7
The Fastback® binder gives you many binding options. You can
edit your bound books, change the bind time, and even adjust how
the strip wraps around your book.
A. Editing Your Bound Books
Editing your already bound books? Not possible, you say. But it is.
The Fastback® binder allows you to add and remove pages from
bound books—meaning you can make minor revisions to your
documents. So when you realize you’ve put the wrong page in,
don’t worry. Just follow these easy steps:
1. Make sure the binder is in READY TO BIND mode.
2. Flatten your book and fold down the corner of the page you want
to remove, or mark it in some other way.
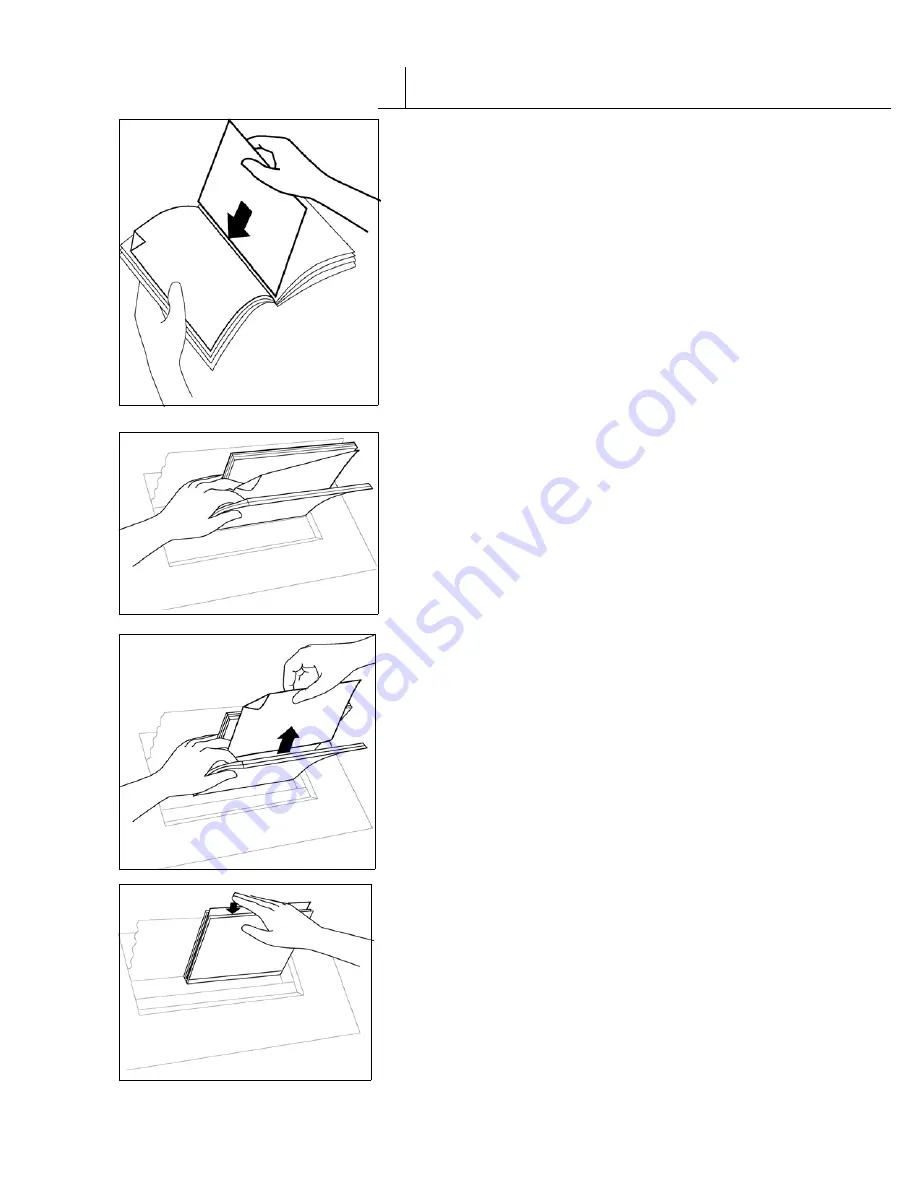
3. Behind this sheet, insert the page you want to add. Nestle it in as
far as you can (figure 7). When you’re sure it’s straight, close your
book.
4. Now put your book in the binder, and press the EDIT button.
This begins the EDIT cycle. The display reads, “EDIT PREP.” The
clamps close and move the book towards the back of the machine.
5. While the binder is remelting the spine adhesive, pinch the front
and back sections of the book, leaving the dog-eared page free
(figure 8). When the book clamps open, and the display reads,
“EDIT NOW,”
immediately
pull the dog-eared page from the
book (figure 9). (Holding the front and back sections of your book
when editing keeps the remaining pages in place.)
As soon as you remove the dog-eared page, tap down the new
page until it’s flush with the rest of the document. Make sure you
are directly tapping the document’s pages—not just the tops of the
document’s covers (figure 10).
6. When you’re satisfied, place the edited book in the cooling rack
for a few minutes.
If the pages don’t remove easily the first time, simply repeat this
process.
S P E C I A L F E A T U R E S
DIAGRAMA/SCHÉMA/FIGURE 8
DIAGRAMA/SCHÉMA/FIGURE 9
DIAGRAMA/SCHÉMA/FIGURE 10


