UNPACKING
Refer to Figure 1.
Check for shipping damage. Check immediately whether
all parts and accessories are included.
The sander comes assembled as one unit. Additional
parts which need to be fastened to sander, should be
located and accounted for before assembling.
ITEM DESCRIPTION QUANTITY
A
Sanding Belt Table
1
B
Locking Lever (Sanding Belt Table)
1
Figure 1
A
B
WARNING
Do not use the machine until it is completely assembled
and you have read and understood the entire operating
manual.
TOOLS NEEDED
The following tools (not included) are needed to assemble
and adjust the belt sander:
• Combination square
• Phillips screwdriver
• 3 mm Hex Wrench
MOUNTING THE SANDING BELT TABLE
Refer to Figure 2–5
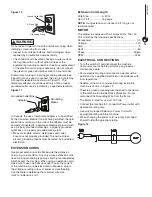
• Remove the belt guard locking knob and then the side
belt guard.
Figure 2
Belt Guard
Locking
Knob
Side Belt
Guard
ASSEMBLY
2
• Take apart the locking lever assembly (hex headed bolt,
washer, splined shaft, lever and screw with spring).
Figure 3
Screw and
Spring
Lever
Washer
Splined
Shaft
Hex
headed
Bolt
• Slide the sanding belt table into place with the adjusting
slot over the hex head bolt.
• Slide the washer onto hex head bolt.
• Thread the splined shaft onto the hex head bolt.
• Slide the lever onto the splined shaft until it stops.
• Insert spring with screw into lever and tighten until
screw head extends above the lever.
Figure 4
Hex
Head
Bolt
Sanding Belt
Table
Screw
and
Spring
Lever
Splined
Shaft
Adjusting
Slot
Washer
• Tighten set screw. Adjust table before tightening the set
screw. See
Adjust Sanding Belt Table.
Figure 5
Set
Screw
Sanding Belt
Table
Locking
Lever
Backstop
Sanding
Belt
• Assemble the side belt guard and secure in place with
the belt guard locking knob. (Figure 2)
2
ASSEMBLY
Summary of Contents for BD1030
Page 10: ...1 x 30 BELT SANDER PARTS ILLUSTRATION 8 PARTS LIST 8 ...
Page 13: ...NOTE ...
Page 14: ...NOTE ...
Page 15: ...NOTE ...
Page 16: ...Southern Technologies LLC 3816 Hawthron CT Waukegan IL 60087 ...


