background image

TOOLS  REQUIRED:  

7/16”, 1/2” and 9/16" sockets and ratchets, block(s) of wood (minimum of 6” tall).

Refer to the parts list on page 12.

WHEEL INSTALLATION

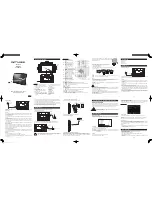
1. Block up end of generator opposite the fuel tank cap to install wheel kit.
2. Insert wheel spacer 

(item 39)

into the center of the wheel 

(item 28).

3. Slide 3/8 x 4.25” bolt 

(item 32) 

and 3/8 washer 

(item 27) 

through the wheel 

(item 28)

, then through the wheel bracket on the 

carrier, with the offset side of the wheel hub against the wheel bracket.

4. Thread 3/8 nyloc nut 

(item 33)

onto the bolt and tighten to securely clamp the wheel assembly to the carrier.

5. Repeat above instructions for the remaining wheel.

FOOT INSTALLATION

1. Assemble the rubber feet 

(item 29)

to the foot bracket 

(item 43) 

using a 1/4-20 x 1.5” bolt 

(item 11)

.  Thread a 1/4 washer 

(item 36)

and a 1/4 nyloc nut 

(item 10)

to the bolt to secure the assembly.  

Caution: Do not over tighten so that the foot 

material collapses.

2. Blocking up the alternator side of the generator, place the foot bracket under the carrier channel.  Thread a 5/16-18 x 1” bolt 

(item 42)

with a 5/16 wide washer 

(item 50)

through the mounting holes and thread a 5/16 wide washer 

(item 50)

and a 5/16 

nyloc nut 

(item 13)

to the bolt to secure the foot bracket to the carrier.

HANDLE INSTALLATION

1. Place handle

(item 25)

and spacer 

(item 46)

on carrier on same end as feet, as shown in the diagram.

2. Slide 5/16 x 2.25” bolt

(item 26)

and 5/16 washers 

(item 12)

through handle and handle bracket as shown in diagram and 

secure with 5/16” nyloc nut 

(item 13).  

Tighten until handle is securely clamped to the carrier.

3. Apply aerosol hairspray or similar adhesive to the handle 

(item 25)

, and then slide the handle grip 

(item 40)

onto the handle.

The aerosol hairspray will allow for easier assembly and will adhere the grip to the handle.

4. Insert cap 

(item 35)

into end of handle 

(item 25)

5. Repeat above instructions for the remaining handle.

LOCKING HANDLE

1. Attach the lanyards 

(item 30)

to the release pins 

(item 34) 

and carrier as shown in the illustration.

2.   To lock the handle 

(item 25)

in the extended 

position, align the holes in the handle brackets 
with the holes in the carrier brackets and insert 
the release pins 

(item 34)

.

3

English

PORTABILITY KIT INSTALLATION

2

1

34

30

Summary of Contents for Black Max PM0676800

Page 1: ... funcionamiento www powermate com 05 07 0065349 PM0676800 Insert Additif Adición Thank you for selecting a Black Max Generator The Black Max generator has been made to supply reliable portable electrical power when utility power is not avail able We hope you will enjoy your new generator Merci d avoir choisi le groupe électrogène Black Max Ce groupe électrogène Black Max a été conçu pour fournir l...

Page 2: ... or its authorized service representative for warranty service or for shipping repaired or replacement products back to the customer these charges must be borne by the customer Engine is covered exclusively by a separate warranty from the engine manufacturer included with the engine Manual Damages caused by abuse or accident and the effects of corrosion erosion and normal wear and tear Warranty is...

Page 3: ...ier channel Thread a 5 16 18 x 1 bolt item 42 with a 5 16 wide washer item 50 through the mounting holes and thread a 5 16 wide washer item 50 and a 5 16 nyloc nut item 13 to the bolt to secure the foot bracket to the carrier HANDLE INSTALLATION 1 Place handle item 25 and spacer item 46 on carrier on same end as feet as shown in the diagram 2 Slide 5 16 x 2 25 bolt item 26 and 5 16 washers item 12...

Page 4: ...Brand New Generators are shipped with the Battery Connections disconnected The Positive and Negative Terminals must be connected to the Battery before the Electric Start Feature will work Initial Battery Connection Refer to the Installation Instructions Below Battery Removal Installation Removal Remove the nut and bolt from the negative and positive post being careful not to short across the termi...

Page 5: ...pédition au client des produits réparés ou remplacés Ces frais doivent être assumés par le client Le moteur est couvert exclusivement par une garantie distincte du fabricant du moteur Cette garantie est incluse dans le guide d utilisation du moteur Les dommages causés par un abus ou un accident et les effets de la corrosion de l érosion ainsi que de l usure normale La garantie est annulée si le cl...

Page 6: ... U Visser un boulon de 5 16 18 x 1 po article 42 avec une rondelle de 5 16 po large article 50 dans les trous de fixation puis visser sur le boulon un écrou nyloc de 5 16 po article 13 avec une rondelle de 5 16 po large article 50 pour fixer le support de pied au profilé POSE DE LA POIGNEE 1 Mettre la poignée article 25 et entretoise article 46 sur la chariot du côté où se trouvent les pieds tel q...

Page 7: ...ie locale NOTA Les nouvelles génératrices sont expédiées avec les connexions de batterie débranchées Les bornes positive et négative doivent être branchées à la batterie avant que la fonction de démarrage électrique puisse fonctionner Branchement initial de la batterie Reportez vous aux directives d installation ci dessous Dépose et pose de la batterie Dépose Enlevez l écrou et le boulon de la bor...

Page 8: ... transporte por el envío del producto a la Compañía o a sus representantes de servicio autorizados por servicio de garantías o por el reenvío de los productos reparados o de reemplazo al consumidor estos cargos los deberá cubrir el cliente El motor está cubierto exclusivamente por una garantía por separado por parte del fabricante del motor que se incluye en el Manual del motor Daños ocasionados p...

Page 9: ...42 con una arandela de 5 16 lejos artículo 50 a través de los orificios de montaje y enrosque una arandela de 5 16 lejos artículo 50 y una tuerca nyloc de 5 16 artículo 13 al perno para asegurar el soporte de la pie al portador INSTALACIÓN DE LA MANIJA 1 Coloque la manija artículo 25 y espaciador artículo 46 sobre la transportadora en el mismo extremo de las patas tal como se indica en el diagrama...

Page 10: ...n con las conexiones de la batería sin conectar Las terminales positiva y negativa deben conectarse con la batería antes de que se ponga en marcha la función Arranque eléctrico Conexión inicial de la batería Consulte las Instrucciones de instalación que aparecen a continuación Extracción e instalación de la batería Extracción Retire la tuerca y el perno de la terminal negativa y la positiva tenien...

Page 11: ...11 PARTS DRAWING SCHEMA DES PIÈCES DIAGRAMA DE PIEZAS ...

Page 12: ...Fuel shut off with filter Robinet de carburant Válvula combustible con filtro 1 22C 0062673 Fuel Bushing Bague d essence Buje de combustible 1 23 0052931 J clamp Collier Pinza vinílica 1 24 0058618 Screw 10 x 1 Vis Tornillo 4 25 0064308 Handle Poignée Manija 2 26 Note B Bolt 5 16 18 x 2 1 4 Boulon Perno 2 27 Note B Washer flat 3 8 Rondelle plates 3 8 Arandela plana 3 8 6 28 0057704 Wheel Roue Rued...

Page 13: ...m Vis Tornillo 8 60I 0063948 AVR module La tension automatique régulatrice El regulador automático del voltaje 1 60J 0064838 Bolt M5 x 235 Boulon Perno 2 60K 0063235 Nut nyloc M5 Écrous nyloc Tuerca nyloc 2 60L 0063236 Terminal block Bloc délimitant Bloque terminal 1 60M 0063237 Washer M5 Rondelle Arandela 8 60N 0063238 Washer lock M5 Contre écrou Arandela de cierre 10 60O 0063239 Nut M5 Écrous Tu...

Page 14: ...C Pour commander un réservoir de rechange contacter Centre de service Powermate Corporation le plus proche AVERTISSEMENT Pour éviter toute blessure personnelle ou dommage à l équipement l installation et tout entretien devralent être effectués par un élec tricien qualifié ou un préposé au service autorisé En aucun cas une personne non qualifiée ne devrait essayer de faire le raccord au circuit pri...

Page 15: ...NOTES REMARQUES NOTAS 15 ...

Page 16: ... Road P O Box 6001 Kearney NE 68848 1 800 445 1805 1 308 237 2181 Fax 1 308 234 4187 2007 Powermate Corporation All rights reserved 2007 Powermate Corporation Tous droits réservés 2007 Powermate Corporation Reservados todos los derechos ...

Reviews: