
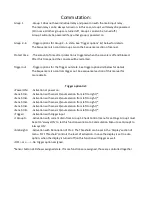


Commutation:
Group 1
-Group 1 does not have individual relay and power on with the main input relay.
The main relay can be always turned on. In this case, Group 1 will always be powered.
(Or in case all other groups are turned off, Group 1 can also be turned off.)
Group 1 will only be powered if any other group is powered on.
Group 2...6
-Trigger options for Group 2...6 state. See ‘Trigger options’ list below for details.
The Sequencer also control Groups. Go to the Sequencer section of manual.
Protect time -The amount of time after protection is triggered when the console is off and blocked.
After this time period the console will be restarted.
Trigger out
-Trigger options for the Trigger out state. See trigger options list below for details.
The Sequencer also controls trigger out. See sequencer section of this manual for
more details.
Trigger option list:
<Power ON> -Activation at power on.
<Sens.btn1> -Activation with sensor 1(enumeration from left to right) *
<Sens.btn2> -Activation with sensor 2(enumeration from left to right) *
<Sens.btn3> -Activation with sensor 3(enumeration from left to right) *
<Sens.btn4> -Activation with sensor 4(enumeration from left to right) *
<Sens.btn5> -Activation with sensor 5(enumeration from left to right) *
<Trigger>
-Activation with trigger input.
<I Group1>
-Activation with current drain from Group1. Check Control menu for settings. Group1 must
be set to ‘always ON’ to let this function work. Go to Commutation Menu to set Group1 to
‘always ON’.
<Amb.Light> -Activation with illumination of YG-3. The Threshold can be set in the ‘Display’ section of
menu. ‘OFF Threshold’ controls the level of activation. In case the display is set to auto
option, when the display is turned off/on this function will trigger as well.
<OFF> or <----> -No trigger option assigned.
*Sensor button LED shows assigned state. If more functions are assigned, those are controlled together.


