5
ASSEMBLY / PRE-OPERATION
NOTE:
The multi-wrench may be used for assembly of the
chute rotator head to snow thrower and making ad just ments
to the skid plates.
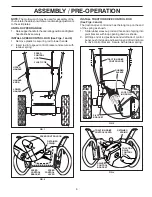
UNFOLD UPPER HANDLE
1. Raise upper handle to the operating position and tight en
handle knobs securely.
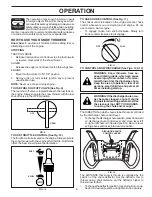
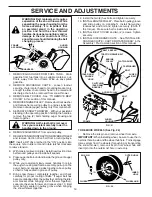
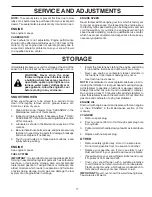
INSTALL SPEED CONTROL ROD (See Figs. 1 and 2)
1. Remove plastic tie securing rod to lower handle.
2. Insert rod into speed control bracket and secure with
retainer spring.
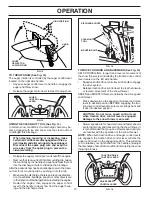
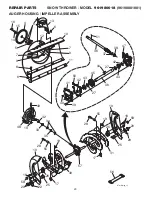
INSTALL TRACTION DRIVE CONTROL ROD
(See Figs. 3 and 4)
The traction drive control rod has the long loop on the end
of the spring as shown.
1. Slide rubber sleeve up rod and hook end of spring into
pivot bracket with loop opening down as shown.
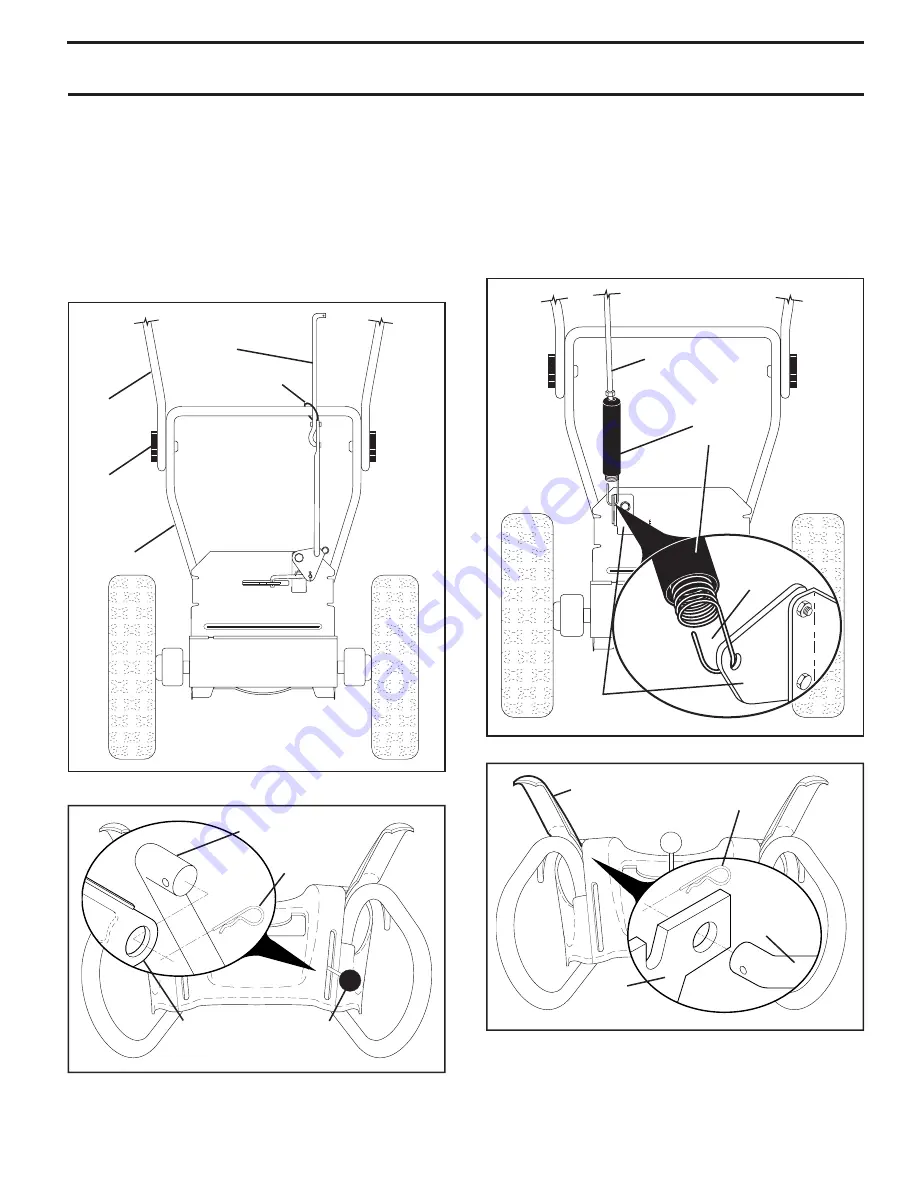
2. With top end of rod positioned under left side of control
panel, push rod down and insert top end of rod into hole
in drive control bracket. Secure with retainer spring.
SPEED CON TROL ROD
SPEED
CONTROL
BRACKET
RETAINER
SPRING
SPEED
CONTROL
LEVER
FIG. 2
TRACTION
DRIVE
CON TROL
ROD
DRIVE
CONTROL
BRACKET
RETAINER
SPRING
TRACTION DRIVE
CON TROL LEVER
FIG. 4
TRACTION DRIVE
CONTROL ROD
PIVOT
BRACKET
RUBBER
SLEEVE
LOOP OPEN-
ING DOWN
FIG. 3
SPEED
CONTROL
ROD
HANDLE
KNOB
LOWER
HANDLE
PLASTIC TIE
UPPER
HANDLE
FIG. 1
Summary of Contents for 415332
Page 19: ...19 SERVICE NOTES...
Page 32: ...32 REPAIR PARTS SNOW THROWER MODEL 961980018 96198001801 DECALS...
Page 34: ...34 SERVICE NOTES...
Page 35: ...35 SERVICE NOTES...


