


Troubleshooting
ROBO-679 User’s Manual
5-
5
5
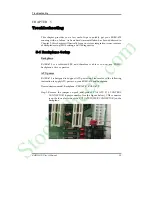
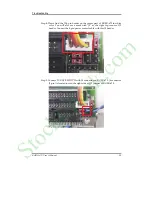
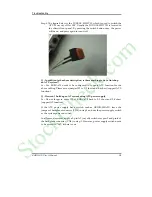
5-2 Onboard Hardware Installation
Q: How do I connect my keyboard and mouse ??
A:
Users may always adopt PS/2 keyboard and mouse over the PS/2 interface
(through Y-cable), J18, on ROBO-679.
However, it is also fine to adopt a standard keyboard over the standard
keyboard connector on backplane, if provided. In this way, users need to adopt
a 5-pin keyboard connection cable to line-up, external keyboard interface, J22 on
ROBO-679 with the 5-pin keyboard connector on backplane.
Q: OK. I have finished up hardware installation, but I got nothing when I
power on the system. Why ??
A:
There are thousands of different reasons to produce this power on failure.
1.
Check ROBO-679 jumper JP3. For AT power supply or ATX power supply
used for AT system, JP3 needs to be at 1-3 and 2-4. Otherwise, it needs to be
at 3-5 and 4-6. Incorrect power setting will not allow you to power on the
system.
2.
Double check if every connector is attached with the correct cable.
3.
If you have changed processor with different system clock, please move JP2
(CMOS clear Jumper) to 2-3, power on the system to clear CMOS, power off
the system, move JP2 back to 1-2, and power on again.
Q: I power on the system, but the CPU speed is not correct. Why ??
A: This applies to Engineering Sample processor ONLY.
If you have ever
loaded the BIOS optimal default, thank you for doing so. However, this will
force the BIOS to pick up the default CPU core/bus ratio as well. It needs to be
emphasized again that ROBO-679 does not have switch or jumper to configure
CPU core/bus ratio. This is done through BIOS setting. Please check in the
“Frequency/Voltage Control” section of Chapter 4 (4-11) to adjust this core/bus
ratio.
Q : I connect two IDE devices over one IDE flat cable, but the system either
does not start or hangs from time to time. Why ??
A :
Make sure that you have configured the two IDE devices as master and slave,
respectively.
StockCheck.com


