


Phase Contrast Microscopy
3032
5-2 Installation and use
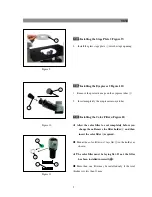
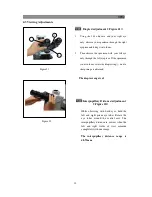
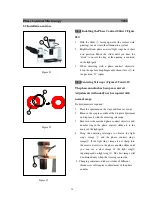
5-2-1 Installing the Phase Contrast Slider
(
(
(
(
Figure
28
)
)
)
)
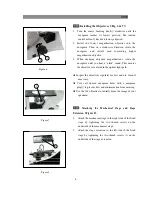
1. With the slider
①
facing upwards (the surface with
printing), insert it into the illumination system.
2. Brightfield and phase contrast light rings have their
own position. Move the slider until you hear the
“click” to ensure the ring or the opening is centered
in the light path.
3. When observing with a phase contrast objective,
keep the aperture diaphragm adjustment lever
②
in
the position “O” (open)
.
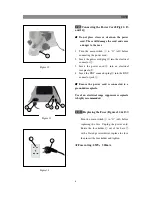
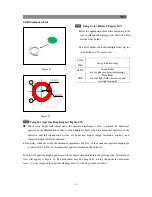
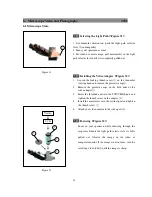
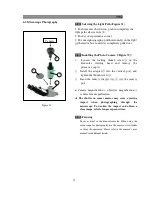
5-2-2Centering Telescope (Figures 29 and 30
)
)
)
)
The phase annulus has been pre-centered.
Adjustments will usually not be required with
normal usage.
If adjustments are required:
1. Place the specimen on the stage and focus as usual.
2. Remove the eyepiece without the diopter adjustment
and replace it with the centering telescope.
3. Ensure sure the matched phase contrast objective and
annulus ring in the phase contrast slider are in the
center of the light path.
4. Using the centering telescope to observe the light
ring’s image
①
and the phase contrast ring’s
image
②
. If the light ring’s image is not sharp, turn
the recessed screws in the phase annulus slider until
you can see a clear image of the light ring
②
superimposed on light ring (1). The best image will
be obtained only when the two rings coincide.
5. Changing containers, dishes or slides of different
thicknesses will require re-adjustment of the phase
annulus.
14
Figure 28
Figure 29
Figure 30
3
1
2
2
1