OWNER’S MANUAL
15
WARNING:
TURN OFF THE PUMP AND UNPLUG THE POWER CORD BEFORE TROUBLESHOOTING THE FILTER SYSTEM.
TROUBLESHOOTING GUIDE
NOTE:
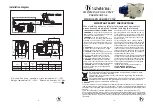
When your pump needs servicing or when working on the return hose, turn the pump off and unplug the main power cord of the system. Then install the service plug
into the diverter fitting and (if removing the pump) into the center hole of the canister as shown on page 13 in steps 3 & 5.
SYMPTOM
PROBLEM
POSSIBLE SOLUTION
1. Motor fails to start or
kicks on and off.
A Unit Not Plugged In
A Unit must be plugged into a 3-wire grounded outlet.
B GFCI Breaker Tripped
B Reset circuit breaker on electrical panel. If problem persists, have an electrician check circuit.
C Low Voltage
C Check line voltage - must be 105 to 125 AC volts.
2. No flow or low flow
through return hose
A Low Water Level
A Water level must be between the Min/Max Limit Lines marked on the faceplate. (See Fig. 4)
B Inlet / Discharge Clogged
B Check for obstructions at strainer basket, filter cartridge, return hose and return fitting.
C Filter Dirty
C Clean or replace the filter cartridge. Spare cartridges make service more convenient.
3. Filter is not cleaning pool
(water cloudy, green, etc.)
A Chlorine Level
A Maintain the chlorine level between 1.0 and 1.6 ppm.
B Filter Dirty
B Clean or replace the filter cartridge. Spare cartridges make service more convenient.
C pH Level
C Maintain pH Level between 7.3 and 7.8.
D Cartridge Damaged
D Inspect the filter cartridge for holes or tears. If visibly damaged; replace the filter cartridge.
E Low Water Flow
E Check for obstructions at strainer basket, filter cartridge, return hose and return fitting.
F Other Chemicals Required F Have water tested at pool supply store. It may be necessary to add other chemicals due to
varying water quality in different localities.
G Pool Water Very Dirty
G Chemicals are required to maintain clean pool water. Clean pool and filter more often.
4. Water Leakage
A Hose Area :
Return hose does not fit
well with volute housing
outlet or fitting elbow.
B Connection between
the Pump and the
Volute Housing
B Check the volute housing at the connection with the pump. Make sure that the volute housing
tabs are seated properly under the brackets on the pump and that the volute housing screws
are tightened down properly. Tighten screws if needed. Inspect the pump and volute housing
for signs of damage. Replace the pump or the volute housing if damage is visible.
C Volute Housing Inlet to
Filter Pump Skimmer
Canister
C Check Volute Housing Inlet O-Ring for damage. Make sure the Pump Mounting Screws
are tightened down all the way. Check the volute housing and the Filter Pump Skimmer
Canister
7
for signs of damage. If damage is visible at the canister or the volute housing,
replace as needed.
A Make sure the Hose Clamp
r
is positioned properly over the hose and O-ring
w
to ensure
a proper seal. Adjust hose clamp, check o-ring and re-tighten. Check hose for any holes or
cracks and replace if needed.