the appliance will do the opposite. Keeping
the start/increase suction button (E) pressed
for a few seconds will stop suction.
5.2 Use of the suction controls on the handle
Simply press the suction push-button once to
start suction. You can select the speed re-
quired for the kind of surface to be treated by
keeping the suction push-button pressed.
When you increase the suction power one
more of the indicators (D) on the control
panel lights up, and when you lower it one of
the indicators (D) goes off. To turn the appli-
ance off, just press the suction push-button.
To turn the appliance off, just press the suc-
tion push-button.
6. AUTOMATIC SUCTION LOCK
When the dirt sucked into the water filter
collector reaches the maximum allowed level,
suction is automatically blocked by the
special safety float. This can also occur when
the water in the container is very dirty.
In these cases, there is an increase in the
motor rpm: it is therefore necessary to
remove the water in the collector.
Turn off the appliance and only restart it
when the level of the water in the collector
has been restored as described in Chapter 1.
7. EMPTYING AND CLEANING THE
DIRT COLLECTION BUCKET
When the dirt sucked into the bucket reaches
the maximum permitted level, vacuuming will
be automatically blocked by the special float.
• Ensure that the appliance is switched off
and disconnected from the mains.
• Pull the lid (R) upwards as shown in fig. 2 to
release it.
• Lift the water container (Z) out of its
housing by its handle (X), moving the built-
in socket flap (S) aside as shown in fig.3.
• Press the water container handle opening
lever (Y) and pull (Pic. 4). Remove the
water filter unit (O), empty the container
and rinse it out. Release the filter body
locking ring (W) by pulling it outwards
(Pic. 5).
• Separate all components and rinse them in
running water.
• If you wish to continue cleaning, refill the
container with water.
• A special cleaning brush is supplied to
facilitate cleaning of the water container
(X); it can also be used to clean the hose
connections of the appliance and the
accessories inside.
• Reinsert the water filter unit (Z), close the
container handle (X) making sure that it is
positioned correctly and reposition the
parts back into the appliance.
• Reposition the lid (R), so that the two
levers on the cover match the relative
positions on the machine, rotating it until it
is locked.
8. PRESSURE INDICATOR
The product has an indicator (M) for di-
splaying the operating pressure.
9. OPTIONAL KITS
USE
Before steam treating leather, special fabrics
and wood surfaces, consult the manufactu-
rer's instructions and always carry out a test
on a hidden part or on a sample of the mate-
rial. Allow the steamed part to dry to make
sure that no changes in colour or deforma-
tions have occurred.
Please pay careful attention when cleaning
wooden surfaces (furniture, doors, etc.). and
treated terracotta flooring as prolonged use
of steam may damage the wax, polish or co-
lour of the surfaces to be cleaned.
We therefore recommend only steaming
these surfaces for short periods of time, or
cleaning using a previously steamed cloth.
On particularly delicate surfaces (i.e. synthe-
tic materials, lacquered surfaces, etc.) we re-
commend using minimum steam. To clean
glass surfaces in particularly cold seasons,
preheat the windows starting from a distance
of about 50 cm from the surface. To take
care of your plants, we recommend spraying
them from a minimum distance of 50 cm.
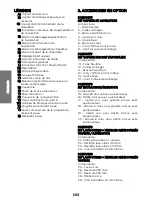
9.1 STEAM & VACUUMING KIT PAEU0375
This kit makes it possible to use the appliance
as a steam cleaner with integrated vacuum
cleaner to vacuum, clean and sanitise all sur-
faces. The compact size of the universal
brush (3) which is connected to the flexible
hose (1) by means of extension hoses (2)
enables it to be used also in small spaces. The
cloth (7) makes it possible to collect the dirt
When the appliance is switched on again,
the suction level will be as set the last time it
was used.
ATTENTION: Turning the appliance back on
immediately, without replacing the water,
can damage the air outlet filter.
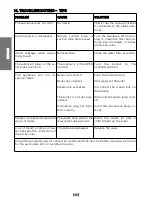
E
N
G
L
IS
H
| 40 |
Summary of Contents for VAPORETTO MV 10.20
Page 2: ...2 A H I G F E B T N Q J K J P C D S R L M R U O V W Y Z X POLTI VAPORETTO MV 10 20...
Page 3: ...3 Pic 10 Pic 7 Pic 11 Pic 8 Pic 9 Pic 4 Pic 5 Pic 6 Pic 1 Pic 2 Pic 3...
Page 8: ...8...
Page 27: ...ITALIANO 27...
Page 28: ...ITALIANO 28...
Page 46: ...ENGLISH 46...
Page 119: ......

