background image

29

SAFETY

Operator Safety

WARNING

POTENTIAL HAZARD
Operating the ATV with improper modifications.
WHAT CAN HAPPEN
Improper installation of accessories or modification of the ATV

may cause changes in handling which could lead to an accident.
HOW TO AVOID THE HAZARD
Never modify the ATV through improper installation or use of

accessories. All parts and accessories added to the vehicle must

be genuine Polaris Industries Inc. or equivalent components

designed for use on this ATV and should be installed and used

according to approved instructions. See your authorized Polaris

ATV dealer for more information.

WARNING

POTENTIAL HAZARD
Overloading the ATV or carrying/towing cargo improperly.
WHAT CAN HAPPEN
Overloading and towing can cause changes in vehicle handling,

which could lead to loss of control or an accident.
HOW TO AVOID THE HAZARD
Never exceed the stated load capacity for this ATV.
Cargo should be properly distributed and securely attached.
Reduce speed when carrying cargo or pulling a trailer. Allow a

greater distance for braking.
Always follow the instructions in the owner’s manual for carrying

cargo or pulling a trailer. See page 48.

WARNING

POTENTIAL HAZARD
Operating on frozen bodies of water.
WHAT CAN HAPPEN
Severe injury or death can result if the ATV and/or the operator

fall through the ice.
HOW TO AVOID THE HAZARD
Never operate the ATV on a frozen body of water.

Summary of Contents for Hawkeye 2x4

Page 1: ......

Page 2: ...03...

Page 3: ...ed to the owner s manual on the next page If you cannot locate this card or if it has been removed please call 1 800 342 3764 for assistance The engine exhaust from this product contains chemicals kno...

Page 4: ...For safe and enjoyable operation of your vehicle be sure to follow the instructions and recommendations in this owner s manual Your manual contains instructions for minor maintenance but information...

Page 5: ...me minor discrepancies may result between the actual vehicle and the information presented in this publication Depictions and or procedures in this publication are intended for reference use only No l...

Page 6: ...TION NUMBERS 5 SAFETY 6 CONTROLS 31 FEATURES 39 OPERATION 42 EMISSION CONTROL SYSTEMS 63 MAINTENANCE AND LUBRICATION 64 ADJUSTMENTS 108 POLARIS PRODUCTS 112 TROUBLESHOOTING 113 SPECIFICATIONS 116 WARR...

Page 7: ...4...

Page 8: ...r in the spaces provided Remove the spare key and store it in a safe place Your key can be duplicated only by mating a Polaris key blank with one of your existing keys so if both keys are lost the ign...

Page 9: ...nstructions of the decals on the ATV If any decal becomes illegible or comes off contact your Polaris dealer to purchase a replacement Replacement safety decals are provided by Polaris at no charge Th...

Page 10: ...ed to the racks With dual racks load distribution 1 3 front 2 3 rear is best For stability on rough or hilly terrain reduce speed and cargo Do not block headlight Be careful if load extends over the s...

Page 11: ...Tow only from tow hooks or hitch S Max Rack Loads Front 70 lbs 32 kg Rear 100 lbs 46 kg 7173740 WARNING Operating this ATV if you are under the age of 16 increases your chance of severe injury or deat...

Page 12: ...s Manual 7173739 TRAILER MAX WEIGHT 750 LBS 340 KG ON LEVEL GROUND HITCH MAX VERTICAL WEIGHT 75 LBS 34 KG MANUFACTURED BY POLARIS IND INC DATE VIN THIS VEHICLE IS AN ALL TERRAIN VEHICLE AND IS NOT INT...

Page 13: ...andards Institute label ANSI z90 1 or the Snell Memorial Foundation label 2 Eye Protection Do not depend on sunglasses for proper eye protection A pair of goggles or a helmet face shield offer the bes...

Page 14: ...m available to you and your eligible family members This training is included in the purchase price of your ATV Polaris strongly encourages you and your eligible family members who will be riding the...

Page 15: ...your vehicle or in this manual alerts you to the potential for personal injury WARNING The safety alert warning indicates a potential hazard that may result in serious injury or death CAUTION The saf...

Page 16: ...c street road or highway including a dirt or gravel road S Never operate an ATV without wearing an approved helmet that fits properly Always wear eye protection goggles or face shield gloves boots a l...

Page 17: ...er attempt to turn the ATV around on any hill until you ve mastered on level ground the turn ing technique outlined in this manual Avoid crossing the side of a steep hill when possible S Always use pr...

Page 18: ...Product Safety Commission at 1 800 638 2772 or visit www cpsc gov visit www atvsafety org or call Polaris at 1 800 342 3764 Equipment Modifications We are concerned for the safety of our customers and...

Page 19: ...e and the operating techniques described in the owner s manual For more information about the training course contact an authorized ATV dealer or call Polaris at 1 800 342 3764 WARNING POTENTIAL HAZAR...

Page 20: ...allow the operator to shift position as needed during operation It is not intended for carrying passengers WARNING POTENTIAL HAZARD Operating an ATV on paved surfaces including sidewalks paths parking...

Page 21: ...POTENTIAL HAZARD Operating this ATV without wearing an approved helmet eye protection and protective clothing WHAT CAN HAPPEN Operating an ATV without an approved helmet increases the risk of a severe...

Page 22: ...fore or while operating an ATV could result in an accident causing severe injury or death HOW TO AVOID THE HAZARD Never consume alcohol or drugs before or while operating an ATV WARNING POTENTIAL HAZA...

Page 23: ...r stunts Avoid exhibition driving WARNING POTENTIAL HAZARD Failure to inspect the ATV before operating Failure to properly maintain the ATV WHAT CAN HAPPEN Poor maintenance increases the possibility o...

Page 24: ...into contact with the rear wheels and lead to accident or injury HOW TO AVOID THE HAZARD Always keep both hands on the handlebars and both feet on the footrests of the ATV during operation WARNING POT...

Page 25: ...e on excessively rough slippery or loose terrain until you ve learned and practiced the skills necessary to control the ATV on such terrain Always use extra caution on rough slippery or loose terrain...

Page 26: ...per hill climbing could cause loss of control or overturn HOW TO AVOID THE HAZARD Always follow proper procedures for climbing hills as described in the owner s manual Always check the terrain careful...

Page 27: ...res for traveling down hills as described in the owner s manual NOTE A special technique is required when braking while traveling downhill See page 55 Always check the terrain carefully before descend...

Page 28: ...t to turn the ATV around on any hill until you ve mastered the turning technique on level ground as described in the owner s manual See page 56 Use extra caution when turning on any hill Avoid crossin...

Page 29: ...l Apply the brakes Lock the parking brake when fully stopped If the ATV begins rolling backwards Keep weight uphill Never apply engine power Never apply the rear brake while rolling backwards Apply th...

Page 30: ...nual WARNING POTENTIAL HAZARD Skidding or sliding WHAT CAN HAPPEN Skidding or sliding can cause loss of control If the tires regain traction unexpectedly the ATV could overturn HOW TO AVOID THE HAZARD...

Page 31: ...nts and maintain a slow and steady forward motion Do not make sudden turns or stops and do not make sudden throttle changes Wet brakes may have reduced stopping ability Always test the brakes after le...

Page 32: ...re information WARNING POTENTIAL HAZARD Overloading the ATV or carrying towing cargo improperly WHAT CAN HAPPEN Overloading and towing can cause changes in vehicle handling which could lead to loss of...

Page 33: ...ng systems WARNING Safe operation of this rider active vehicle requires good judgement and physical skills Persons with cognitive or physical disabilities who operate this vehicle have an increased ri...

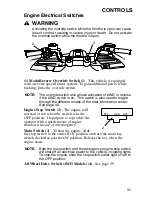
Page 34: ...sed to toggle through the different modes of the rider information center See page 40 Engine Stop Switch 2 The engine will not start or run when the switch is in the OFF position Its purpose is to pro...

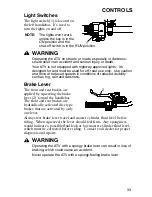
Page 35: ...lly during operation Throttle Lever Engine speed and vehicle movement are controlled by pressing the throttle lever 1 The throttle lever is spring loaded Engine speed returns to idle when the lever is...

Page 36: ...f reduced visibility such as fog rain and darkness Brake Lever The front and rear brakes are applied by squeezing the brake lever 2 toward the handlebar The front and rear brakes are hydraulically act...

Page 37: ...k brake lock 2 forward to engage the brake Release the brake lever 4 To release the parking brake lock squeeze and release the brake lever It will return to its unlocked position Important Safeguards...

Page 38: ...orward The rear wheels may skid and slide sideways causing loss of control and serious injury or death Your Polaris ATV has an auxiliary brake 1 for added safety It s located on the inside of the righ...

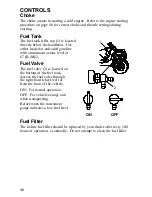
Page 39: ...h a minimum octane level of 87 R M 2 Fuel Valve The fuel valve 2 is located on the bottom of the fuel tank Access the fuel valve through the right front wheel well or from the front of the vehicle ON...

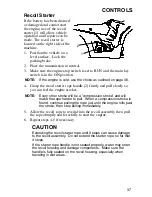
Page 40: ...y so you can feel the engine strokes NOTE Every other stroke will be a compression stroke and will make the rope harder to pull When a compression stroke is found continue pulling the rope just until...

Page 41: ...Gear N Neutral R Reverse CAUTION Shifting gears with the engine speed above idle or while the vehicle is moving could cause transmission damage To change gears stop the vehicle and with the engine id...

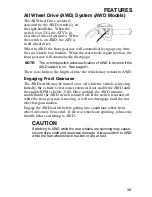
Page 42: ...time the vehicle may remain in AWD Engaging Front Gearcase The AWD switch may be turned on or off while the vehicle is moving Initially the vehicle s electronic system will not enable the AWD until t...

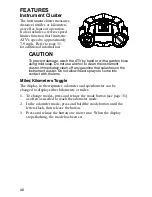
Page 43: ...rument cluster Immediately clean off any gasoline that splashes on the instrument cluster Do not allow insect sprays to come into contact with the lens Miles Kilometers Toggle The display in the tripm...

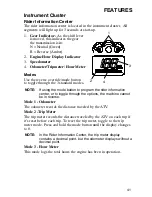
Page 44: ...odes NOTE If using the mode button to program the rider information center or to toggle through the options the machine cannot be in reverse Mode 1 Odometer The odometer records the distance traveled...

Page 45: ...Do not overfill the tank Do not fill the tank neck S If gasoline spills on your skin or clothing immediately wash it off with soap and water and change clothing S Never start the engine or let it run...

Page 46: ...more efficient performance and longer life for these components NOTE Install the accessory oil cooler if the ATV will be used for towing heavy loads dragging ground surfaces or performing similar act...

Page 47: ...tained idle 5 Perform regular checks on fluid levels controls and areas outlined on the daily pre ride inspection checklist See page 45 6 Pull only light loads 7 During the break in period change both...

Page 48: ...Inspect condition and pressure 81 Wheels fasteners Inspect ensure fastener tightness 83 Frame nuts bolts fasteners Inspect ensure tightness Fuel and oil Ensure proper levels 70 Coolant level if applic...

Page 49: ...If the engine is over choked when warm depress the throttle lever fully while cranking to aid in starting Release the throttle lever immediately after the engine starts If the engine does not start an...

Page 50: ...ottle to aid in warm up When the engine idles smoothly push the choke completely in CAUTION Operating the vehicle immediately after starting could cause engine damage Allow the engine to warm up for s...

Page 51: ...he owner s manual and on the safety decals Cargo weight should be evenly distributed 1 3 on the front rack and 2 3 on the rear rack and mounted as low as possible When operating over rough or hilly te...

Page 52: ...erating conditions which could result in loss of control of the vehicle S OPERATE ONLY WITH STABLE AND SAFELY ARRANGED LOADS When handling off centered loads that cannot be centered securely fasten th...

Page 53: ...up then shift the transmission into gear 3 Check your surroundings and determine your path of travel 4 Release the parking brake 5 Slowly depress the throttle with your right thumb and begin driving...

Page 54: ...n leaning your upper body to the inside of the turn while supporting your weight on the outer footrest This technique alters the balance of traction between the rear wheels allowing the turn to be mad...

Page 55: ...ing the handlebars in the direction of the skid and shifting your body weight forward CAUTION Severe damage to drive train may occur if the AWD is engaged while the wheels are spinning Always allow th...

Page 56: ...hrottle opening 6 Remain alert and be prepared to take emergency action This may include quick dismounting of the vehicle WARNING Braking and handling are greatly affected when operating in hilly terr...

Page 57: ...the most dangerous type of driving encountered and should be avoided if at all possible If you do enter into a situation where sidehilling is necessary follow these precautions 1 Slow down 2 Lean into...

Page 58: ...ght to the rear of the vehicle 3 Slow down 4 Apply the brakes slightly to aid in slowing Familiarize yourself with operation of the auxiliary brake in the event loss of normal service brakes occurs WA...

Page 59: ...8 2 4 m 56 OPERATION Turning Around on a Hill If the vehicle stalls while climbing a hill never back it down the hill Use the K turn to turn around...

Page 60: ...e turn the handlebars full left 5 While holding the service brake release the parking brake lock and slowly allow the vehicle to roll around to your right until it s pointing across the hill or slight...

Page 61: ...trests 1 Follow these procedures when operating through water 1 Determine water depths and current before crossing 2 Choose a crossing where both banks have gradual inclines 3 Proceed slowly avoiding...

Page 62: ...ecomes immersed or is operated in water that exceeds the footrest level take it to your dealer for service before starting the engine NOTE Avoid operating the vehicle through deep or fast flowing wate...

Page 63: ...ain you re traveling on Be constantly alert for hazards such as logs rocks and low hanging branches WARNING Severe injury or death can result if your vehicle comes in contact with a hidden obstacle No...

Page 64: ...ple behind the vehicle When it s safe to proceed back slowly Do not use the override switch unless additional power is required for vehicle movement Use with caution Avoid backing on inclines and avoi...

Page 65: ...n incline if possible If it s unavoidable follow these precautions 1 Turn the engine off 2 Place the transmission in gear 3 Lock the parking brake 4 Always block the rear wheels on the downhill side a...

Page 66: ...e at www gpoaccess gov ecfr Crankcase Emission Control System This engine is equipped with a closed crankcase system Blow by gases are forced back to the combustion chamber by the intake system All ex...

Page 67: ...fe service and adjustment procedures have a qualified dealer perform these operations Maintenance intervals in the following chart are based upon average riding conditions and an average vehicle speed...

Page 68: ...rm these services Perform all services at whichever maintenance interval is reached first Item Maintenance Interval whichever comes first Remarks Hours Calendar Miles Km J Steering Pre Ride Make adjus...

Page 69: ...f needed General lubrication 50 H 3 M 500 800 Lubricate all fittings pivots cables etc Carburetor float bowl 50 H 6 M 500 800 Drain bowl periodically and prior to storage J E Throttle Cable ETC Switch...

Page 70: ...nspect replace as needed J E Ignition Timing 100 H 12 M 1000 1600 Inspect Wiring 100 H 12 M 1000 1600 Inspect for wear routing security apply dielectric grease to connectors subjected to water mud etc...

Page 71: ...Joint Lube every 500 miles before long periods of storage or after pressure washing or submerging Item Lube Method Engine Oil See page 69 Add to proper level on dip stick See page 70 Brake Fluid DOT 3...

Page 72: ...ngine PS 4 is a fully synthetic high performance multi viscosity oil designed to provide the ultimate in lubrication performance and protection Oil may need to be changed more frequently if Polaris oi...

Page 73: ...ow it to idle for 30 seconds Turn the engine off 5 The oil dipstick and fill hole are located behind the recoil on the right side of the ATV Remove the dipstick Wipe it clean 6 Reinstall the dipstick...

Page 74: ...off 5 Clean the area around the drain plug CAUTION Hot oil may result in serious burns Do not allow hot oil to contact skin 6 Place a drain pan under the vehicle 7 Remove the drain plug Use a 6mm Alle...

Page 75: ...ring is in good condition 14 Install the new oil filter After the filter contacts the engine surface turn it 1 2 turn by hand 15 Remove the dipstick 16 Add the recommended oil See page 69 17 Reinstall...

Page 76: ...e Periodic Maintenance Chart beginning on page 64 Maintain the oil level at the bottom of the fill plug hole The transmission fill plug 1 is located on the left side of the ATV under the rear fender b...

Page 77: ...ock the parking brake 4 Remove the fill plug Use a 15mm wrench 5 Remove the drain plug Use a 15mm wrench 6 Drain the fluid into a drain pan 7 Clean and reinstall the drain plug Torque to specification...

Page 78: ...he bottom of the fill hole threads 1 The fill plug 2 is located on the right side of the gearcase The drain plug 3 is located on the bottom right side of the gearcase Use the recommended oil Use of ot...

Page 79: ...brake 4 Remove the fill plug Use an 8mm Allen wrench 5 Remove the drain plug Use an 11mm wrench 6 Drain the fluid into a drain pan Dispose of oil properly 7 Clean and reinstall the drain plug Torque...

Page 80: ...s WARNING Never store or use a partial bottle of brake fluid Brake fluid is hygroscopic meaning it rapidly absorbs moisture from the air The moisture causes the boiling temperature of the brake fluid...

Page 81: ...n the vehicle on a level surface Make sure the handlebars are straight 2 View the fluid level through the indicator window eye on the top of the master cylinder A dark eye 2 indicates a full fluid lev...

Page 82: ...elf adjusting Perform the following checks to keep the brake systems in good operating condition Check more often if brakes are used heavily during normal operation 1 Check the brake system for fluid...

Page 83: ...8 to 1 4 toe out 1 Set the handlebars in a straight ahead position NOTE The steering frog can be used as an indicator of whether the handlebars are straight The frog should always point straight back...

Page 84: ...decal on your ATV and in the owner s manual Always use original equipment size and type when replacing tires Make sure the wheels are installed properly Always replace tires when the tread depth meas...

Page 85: ...that all nuts are torqued to specification Do not service axle nuts that have a cotter pin installed See your Polaris dealer 1 Position the vehicle on a level surface 2 Place the transmission in gear...

Page 86: ...pointing toward forward rotation 8 Install the wheel nuts finger tight 9 Lower the vehicle to the ground 10 Torque the wheel nuts to specification Wheel Nut Torque Specifications Check the wheel nut t...

Page 87: ...64 1 Position the vehicle on a level surface 2 Place the transmission in gear 3 Lock the parking brake 4 Remove the seat 5 Unlatch the air box clips 1 Remove the air box cover 6 Remove the air filter...

Page 88: ...peration of your vehicle without a breather filter can cause engine damage Always reinstall the breather filter after removing for service 12 Reinstall the sleeve over the air filter Replace the filte...

Page 89: ...2 Grasp the top of the side panel and pull it outward to remove it Footwell Removal 1 Remove the two screws 1 on the bottom of the footwell 2 Use a flat screwdriver or sidecutters to remove the 10 pl...

Page 90: ...causing a hot spot that will shorten the life of the lamp WARNING Poor lighting while driving can result in severe injury or death Headlight and taillight lenses become dirty during normal operation W...

Page 91: ...Lock the parking brake 4 Measure the distance from the floor to the center of the headlight and make a mark on the wall at the same height NOTE Include rider weight on the seat when measuring 5 Start...

Page 92: ...install the new headlamp 3 Reinstall the harness assembly into the headlight assembly 4 Turn the headlight harness clockwise to secure the headlamp Taillight Brakelight Replacement 1 From the rear of...

Page 93: ...stem and engine can cause serious burns Wear protective gloves when removing a spark plug for inspection 1 Normal The normal insulator tip is gray tan or light brown There will be few combustion depos...

Page 94: ...e the spark plug 1 counterclockwise to remove 4 Inspect the electrodes for wear and carbon buildup Replace worn or fouled plugs Verify that the gap is at specification before installation NOTE Refer t...

Page 95: ...age 91 4 Drain any water found in the air box Replace the air filter if it became wet 5 Loosen the carburetor drain screw 1 and drain the carburetor 6 Turn the engine over several times using the elec...

Page 96: ...llow components to cool sufficiently before proceeding Wear eye protection and gloves Never run the engine in an enclosed area Exhaust contains poisonous carbon monoxide gas 1 Remove the bolt A and re...

Page 97: ...if the starter handle 2 is disengaged from the rope guide when under water 1 Place the transmission in gear 2 Lock the parking brake 3 Using a wrench remove the drain screw 3 on the bottom of the reco...

Page 98: ...and additional loads on components The PVT system rotates at high speeds creating large amounts of force on clutch components Extensive engineering and testing has been conducted to ensure the safety...

Page 99: ...Allow the water to drain Reinstall the drain plug 4 Start the engine Place the transmission in neutral Apply varying throttle for 10 15 seconds to expel the moisture and air dry the belt and clutches...

Page 100: ...lean shop towels Coat the terminals with dielectric grease or petroleum jelly Be careful not to allow cleaning solution or tap water into a conventional battery WARNING Battery electrolyte is poisonou...

Page 101: ...batteries remove the battery vent tube 6 Disconnect the black negative battery cable first 7 Disconnect the red positive battery cable next 8 Lift the battery out of the ATV Be careful not to tip a co...

Page 102: ...ould be routed away from the frame and body to prevent corrosion Avoid skin contact with electrolyte which can cause severe burns 3 First connect and tighten the red positive cable 4 Second connect an...

Page 103: ...plenishing Battery Fluid Conventional Battery A poorly maintained battery will deteriorate rapidly Check the battery fluid level often The fluid level should be kept between the upper and lower level...

Page 104: ...ion of this battery The YUASA activated sealed battery is already filled with electrolyte and has been sealed and fully charged at the factory Do not ever pry the sealing strip off or add any other fl...

Page 105: ...lode causing severe injury or death Always watch charging times carefully Stop charging if the battery becomes very warm to the touch Allow it to cool before resuming charging NOTE Always verify batte...

Page 106: ...r Polaris dealer for free replacement CAUTION High water pressure may damage ATV components Polaris recommends washing the ATV by hand or with a garden hose using mild soap Certain products including...

Page 107: ...t or Polaris Fuel Stabilizer Follow the instructions on the container for the recommended amount Carbon clean will also reduce the possibility of bacterial growth in the fuel system Allow 15 20 minute...

Page 108: ...e to Using Fogging Oil If you choose not to use Polaris Fogging Oil perform the following procedure 1 Treat the fuel system with Polaris Carbon Clean following the instructions on the can Run the engi...

Page 109: ...battery in a cool dry place Charge can be maintained easily by using Polaris Battery Tendert charger PN 2871076 or by charging about once a month to make up for normal self discharge Battery Tendert...

Page 110: ...to prevent loss during transporting 2 Place the transmission in gear 3 Lock the parking brake 4 Turn the fuel valve off 5 Be sure the fuel cap oil cap and seat are installed securely 6 Always tie the...

Page 111: ...adjustable Rear Spring The rear shock absorber spring is adjusted by rotating the adjuster 1 either clockwise or counterclockwise to increase or decrease spring tension Always adjust both sides equall...

Page 112: ...of control and possible serious personal injury or death Follow the adjustment procedures exactly or see your Polaris dealer for service 1 Loosen the four bolts 1 2 Adjust the handlebar to the desired...

Page 113: ...aris dealer are required for operation above 6 000 feet and temperatures below 40 degrees F 4 degrees C NOTE Continuous operation of the engine without proper jetting when required can cause poor perf...

Page 114: ...ble adjuster sleeve 2 Loosen the adjuster locknut 3 2 Turn the adjuster until 1 16 1 5 mm to 1 8 3 2 mm freeplay is achieved at the thumb lever NOTE While adjusting freeplay be sure to flip the thrott...

Page 115: ...e Hub Fluid 8 oz 2872277 Premium Demand Drive Hub Fluid 2 5 gal Grease Specialized Lubricants 2871322 Premium All Season Grease 3 oz cartridge 2871423 Premium All Season Grease 14 oz cartridge 2871460...

Page 116: ...l Fuel valve is turned off Turn the fuel valve on Old or non recommended fuel Replace with new fuel Fouled or defective spark plug s Inspect plug s replace if necessary No spark to spark plug Inspect...

Page 117: ...e ignition connections Check all connections and tighten Water present in fuel Replace with new fuel Low battery voltage Recharge battery to 12 5 VDC Kinked or plugged fuel vent line Inspect and repla...

Page 118: ...rge battery to 12 5 VDC Incorrect fuel Replace with recommended fuel Clogged air filter Inspect and clean or replace Reverse speed limiter malfunction See your Polaris dealer Electronic throttle contr...

Page 119: ...n Radius 62 5 in 159 cm unloaded Ground Clearance 8 in 20 3 cm Length 74 in 188 cm Width 42 in 107 cm Height 45 5 in 116 cm Dry Weight 525 lbs 238 kg Wheel Base 46 in 117 cm Engine Cooling Engine Mode...

Page 120: ...n 20 cm travel Shock Adjustment CAM Front Brake Single Control Hydraulic Disc Rear Brake Single Control Hydraulic Disc Auxiliary Brake Hydraulic Rear Wheel Park Brake Hydraulic Lock All Wheel Features...

Page 121: ...Below 5 C 40 F and above 5 C and above ALTITUDE Meters F t 0 1800 0 6000 152 5 147 5 Feet 1800 3700 6000 12000 147 5 142 5 Clutching Chart Altitude Meters Feet Shift Weight Driven Clutch Spring 0 1800...

Page 122: ...Radius 62 5 in 159 cm unloaded Ground Clearance 8 in 20 3 cm Length 74 in 188 cm Width 42 in 107 cm Height 45 5 in 116 cm Wheel Base 46 in 117 cm Dry Weight 550 lbs 250 kg Engine Cooling Engine Model...

Page 123: ...wing Arm 8 in 20 cm travel Shock Adjustment CAM Front Brake Single Control Hydraulic Disc Rear Brake Single Control Hydraulic Disc Auxiliary Brake Hydraulic Rear Wheel Park Brake Hydraulic Lock All Wh...

Page 124: ...Below 5 C 40 F and above 5 C and above ALTITUDE Meters F t 0 1800 0 6000 152 5 147 5 Feet 1800 3700 6000 12000 147 5 142 5 Clutching Chart Altitude Meters Feet Shift Weight Driven Clutch Spring 0 1800...

Page 125: ...olaris dealer REGISTRATION At the time of sale the Warranty Registration Form must be completed by your dealer and submitted to Polaris within ten days Upon receipt of this registration Polaris will r...

Page 126: ...rosion or defects in parts components or the ATV due to fire explosions or any other cause beyond Polaris control This warranty does not cover the use of unauthorized lubricants chemicals or fuels tha...

Page 127: ...your original selling dealer however you may use any Polaris Servicing Dealer to perform warranty service Please work with your dealer to resolve any warranty issues Should your dealer require any ad...

Page 128: ...ling within the country where your vehicle was purchased Warranty or Service Bulletin repairs may be requested from any authorized Polaris dealer who sells the same line as your vehicle Outside the Co...

Page 129: ...d outside of the country where it was pur chased and you have not followed the procedure set out above your vehicle will no longer be eligible for warranty or service bulletin cover age of any kind Ve...

Page 130: ...127 MAINTENANCE LOG Use the following chart to record periodic maintenance DATE MILES KM TECHNICIAN SERVICE PERFORMED COMMENTS...

Page 131: ...128 MAINTENANCE LOG DATE MILES KM TECHNICIAN SERVICE PERFORMED COMMENTS...

Page 132: ...129 MAINTENANCE LOG DATE MILES KM TECHNICIAN SERVICE PERFORMED COMMENTS...

Page 133: ...55 Driving in Reverse 61 Driving on Slippery Surfaces 52 Driving Over Obstacles 60 Driving Procedures 50 Driving Through Water 58 59 Driving Uphill 53 E Electrical Switches 31 Emission Control Systems...

Page 134: ...witch 31 Rider Information Center 41 S Safe Riding Gear 10 Safety 6 30 Safety Decals and Locations 6 9 S Safety Training 11 Severe Use 64 Side Panel Removal 86 Sidehilling 54 Spark Arrestor 93 Spark P...

Reviews: