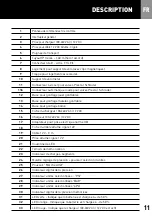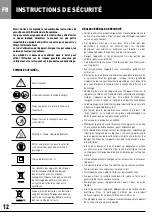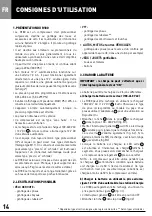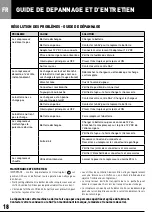
25
EN
OPERATING INSTRUCTIONS
lights up if the battery is charged to less than 50% (fig .
C3) . If the battery is charged to more than 50%, the
green LED
31
lights up (fig . C4) .
• When the battery is fully charged, the green LED
33
is on and the charge indicator
23
displays 4 segments .
You can then unplug the charger and replace it in the
slot
9
provided for this purpose .
IMPORTANT: it is preferable to recharge the battery
while the vehicle is moving (during a trip for example) .
Be sure to maintain the compressor and ensure proper
ventilation .
4. BATTERY CHARGE INDICATORS
Important: to obtain a full charge, you must charge the
battery for at least 8 hours . This time depends on the
number of uses, the ambient temperature, the age of the
battery, the frequency of recharges .
2 indicators inform you about the charge of the battery,
before, during and after the duration of the charge .
• Indication 1: by the LEDs located on the side:
- Orange LED
32
: the battery is charged between 0 and 50%
(fig . D1)
- Green LED
31
: the battery is charged between 50 and 100%
(fig . D2)
• Indication 2: 4 segments LCD charge indicator:
23
:
DISPLAY
BATTERY CHARGE
75 to 100 %
50 to 75 %
25 to 50 %
10 to 25 %
0 to 10 %
All these indications are average values, benchmarks,
which evolve according to the age of the battery and its
conditions of use .
5. GETTING STARTED
IMPORTANT: When the R180 is not in use, the main
switch
2
must be in the OFF position . All the LEDs are
off (fig . A1)
• To put the compressor in operating mode (or to load
it), turn the main switch
2
to ON . The green LED
31
lights up (fig . A2) . (If the battery is charged at less than
50%, the orange LED
32
q lights up)
• The control panel screen then
1
lights up and the
compressor makes a reset (all the LEDs
21
light up) .
After a few seconds the screen stabilizes and the
recorded values appear . The device is ready to use
6. CHOICE OF THE DISPLAY UNIT
• Your compressor can display the pressure in BAR,
PSI or KPA . When you change the unit, the displayed
values are automatically converted
• The selected unit is highlighted
27
28
29
• To change the display unit, press the push button/
selector
24
. Pressing this button once changes the
display unit (fig . E1, E2 and E3) .
7. PRESSURE ADJUSTMENT AND STORAGE
The R180 is designed to stop automatically at the preset
pressure . This pressure remains in memory, even when
the compressor is OFF . To set and store the pressure,
proceed as follows:
• Set the desired pressure by turning the dial
24
(fig .F1)
• When the desired pressure is displayed, release the
dial . The display flashes for 3 seconds (fig . F2)
• After 3 s . the memory indicator “M”
22
is displayed,
as well as the value stored in the memory
30
(fig . F3)
8. STARTING AND STOPPING - SAFETY
IMPORTANT: before starting the compressor, make sure
that all safety measures are taken (see chapter safety
instructions)
• To start the compressor, press the on / off push button
25
(fig .G1)
• When the memorized pressure is reached, the
compressor stops automatically
• As a safety measure, you can manually stop the
compressor operation at any time by pressing the
button
25
(fig . G3)
SAFETY: you can stop compressor operation at any time
by pressing the button
25
(fig. G3) or by turning the
main switch
2
to OFF.
9. OPERATION ON 12V DC
The R180 can operate directly on the 12 V battery of a
motor vehicle:
• Put the switch
2
in the OFF position
Summary of Contents for 900180
Page 2: ...6 7 10 11 9b 9 16 17 20 19 18 15 2 3 4 5 8 12 13 14 1 2 11b a...
Page 3: ...27 28 29 30 4 3 33 31 32 2 26 25 24 23 22 21 3 c b...
Page 5: ...E1 G1 G2 G3 F1 F2 E3 F3 STOP 3 s E2 24 25 5...
Page 6: ...H1 H3 H4 H2 Schrader Presta 1 1 3 2 2 3 4 34 35 36 M11x0 8 6...
Page 8: ...K1 K4 K2 10 10 8 K3 Pr e s t a S c h r a d e r J4 11 10 10 12 13 14 J1 J2 J3...
Page 39: ...39 39...

