


Page 14
Section 3
Installation
QUICKCHIP Installation
The upgrade installation may vary according to the type and location of your 486 processor
socket. Also, the orientation when installing the QUICKCHIP 133 will depend on the location
of Pin 1 on the processor socket. Pin 1 of the 133 processor has a white stripe and beveled edge
or other distinguishing mark. Pin 1 on the system board is usually denoted by a beveled cor-
ner, arrow, dot, an extra pin hole or other distinguishing mark.
If you have a 168-pin sockets or overhead-bar ZIF socket, you need to contact PNY
Technologies Technical Support to receive a PGA Socket Extender. Follow the steps below to
install the QUICKCHIP 133 into your computer.
WARNING: If the processor upgrade is not installed correctly (Pin 1 to Pin 1), it may
result in damage to the computer, the processor upgrade or both. (Figure 4.1 & 4.3)
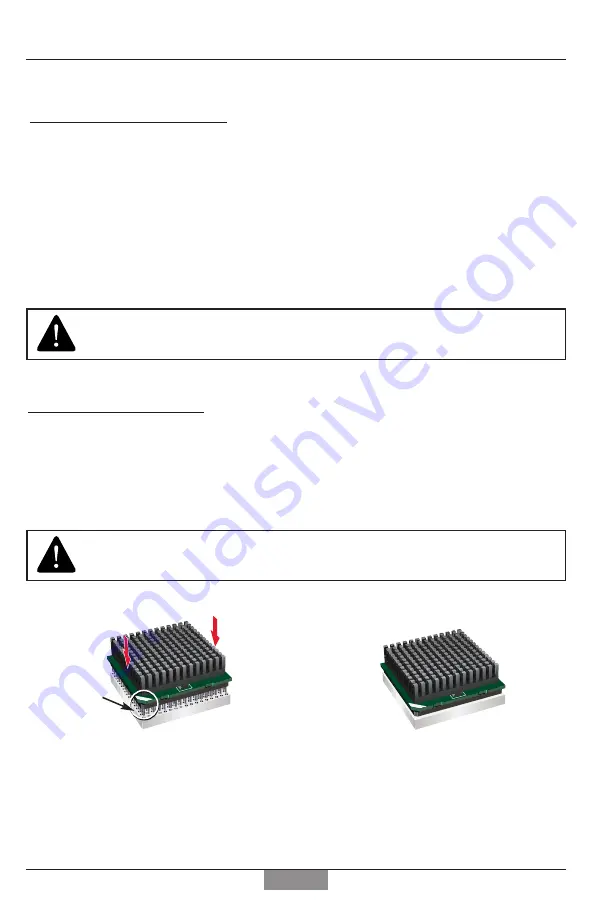
Figure 4.1
Aligning the QUICKCHIP in a
Standard Socket
Figure4.2
QUICKCHIP installed in a Standard
Socket
Pin 1
Beveled Edge
& White Stripe
Installing in a Standard Socket
1.
Align the QUICKCHIP’s pins with the socket on the motherboard. Be sure it’s pin 1 to pin 1.
2.
Apply an even pressure while gently, but firmly, pushing the QUICKCHIP 133 into the
socket. Repeat on opposite corners of the upgrade until it is flush with the system board
socket. (Figure 4.2)
Note:
If the processor upgrade is resisting, stop and check the pin alignment. If the
alignment is incorrect, remove the processor upgrade and begin the insertion again.


