Page 13
Section 3
Installation
If you have a 486 soldered to the system board and DO NOT have an addition-
al socket or OverDrive socket, the upgrade can not be installed in your system.
Removing the 486 from a standard socket
1. Remove the 486 CPU chip from its socket using the provided Chip Extractor Tool.
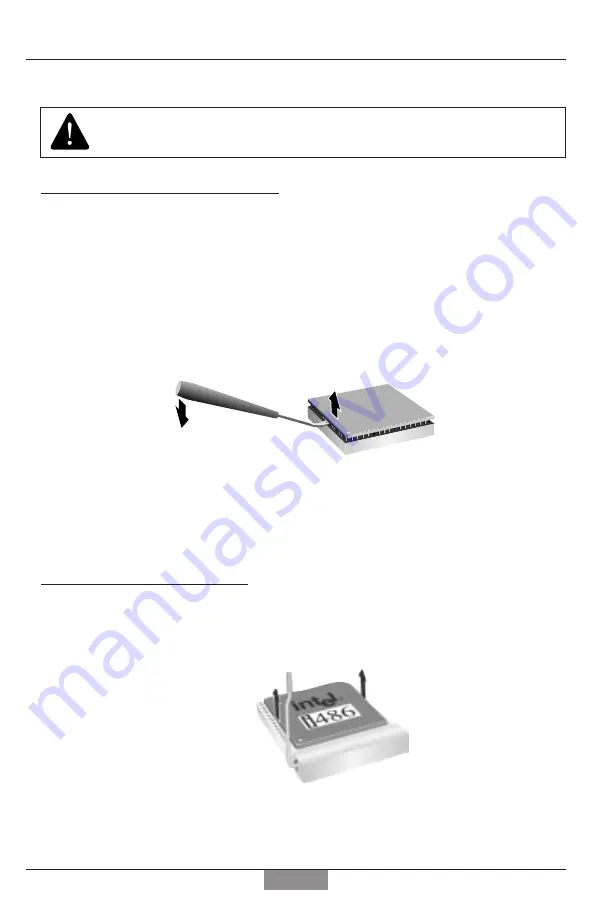
Carefully insert the edge of the tool between the processor and the socket. Start on one
side of the 486 chip at a time,levering each side up slightly.(Figure 3.3) Work around each
side several times until the pins on the underside of the chip are sufficiently exposed.
2. Once free,
carefully lift out the processor with your fingers taking care not to bend
or break the pins.
3. Use the QUICKCHIP 133 packing material to store the 486 chip in a safe place.
Removing the 486 from a ZIF socket
1. Unlock the socket using the side lever, overhead bar or loosening the retaining screw.
2.
Once free, carefully remove the CPU with your fingers. (Figure 3.4)
Figure 3.3
Removing the 486 from a Standard
Socket with the Chip Extractor Tool
Figure 3.4
Removing the 486 from a ZIF
Socket with a Sidebar


