7077-801F • 08/20
20
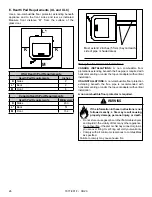
D. Igniter Replacement
1. Turn the dial control to the off position. Unplug the power
to the unit.
2. Unplug the wire leads to the igniter.
3. Loosen the thumb screw in the side of the igniter chamber.
4. If there is difficulty in removing the igniter from the
chamber, the chamber can be removed from the rear of
the firebox by removing the 1/4-20 bolt.
5. Re-install the new igniter into the chamber. Ensure
igniter flange it flush with back of chamber.
6. Tightening the thumb screw.
7. Re-attach wire to terminals.
C. Snap Disc Replacement
Power - Manual Reset
1. Turn the dial control to the off position. Unplug the power
to the unit.
2. Using #2 Phillips screwdriver, loosen the bolts on the
rear of the unit holding on the left side panel. You do
not need to remove the screws. Remove side panels by
lifting up and out.
3. Locate the snap disk on the top side of the feed tube
where it meets the hopper. Disconnect the wire leads
from the snap disk.
4. Using a #1 Phillips screwdriver, remove two 6-32
fasteners retaining the snap disk onto the side of the
feed tube.
5. Using the same fasteners, attach the new snap disk.
Attach the wire leads.
6. Restore power.
E. Baffle Removal & Replacement
1. Turn the dial control to the off position. Make sure the
unit is cool.
2. Remove the center baffle first by using the handle at
the top of the baffle and pull up and then towards you.
The hooks on the baffle will slide out of the slots in
the bracket.
3. Remove the left baffle and then the right baffle by pulling
up and then towards you. The left and right baffles have
similar hooks and slots.


