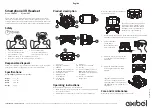
Adjusting the Headband and
Receivers
Fig 1
To adjust the headband,
lengthen or shorten the
band until it fits comfortably.
The click-stop feature keeps
the headband securely
adjusted.
Fig 2
Position the headset
receiver(s) so that the foam
cushion(s) sit comfortably
over the centre of your
ear(s).
Fig 3
On models with only one
receiver, position the
stabiliser T-bar above
your ear.
Adjusting the Mouthpiece
Standard Voice Tube Models
Fig 4
The voice tube is adjustable
in 2 ways. First it pivots at
the metal ball joint; and
secondly the voice tube can
be telescoped in and out.
Hold the headset securely
against your ear with one
hand.
With your other hand, adjust
the voice tube so that the tip
sits two finger widths from
the corner of your mouth.
Your voice will sound clearer
if you avoid positioning
the voice tube in front
of your mouth.
Noise Cancelling Models
Fig 5
Carefully shape boom with
both hands as shown. Do
not bend or twist the boom
within 50mm of the
microphone.
Fig 6
Position the boom so that
the microphone sits two
finger-widths from the
corner of your mouth.
Make sure the front of the
microphone faces your
mouth. If necessary,
carefully rotate the
microphone into the proper
position. Avoid repeated
twisting of the boom.
Polaris and StarBase Additional
Features
Fig 7
The Polaris and StarBase
headset models are fitted
with a standard modular
connector.
To use these models, simply
insert the connector into the
headset port of a compatible
telephone.
Volume Adjustment/Mute Switch
Fig 8
If you are using an M12 or
E10 adapter there is a
variable volume control. Start
with setting 4, then increase
or decrease the setting until
you reach a comfortable
listening volume.
You can prevent a caller
from hearing your voice by
pressing the mute switch on
the adapter. Voice contact
can be retrieved by pressing
the switch again.
If you use an adapter please
refer to the adapter user
guide.
If you do not have an
adapter these features will
be controlled by your
telephone system. Please
refer to the appropriate user
guide.
Hook Switch Control
Fig 9
For certain DECT
applications, the headset
can be supplied with a hook
switch control in line on the
cable. You can use this
switch to answer or end
a call.
Clothing Clip
Fig 10 The clothing clip keeps the
headset properly positioned
by supporting the weight of
the cord. Attach the clothing
clip comfortably at chest
height, making sure there is
enough slack to allow for
head movement.
Quick Disconnect Connector
Fig 11 Some models are fitted with
a Quick Disconnect
connector. Before you use
your headset, join the
adapter cable and the Quick
Disconnect together.
When you separate the
Quick Disconnect, you put
your telephone conversation
‘on hold’ without removing
the headset.
To do this, hold the Quick
Disconnect as shown and
pull straight apart. To
resume the call, reconnect
the two halves.
3
32303-01 Rev.C 30/3/99 6:00 pm Page 5


