3. Stand facing the front side of the PLANIX and
tap the Scan button again. A second 360° image
will be captured and merged with the first
image, excluding the halves from both images
containing you, the user.
Align data manually
1. Tap the Align button.
2. Drag one finger on the screen to move and two
fingers to rotate the highlighted data.
3. Tap Snap once the data is almost aligned to
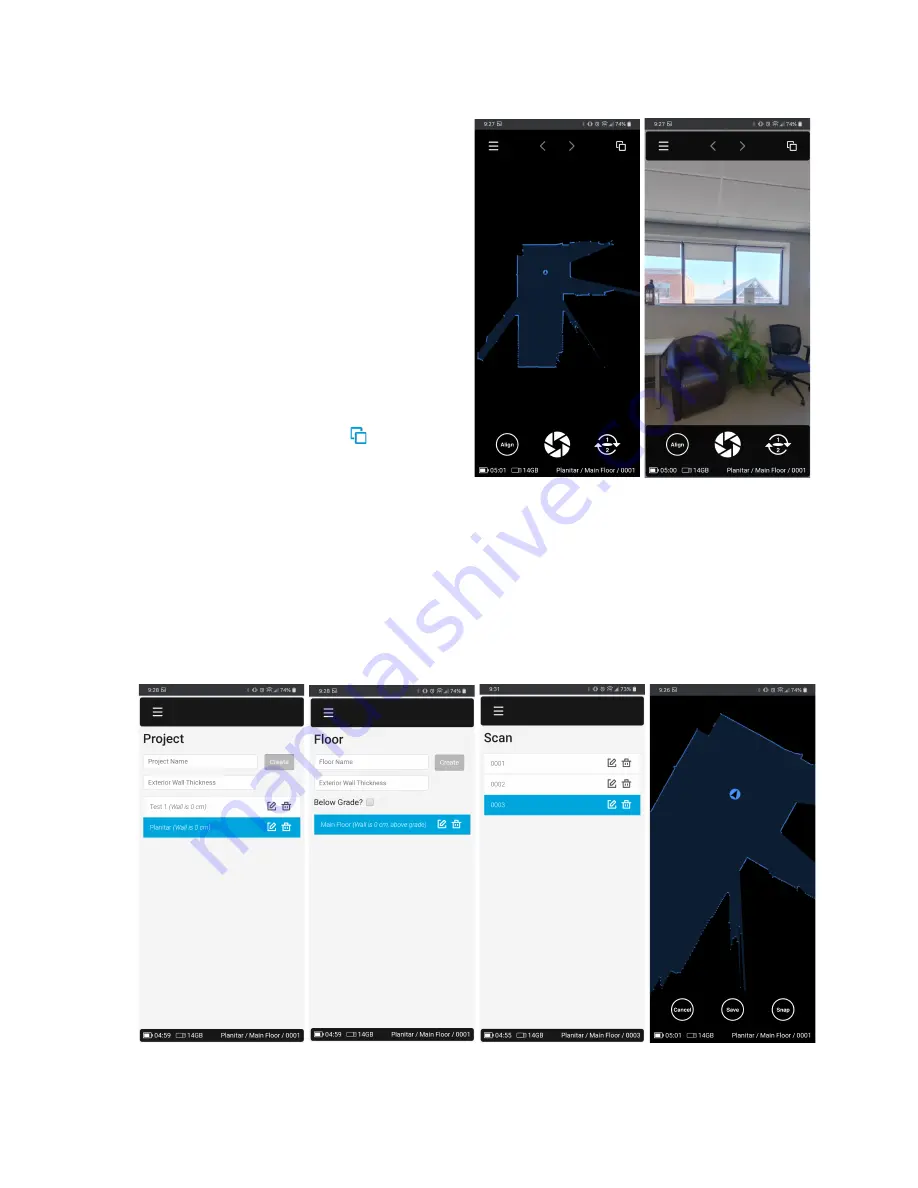
fine-tune the alignment (see figure 15).
4. Once the data is aligned, tap Save.
Change data presentation views
1. Tap the Change View button
at the top-right
to enter Laser Scan View (figure 14).
2. Tap the button again to enter Pano View and
again to return to Split View (see figure 13).
Figure 14 - Laser Scan View (left), Pano View (right)
Select and Edit Scans
1. Double tap a scan circle in the laser data to select the scan or use the arrows at the top of the screen.
2. Tapping the current scan name displayed in the lower right corner of the screen will bring up the Edit
dialog where the scan name can be edited.
3. Additionally, the Scan menu can be used to select, edit, or delete a previous scan (see figure 15).
Figure 15 - (left to right) Project menu, Floor menu, Scan menu, Align mode
Setup
➤
Connect
➤
Survey
➤
Stitch
15
Summary of Contents for iGUIDE PLANIX
Page 1: ...Instruction Manual v1 0 ...


