


Survey
Upon loading the Survey web app, the following message may appear
on-screen: “The 360° Camera has not been aligned...” Follow the on-screen
instructions, then proceed.
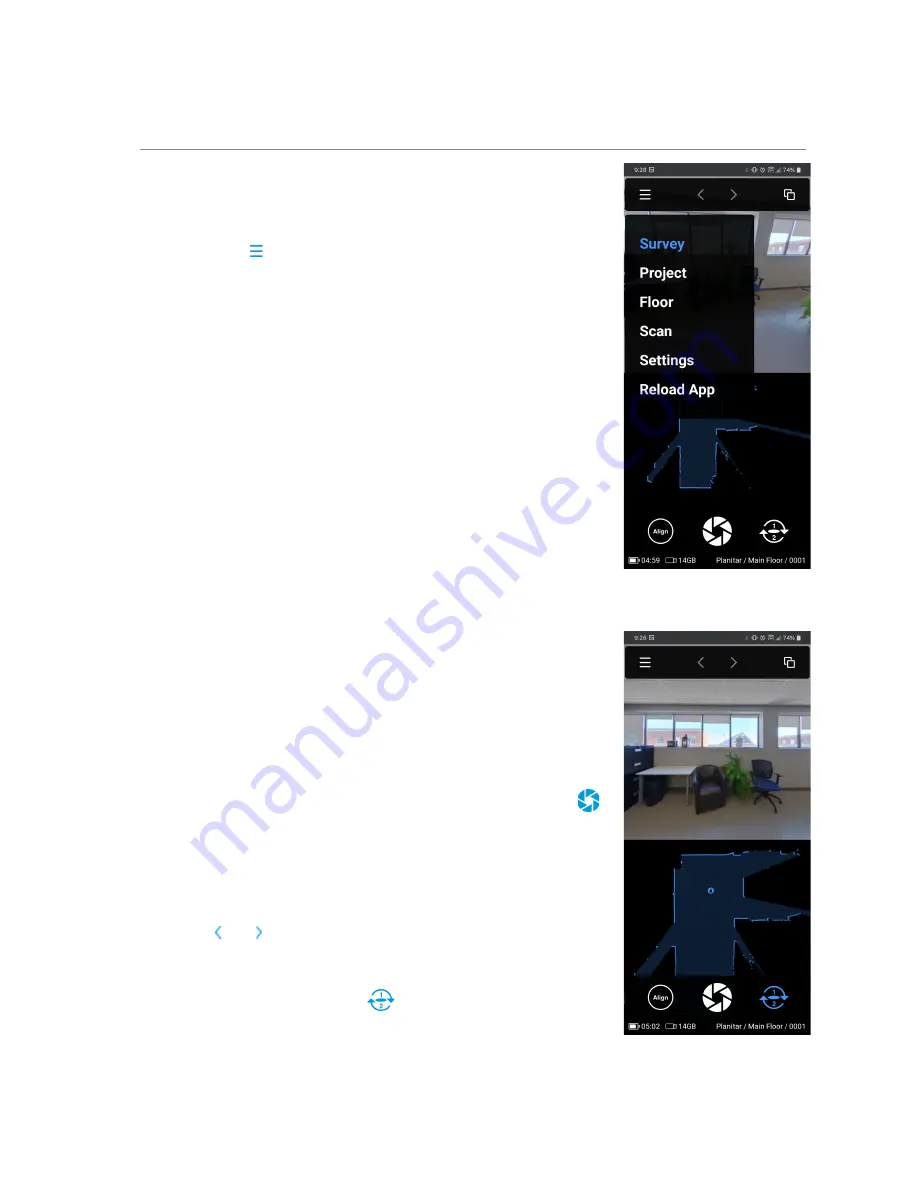
The Survey menu
presents the following options (see figure 12):
1.
Survey: The main PLANIX and data alignment controls. Create a new
scan or browse to view a previous scan.
2.
Project: Create or select a project and project folder in USB drive.
3.
Floor: Create or select a floor and floor folder (after selecting a project).
4.
Scan: Select, edit, delete an existing scan (after selecting a floor).
5.
Settings: PLANIX and Survey settings, system information and other
options.
6.
Reload App: Refresh the Survey web page after reconnecting to the
PLANIX system.
Create a Project
1. Tap in the blank field on the Project menu and enter a name (figure 15).
2. Enter the exterior wall thickness in the field provided if necessary.
3. Usually, exterior wall thickness is measured at the front door jamb.
Figure 12 - Menu, Two-Shot mode off
Create a Floor
1. Tap in the blank field on the floor menu and enter a name (figure 15)..
2. Enter the exterior wall thickness if necessary. If left blank, the wall
thickness from the project level (if entered) will be used later.
3. Select Below Grade if necessary (for proper square footage calculation).
Survey a Property
1. Ensure you will not be seen in the image and tap the Scan button
.
A 360° image and laser scan data will be captured simultaneously. The
laser scan data will be automatically aligned to any previously captured
data if Auto Align mode is enabled in Survey Settings (default is
enabled). A new folder is created on the USB drive for each scan.
2. Tap the Scan button again to capture the next scan.
3. Tap the and arrows at the top to view a previous or next scan.
Two-Shot mode
1. Tap the Two-Shot mode button
(figures 12 & 13).
2. Stand facing the back side of the PLANIX (the side with USB drive and
the power button) and tap the Scan button. A 360° image will be
captured along with laser measurement data.
Figure 13 - Survey, Two-Shot mode on
Setup
➤
Connect
➤
Survey
➤
Stitch
14
Summary of Contents for iGUIDE PLANIX
Page 1: ...Instruction Manual v1 0 ...


