


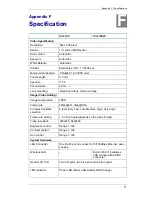
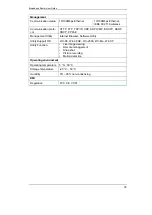
Appendix C - Specifications
67
Appendix E
Install Xplug Control Utility
Install on Web Server
STEP 1
Copy xplug.ocx to the home directory of a web server.
STEP 2
Log on the Home page of ICA-100 series, click on the
“
System Administration
”
link.
The system page will appear.
STEP 3
Locate the
“
Loading ActiveX From
”
field on system page. Fill the field with web server
’
s
address. Either IP address or Internet address will do.
Once the settings are completed, users are able to access ICA-100 series from the
web browser by selecting the Image View
–
ActiveX mode.
Install to Local PC
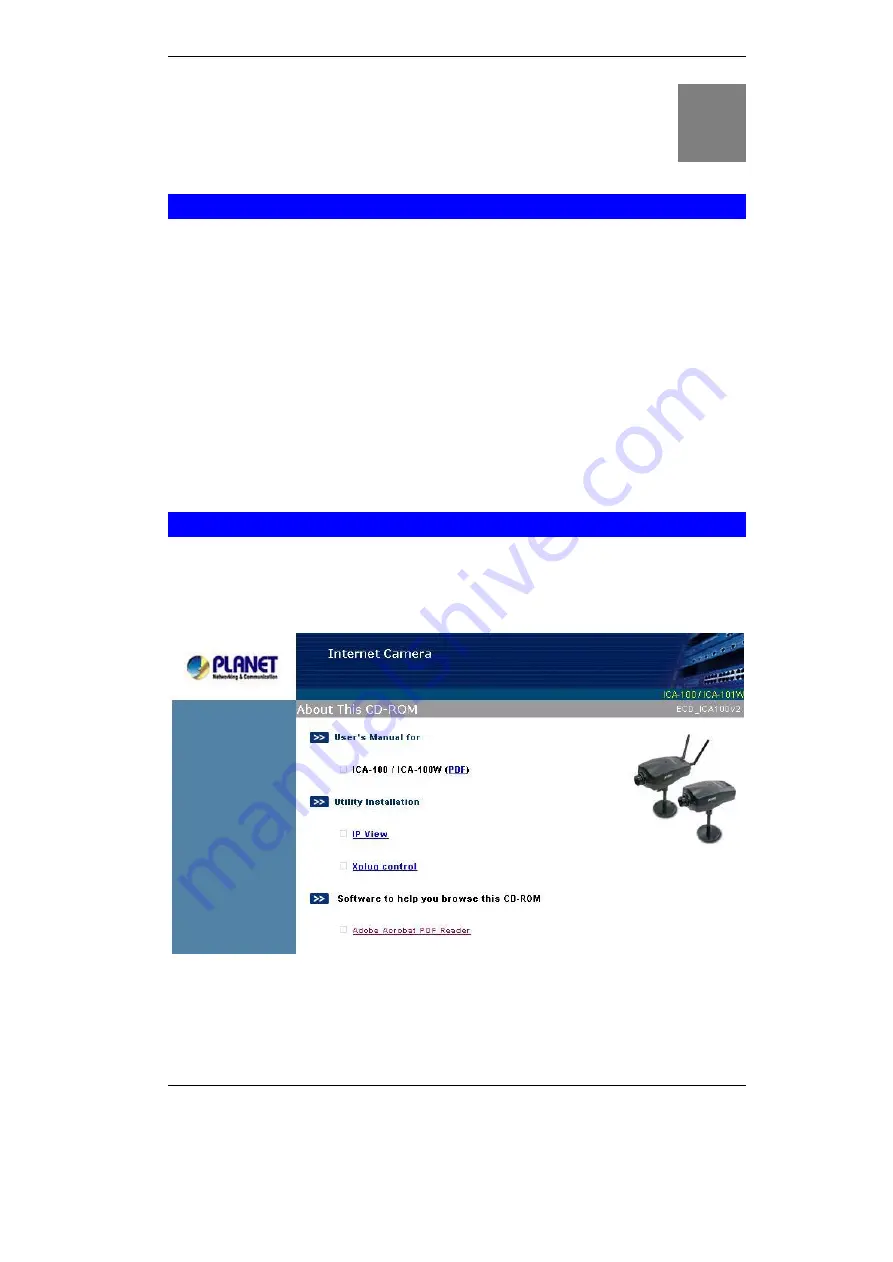
STEP 1
Insert the CD-ROM into the CD-ROM drive to initiate the autorun program. A menu
screen will appear as follows:
STEP 2
Click on the
"Xplug Control"
hyperlink to activate the installation procedure for the
plug-in program.
If the above screen is not shown, you can start the installation as follows.
E
Summary of Contents for ICA-100
Page 1: ...Internet Camera ICA 100 ICA 100W User s Manual ...
Page 13: ...Broadband Router User Guide 10 ...
Page 55: ...Broadband Router User Guide 52 Figure 5 26 Tools Screen ...
Page 58: ...Advanced Configuration 55 Figure 5 29 Motion Setting Screen ...
Page 61: ...Broadband Router User Guide 58 Figure 5 31 Case Sensitive Menu in Camera View Format ...


