


39
Before You Start
01
6
Replacing the Fuse
Make sure the amperage matches the
specified value when replacing the fu-
ses. If the fuse is blown, check the po-
wer connection and replace with a n-
ew one. If the same problem occurs,
it would be subjected to the malfun-
ction. In such cases, please consult
to the nearest service dealer.
When the range of the operation of t-
he card remote control becomes short
or no functions while operating. Rep-
lace the lithium battery with a new b-
utton cell (CR2025). Make sure the b-
attery polarity before replace.
Precautions on Using Lithium
Battery
Always keep the lithium battery beyond
children s reach. In case
swallowed, see a doctor immediately.
Cleaning the battery with a dry cloth,
to ensure its perfect connected.
Make sure the proper polarity when
loading with the battery.
To prevent short circuit, do not use
metal tweezer to clip the battery.
Gently pull out the Battery Holder while
pressing the Stopper.
Put the button-type battery with mark(+)
upward into the Battery Holder.
Replacing the Battery
Insert the Battery Holder into the Remote
Control.
!
Maintenance
Warning
Never use the fuse with the rated
amperage more than that supplied to
your unit, otherwise it will damage the
unit.
Warning!
Improper handle with the battery may
lead to explosion.
It cannot be charged , disassembled or
thrown into a fire.
!
07
Tuner
Listening to the radio
LOC ON
appears on the display and only
local station is available. when it disappears
both distance and local stations can be
received.
DX/LOC Selector
During radio status, press LOC button
to select
or weak station reception.
strong
5
The function is only valid on remote control.
The function is invalid in AM tuning.
Note:
*
*
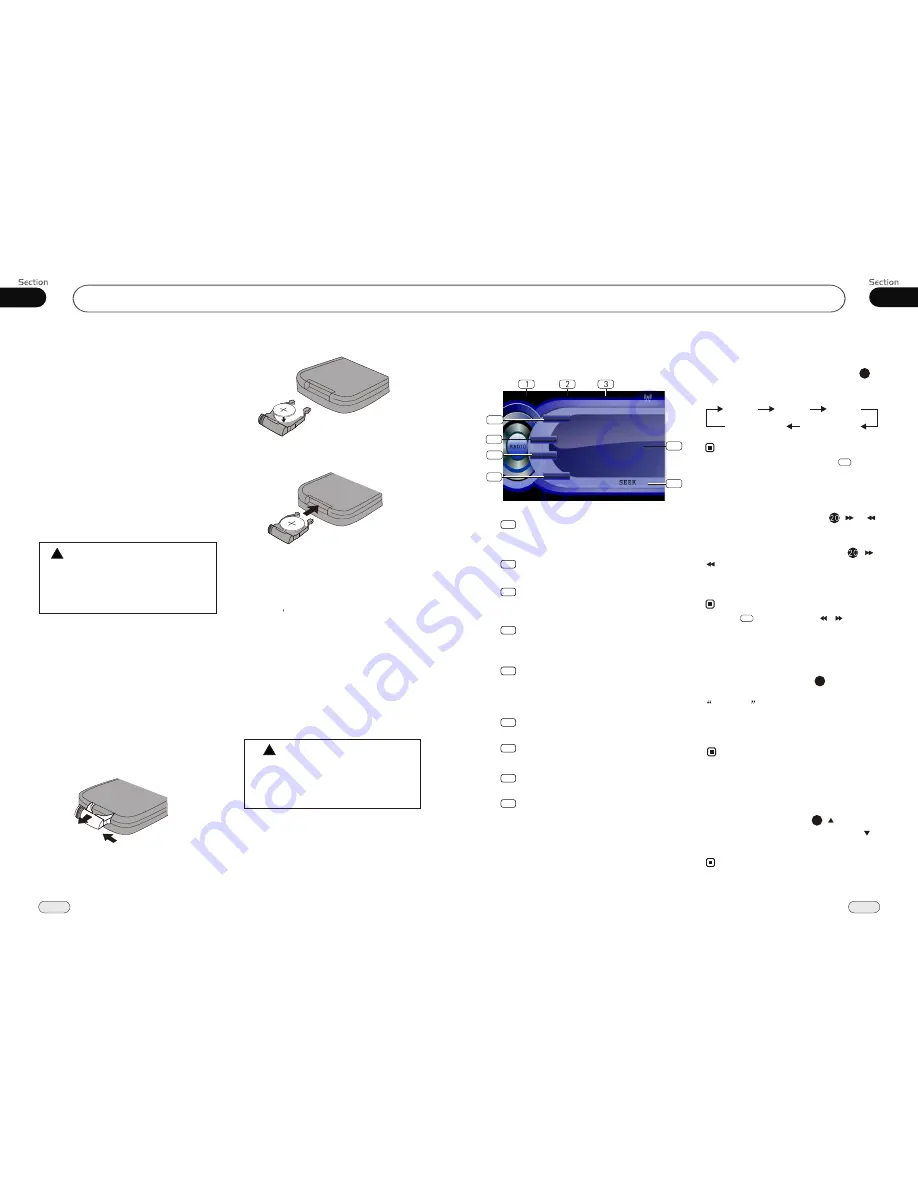
Band Indicator
Shows which band the radio is tuned
to.
1
Preset Number Indicator
Shows what preset has been selected.
2
Shows which frequency the tuner is
tuned.
Frequency Indicator
3
SEEK+/SEEK-
Briefly press to tune by the presettable
range, hold and press to tune automatically.
4
5
6
BAND
To select the bands.
7
MENU
8
9
SRC
Press this button to select the signal
source.
The 6 stations of the current band.
Briefly press to select station, hold and
press to save the current station to one
of the 6 stations.
Selecting the Stored Station
During radio status, press button to
select the stored station upward, press to
select downward.
the stored station
27
Note:
The function is only valid on remote control.
*
Note:
* Press BAND on the head unit or in the
monitor performs the same function.
During radio status, repeatedly press
BAND button to select bands in
lowing order:
the
fol
Band Selector
3
(For Two Bands)
6
Manual/Automatic Tuning
Manual Tuning:
Briefly press
(
button on the remote control to select the
different band.
or
)
Automatic Tuning:
ress
and
)
button the radio
a station
or
respectively
and plays when it finds a station.
P
hold (
or
automatically searches
downward
upward
Press in the monitor or / on the
main unit also performs the same function.
Note:
*
4
RDS
Press to RDS setup.
FM2
MW2(AM2)
MW1(AM1)
FM3
FM1
87.50M
87.50M
107.90M
106.10M
98.10M
90.10M
FM1
CH:1
87.50MHz
-
+
4
6
5
7
8
9
Press to SYSTEM setup.
BAND
MENU
RDS
SRC
Summary of Contents for P9754
Page 1: ...13 P9754 P9754 02 2011...


