background image

8

Auto-orientation

When powering on or resetting your computer, the orientation of your panel is detected
automatically, whether portrait or landscape. The default setting is ON. Use the Dome tab 
to disable this funtion.

To set the resolution palette

Use the Resolution field on the Dome tab to manually set the resolution to portrait or
landscape.

1

Log on with administrator priviledges.

2

Right-click the desktop. Select Properties > Settings.

3

Select the Plug and Play Monitor on Dome DX2/PCI Properties from the Display list.

4

Select Extend my Windows desktop onto this monitor. Click Apply.

5

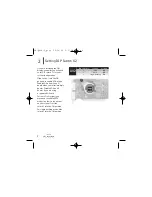
Select Advanced > Dome.

6

Choose a resolution and palette option. Click Apply.

5

Click OK until you return to the Desktop.

To set brightness

In the Brightness field of the Dome tab, slide the scroll box left or right, or use the left and
right arrows, to adjust each panel. (The default brightness is 100%.) Click OK. (Note: If the
Dome CXtra software is running, the brightness function on the tab is disabled.)

EX-QSUG-1_grey  10/18/05  2:07 PM  Page 8

Summary of Contents for Dome E Series

Page 1: ...Dome EX Displays QUICK REFERENCE Windows XP Windows 2000 EX QSUG 1_grey 10 18 05 2 06 PM Page 1...

Page 2: ...ICacheMode registry entry On systems with 64 bit PCI slots use the display driver to enable write combining for the display controller Enabling this function can improve video performance on the board...

Page 3: ...Do not set up the display in areas with sudden temperature changes and strong light sources Do not block the vents on the back of the display Do not remove the back cover or disassemble the display Un...

Page 4: ...position to enable VGA mode Enable VGA on only one 1 board when you install multiple boards Disable VGA on all boards if you are using a separate VGA card For some Dell systems you may need to enable...

Page 5: ...lank bracket from the available PCI or PCI Express slot 4 Insert the display controller into the slot align the connector pins and press the board down until it is firmly seated 5 Secure the mounting...

Page 6: ...Tighten the thumbscrews to secure the connection 3 Plug the power cord into the power input port 4 Plug the other end of the DVI cable into the video port on the installed display controller Use DVI...

Page 7: ...Signature Not Found message appears click Yes or Continue to complete the driver installation 7 Select Yes I want to restart my computer now and click Finish To enable the display 1 Log on with admini...

Page 8: ...Select Properties Settings 3 Select the Plug and Play Monitor on Dome DX2 PCI Properties from the Display list 4 Select Extend my Windows desktop onto this monitor Click Apply 5 Select Advanced Dome 6...

Page 9: ...omputer now and click Finish 7 If the Digital Signature Not Found message appears click Yes or Continue to complete the driver installation To set the display mode manually 1 Right click the desktop a...

Page 10: ...E3 1536 x 2048 Dynamic gray 8 2048 x 1536 Nonlinear gray 3072 x 2048 Static gray 4096 x 1536 1536 x 2048 True color 32 2048 x 1536 3072 x 2048 4096 x 1536 Dome E5 2048 x 2560 Dynamic gray 8 2560 x 20...

Page 11: ...s immediately to avoid damage to the screen Do not use or spray liquid aerosol ammonia or other alcohol based cleaners on the display or screen Some chemical cleaners may damage the display and its ca...

Page 12: ...les Planar Systems Inc 388 Nan Jing West Road Suite 3905 Shanghai Peoples Republic of China phone 86 21 6334 5050 fax 86 21 6334 6339 For more information Download the full version of the Dome EX disp...

Reviews: